EasyManua.ls Logo

NAPCO StarLink SLE-LTEAI-CFBPS User Manual

NAPCO StarLink SLE-LTEAI-CFBPS
16 pages
To Next Page IconTo Next Page
Page #1 background imageLoading...
Page #1 background image
StarLink
SLE Commercial LTEVI & LTEAI Series Dual-Path Alarm Communicators -- Installation Instructions 1
ADDITIONAL COMPONENTS
In addition to the models listed above, the following sub-
assemblies are available:
SLE-ULPS-R - Power Supply. Required for installations
where the control panel cannot provide the Auxiliary
power required to operate the StarLink radio. Uses a
standard 4AH / 12V minimum (7AH maximum, required
with optional Wi-Fi Module) rechargeable battery to pro-
vide radio standby power. Requires connection to either
the model NAPCO TRF12/T123 (16.5V / 20VA) external
plug-in transformer or the chassis-mounted 16.5VAC /
20VA transformer affixed inside the housing (see wiring
diagrams further in this manual). Note: For models
without the SLE-ULPS-R, connect the radio terminals 1
and 2 to the control panel Aux Power terminals
(observing polarity).
SLE-WIFI-MODULE - Allows your Napco StarLink
device
to connect to the Internet by means of a wireless (Wi-Fi)
link, eliminating a wired Ethernet cable connection.
Note: 7AH battery required when using the SLE-
WIFI-MODULE. For more information, see WI2191.
SLE-DLCBL - Download Cable, 6 feet
SLE-ANTEXT30 - Extended antenna with 30 feet of cable
SLE-ANTEXT50 - Extended antenna with 50 feet of cable
SLE-ANTEXT75 - Extended antenna with 75 feet of cable
SLE-ANTEXT100 - Extended antenna with 100 feet of cable
(Any suitable external cellular antenna is permitted by
UL). Always follow the manufacturer's installation in-
structions. Note: Antennas are not Listed by UL.
GEM-Tamperkit - Tamper switches and screws to protect
metal housing (see page 14).
SPECIFICATIONS
The following specifications apply to all StarLink radio mod-
els unless otherwise stated:
Electrical Ratings for 120VAC, 60Hz
For Models with Power Supply
 Input Voltage: 120VAC nominal
StarLink™ SLE Commercial
LTEVI & LTEAI Series
Dual-Path Alarm Communicators
INSTALLATION INSTRUCTIONS
WI2327ELF 11/19
333 Bayview Avenue, Amityville, New York 11701
For Sales and Repairs, (800) 645-9445
For Technical Service, (800) 645-9440 or visit us at
http://tech.napcosecurity.com/
(Note: Technical Service is for security professionals only)
Publicly traded on NASDAQ Symbol: NSSC
© NAPCO 2019
INTRODUCTION
The StarLink
LTE Series Dual-Path Commercial / Resi-
dential Fire alarm capture radio IP communicators are fully
supervised, wireless digital two-way subscriber units. All
models are compatible with most 12/24VDC alarm control
panels (always adhere to the documentation provided by
the control panel manufacturer). These communicators are
for use as the primary means of communication with the
central station and do not have backup mode capability.
No POTS (Telco Line) connection permitted. See WI2140
for programming information.
The following models are available:
SLE-LTEVI-CFBPS & SLE-LTEAI-CFBPS: Commercial /
Residential Fire LTE Radio-TCP/IP Communicators in
red metal housing with SLE-ULPS-R power supply and
16.5V / 20VA transformer mounted inside housing
SLE-LTEVI-CFB & SLE-LTEAI-CFB: Commercial / Resi-
dential Fire LTE Radio-TCP/IP Communicators in red
metal housing. Powered directly from control panel (no
power supply, no transformer, rated nominal 12/24VDC
input)
The following features are included with models that in-
clude a SLE-ULPS-R power supply:
 Power limited output to the StarLink radio PC board 12V
input terminals
 Battery connection red and black flying leads
 Monitored battery charging and Active battery test circuits
 StarLink radio trouble input (from StarLink radio PC
board PGM1 terminal to detect StarLink radio trouble)
 Requires a sealed lead acid min 4AH / max 7AH battery
for minimum 24-hour standby time (max charge current
200mA).
 Trouble relay output (C, N/O and N/C terminals) to
wire to a panel zone dedicated to "Radio Trouble" (dry
contacts). Remove jumper "J2" isolate relay OUT1
common from ground
 Green AC ON LED visible from the exterior housing
 Yellow TROUBLE LED "D4" on PC board. Flashes sig-
nify:
One flash: AC fail / brownout
Two flashes: Low battery
Three flashes: Charging circuit trouble
Four flashes: StarLink radio trouble
The housing-mounted transformer (when provided) is
mounted inside its own housing compartment with a re-
placeable UL Listed .5A fast blow primary fuse. 120VAC
connections are to be made by a licensed electrician using
suitable connectors, in accordance with N.E.C. and local
code requirements.
AGENCY LISTINGS
 UL 864 Standard For Control Units and Accessories For Fire
Alarm Systems, 10th Edition
 UL 1610 Standard For Central-Station Burglar-Alarm Units
 UL 985 Standard For Household Fire Warning System Units
 UL 1023 Standard For Household Burglar-Alarm System Units
 UL 1076 APOU Proprietary Alarm Systems
 UL 365 APAW Police Connect
Question and Answer IconNeed help?

Do you have a question about the NAPCO StarLink SLE-LTEAI-CFBPS and is the answer not in the manual?

NAPCO StarLink SLE-LTEAI-CFBPS Specifications

General IconGeneral
BrandNAPCO
ModelStarLink SLE-LTEAI-CFBPS
CategoryCell Phone
LanguageEnglish

Summary

Introduction and Additional Components

Power Supply & Wi-Fi Module

Details the SLE-ULPS-R Power Supply and SLE-WIFI-MODULE for connectivity.

Cables, Antennas & Tamper Kit

Lists available accessories like download cables, antennas, and tamper kits.

Specifications and Agency Listings

Electrical Ratings

Specifies electrical ratings for 120VAC, 60Hz models with power supply.

UL Standards

Lists UL standards relevant to control units and accessories for fire alarm systems.

Electrical Ratings and Terminal Descriptions

+12V/24V Models & Inputs/Outputs

Details electrical ratings for +12V/24V models and various input/output terminals.

Power, Input, Output, Comm, Ground

Descriptions for power, input, output, communication, and ground terminals on the PC board.

LED Indicators and Notices

RF Signal & Operational Status LEDs

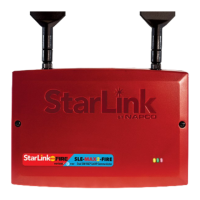
Describes the Green RF Signal Strength and Yellow Operational Status LEDs.

Trouble, Diagnostic & IP Network LEDs

Explains the Red Trouble, Red Diagnostic, and Green IP Network LEDs.

Downloading & Supervision Settings

Covers unattended downloading and 7-day supervision configurations.

Input & Wi-Fi Configurations

Details unsupervised input settings and Wi-Fi module enablement.

IP Network Indicators and Installation Steps

Red Troubles & Yellow State LEDs

Details the function of Red IP Network Troubles and Yellow IP Network State LEDs.

Supplying Power & Jumper X5

Information on powering the unit and descriptions of Jumper block X5 options.

Primary Reporting & Network Coverage

Explains primary reporting function and network coverage supervision.

Account Registration & Gemini Panel Setup

Covers account registration and programming for Gemini C-Series panels.

Mounting Location and Installation Steps

Recommendations & RF Verification

Guidance on selecting a mounting location and verifying signal strength.

FCC RF Exposure Warning

Warning regarding minimum separation distance for FCC RF exposure compliance.

Wiring, Power Application & Verification

Details wiring, power application, and signal verification steps.

Contact ID Example, Formats & Caution

Explains Contact ID programming, compatible formats, and programming cautions.

StarLink Radio Troubles and NOC Signals

Wiring OUT1 Relay for Trouble Annunciation

Instructions for wiring the OUT1 relay to a zone for trouble annunciation.

Reporting Troubles to Central Station

Requirement for the radio to report troubles to the central station.

StarLink Event Report Codes

Lists common Contact ID alarm codes for StarLink radio events.

NOC Signal Procedures

Describes NOC originated signals like Supervisory Fail and test signals.

Radio Supervision and Configuration

Telco Line Cut Detection

Explains how to detect cut Telco wires and program supervision.

Supervision Timer Logic

Describes how status changes affect the radio supervision timer.

Firmware Updates & Tamper Switches

Covers firmware update procedures and optional tamper switch installation.

Commercial Fire Wiring Diagram

General Wiring Notes

Important notes and requirements for wiring connections.

Telco Trouble & Supervision Wiring

Specific wiring for Telco trouble and supervision connections.

Power Supply Trouble Output Wiring

Wiring instructions for the Power Supply Relay Trouble Output.

Wiring Diagrams for Generic FACPs with TELCO RJ Sockets

Optional FACP Aux Power Connection

Option for connecting FACP Aux Power when SLE-ULPS-R is not used.

JP2 Option Wiring for Telco 2 Supervision

Wiring instructions for the JP2 option to enable Telco 2 supervision.

Wiring Diagrams for Generic FACPs without TELCO RJ Sockets

RJ31X vs. Direct Panel Wiring

Guidance on using RJ31X for longer distances versus direct panel wiring.

JP2 Option Wiring for Telco 2 Supervision

Wiring instructions for the JP2 option to enable Telco 2 supervision.

Wiring Diagram for GEMC Control Panels

RJ-45 Cable & Optional Communication

Requirements for RJ-45 cable and optional remote communication.

JP2 & JP1 Jumper Configuration

Instructions for configuring JP2 and JP1 jumpers for specific functions.

Telco Line Cut Supervision Note

Note regarding Telco line cut identification and supervision.

Alternate Telco Line Supervision

Using FACP Telephone Connections for Supervision

Method for utilizing existing FACP telephone connections for supervision.

JP2 Shunt & "Tip/Ring Fault Report"

How removing JP2 shunt and enabling feature impacts supervision.

Tamper Switch Installation and Dialing Format

Wiring Tamper Switches

Instructions for wiring tamper switches for security.

Tamper Switch Locations

Details the recommended locations for mounting tamper switches.

Tamper Supervision Loop Wiring

Guidance on wiring a normally closed sensor loop for tamper supervision.

Receiver Compatibility

Information on the compatibility of SLE Dual-Path radios with 4/2 receivers.

Alternate Power Connection Methods

Conduit Location Example

Illustrates an example of a conduit location for power connections.

UL Listed Pull Box Connection Method

Describes connecting to a UL listed pull box on a fire alarm branch circuit.

Transformer Secondary Wiring Limits

Specifies the maximum length for transformer secondary wiring conduit.

Important Wiring Methods

Single-Conductor Terminals

Wiring methods for terminating single conductors in terminal blocks.

Barrier-Type Terminals

Wiring methods for terminating conductors in barrier-type terminals.

Terminating Multiple/Different Wires

Using the 'pigtail' method for multiple or different sized conductors.

Related product manuals