4 StarLink
™
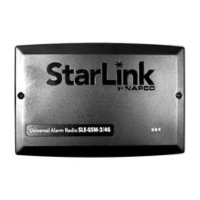
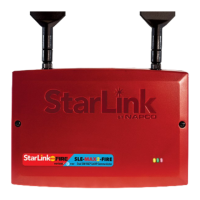
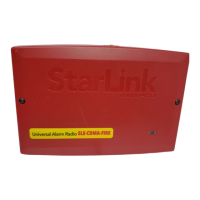
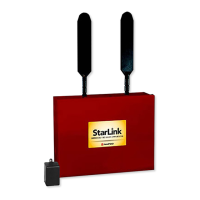
SLE-LTEVI-FIRE Commercial Series Dual-Path Alarm Communicator -- Installation Instructions
YELLOW IP NETWORK STATE LED
Labeled "D15" (or DS15), this LED is located to the right
of the ETHERNET socket on the PC board. Operation
is as follows:
Off = No power
Steady with 1 quick blink off every 1.7 seconds
when reporting signal to NOC
Steady with 2 quick blinks off every 1.7 seconds
when downloading to control panel or the module
Slow Flashing:
1 Blink: Ethernet Available
2 Blinks: Wi-Fi Station Mode (normal operation)
SUPPLYING POWER
Control panels can provide power through their Auxiliary
Power terminals if the available standby current is reduced
by the SLE standby power (refer to Electrical Ratings for
+12V / 24V).
Note: The cable modem/router and switch (if any) at
the premises requires standby power, therefore a UL 1481
or UL 864 Listed UPS must be used at the premises to
power these devices for 24 hours (unless an engine driven
generator is provided on the premises, then only 4 hours of
UPS backup are required).
JUMPER DESCRIPTIONS
Jumper block labeled "X5"; from top to bottom, as detailed
in the following table. Note: Contact ID is always availa-
ble in response to a Contact ID handshake.
The SLE series radios are compatible with 4/2 Pulse Dial-
ing formats with 10pps, 20pps, and 40pps with and with-
out checksum, either 1400Hz or 2300Hz handshake /
kissoff. See table of formats on page 5.
Refer to WI2140 for selecting the required handshake /
kissoff frequency in the NOC (www.NapcoNOC.com) set-
up screens (as required by the control panel).
NETWORK COVERAGE
The StarLink radio constantly supervises the cell network
coverage. When the StarLink radio detects a loss in net-
RED TROUBLE LED
Labeled "D5", this LED is located at the bottom right of
the PC board. Operation is as follows:
1 Blink: Low Aux Power input voltage
2 Blinks: Battery trouble
3 Blinks: Alarm report Failed to Communicate
(will restore only when the radio path is restored)
4 Blinks: RF trouble (antenna connection or cellu-
lar registration)
5 Blinks: Radio poll or check-in failure (radio and/or
Ethernet). Either or both paths will trigger the trouble,
but for the trouble to clear, unit requires both IP and
radio polling/checkins to be operational
6 Blinks: Unit disabled (reporting or control panel
downloading not allowed)
7 Blinks: Unit was shutdown and has no function-
ality; requires a restart (full power down and full power
up sequence) to restore operation.
8 Blinks: Telco Line Cut (this is not the DACT in-
terconnect to the radio)
RED DIAGNOSTIC LED
Labeled "D7", this LED is located in the middle of the
PC board. One blink indicates a weak or non-existent
signal from the network (green LED is off). If this red
LED is blinking in any other manner, please contact
technical support.
GREEN IP NETWORK CONNECTION LED
Labeled "D14" (or DS14), this LED is located to the right
of the ETHERNET socket on the PC board. Operation
is as follows:
Off = No network cable detected
Fast Flash = No IP connection (Occurs just after
power on, while trying to obtain a IP address)
Slow Flash = Normal IP network operation
1 Blink: Static IP
2 Blinks: DHCP
3 Blinks: Auto IP (if unable to acquire DHCP ad-
dress, then after 5 minutes it will convert to Auto IP)
RED IP NETWORK TROUBLES LED
Labeled "D16" (or DS16), this LED is located to the right
of the ETHERNET socket on the PC board. Operation
is as follows:
Off = No troubles
Fast Flash = No IP connection (occurs just after
power on while trying to obtain a DHCP address)
Slow Flashing:
1 Blink: No network cable detected
2 Blinks: No access to the Internet
3 Blinks: Ethernet failed to communicate
4 Blinks: Ethernet poll / checkin fail
5 Blinks: Wi-Fi is enabled, but SLE-WIFI-MODULE
is not detected
6 Blinks: Wi-Fi no access to the Internet
7 Blinks: Wi-Fi failed to communicate
8 Blinks: Wi-Fi poll / checkin failure
9 Blinks: Wi-Fi serial data error or no serial data re-
sponse
10 Blinks: Wi-Fi Security / Authentication failed
Jumper Block "X5" Options
Jumper block labeled "X5" contains 5 jumper terminals; from top (labeled
"1") to bottom (labeled "5") as follows:
Jumper ON
Jumper
Number
Jumper OFF
Tech on site must temporarily
remove to download
1 Not permitted by UL 864
4/2 with Checksum Pulse Format* 2 4/2 Pulse Format*
Supervised inputs. EOLR(s)
required, see page 2
4 and 5
Not permitted by UL 864 (UL 864
permits use of conduit within 20
feet of FACP in lieu of Supervi-
sion)
*See table "NOTICE TO AUTHORITIES HAVING JURISDICTION..." on page 3.
 Loading...