© National Instruments Corporation 13 NI USB-443x Calibration Procedure
5. Measure the exact frequency of the acquired signal. Compare the detected frequency to the
timebase frequency accuracy limits in Table 15.
Adjustment
Performing the calibration adjustment procedure automatically updates the calibration constants and
date in the EEPROM on the NI USB-443x device.
Analog Input Adjustment
Complete the following steps to adjust the analog input of an NI USB-443x device.
1. Connect the output of the calibrator to all input channels on the device. Use the BNC T-connectors
to route the signal to all of the inputs.
2. Configure the calibrator to output a 1 kHz signal with a 6.3 V
rms
(8.91 V
pk
) amplitude.
3. Enable the calibrator output.
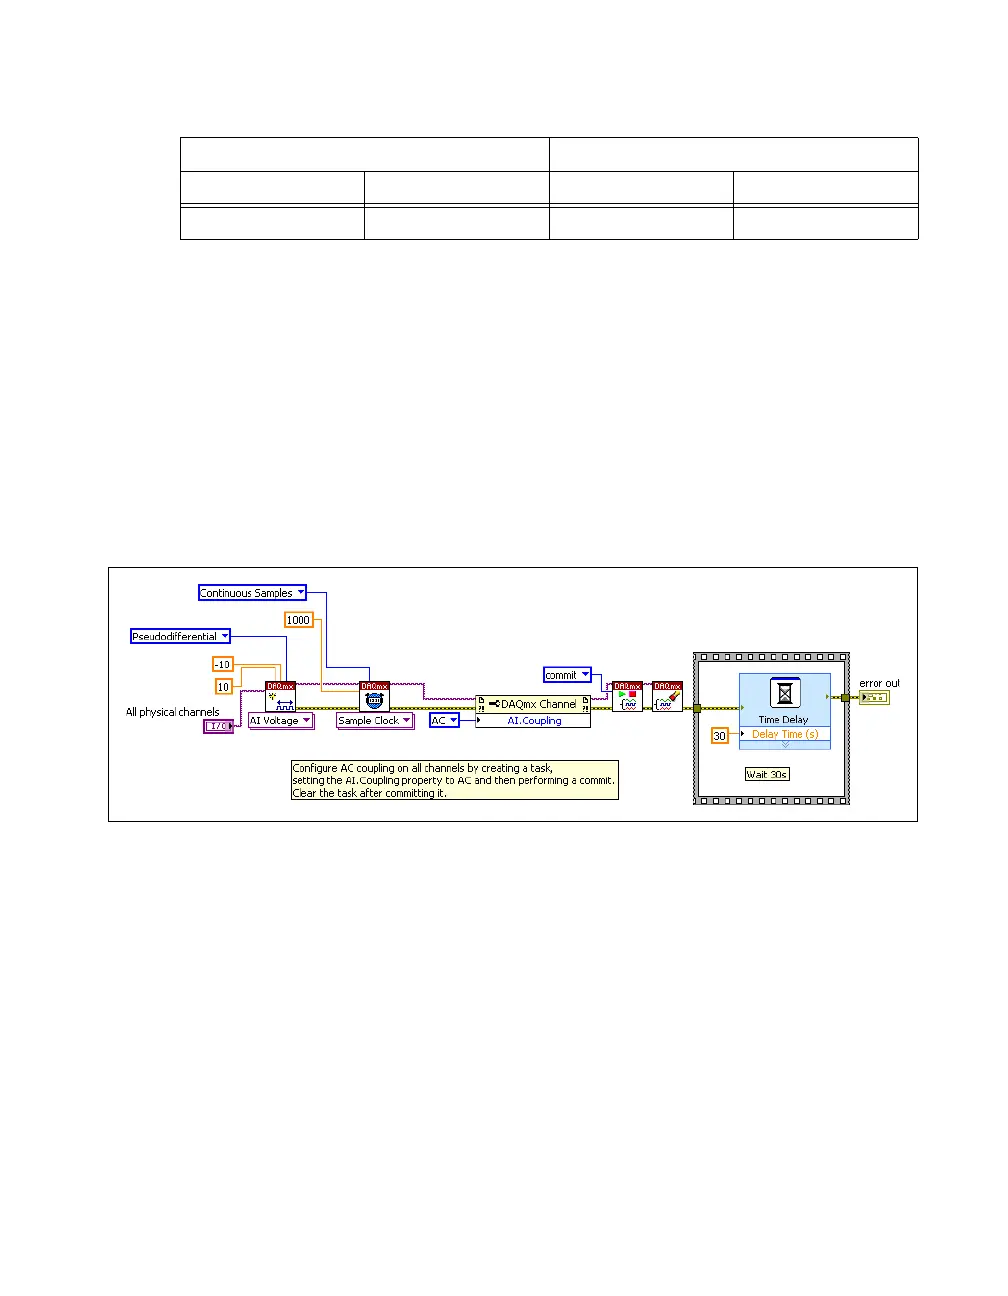
4. Using Figure 3 as a guide, commit an AI voltage task on the NI USB-443x with the settings shown
in Table 16. After the task is committed, clear the task and wait for 30 seconds.
Figure 3. VI Showing How to Prepare a NI USB-443x for Analog Input Adjustment
Table 15. Timebase Frequency Accuracy Limits for NI USB-443x
Function Generator Output Device Input Frequency
Amplitude (V
pk
) Frequency (Hz) Min (Hz) Max (Hz)
9 10000 9999.25 10000.75
 Loading...