EasyManua.ls Logo

Nautel Vector-LP VR250 - User Manual

Default Icon
150 pages
Print Icon
To Next Page IconTo Next Page
Loading...
Vector-LP
Radio Beacon
Transmitter
Technical Instruction Manual
VR125
VR250
Issue 1.1 .................... 24 February 2009
Nautel Limited
10089 Peggy's Cove Road,
Hackett's Cove, NS, Canada B3Z 3J4
T.877 6 nautel (628835) or +1.902.823.2233
F.+1.902.823.3183 info@nautel.com
U.S. customers please contact:
Nautel Inc.
201 Target Industrial Circle, Bangor ME 04401
T.877 6 nautel (628835) or +1.207.947.8200
F.+1.207.947.3693 info@nautel.com
e-mail: support@nautel.com
www.nautel.com
Copyright 2009 NAUTEL. All rights reserved.

Table of Contents

Questions and Answers

Summary

Preparation for Use and Installation

2.2 Preparation for Use

Details site preparation requirements before transmitter delivery and installation.

2.2.1 Transmitter Room Requirements

Lists criteria to be addressed when finalizing the transmitter site, including dimensions, weight, and clearances.

2.2.2 Lightning Protection

Emphasizes precautions against lightning-induced transients for transmitter protection.

2.2.3 Station Reference Ground

Specifies requirements for a station reference ground to ensure a continuous, low impedance path to earth.

2.2.4 AC Power Source

Details AC power source requirements, including surge protection and ferrite toroids.

2.2.8 Electrical Power

Outlines requirements for AC and DC power sources used by the transmitter.

2.2.9.2 Interface Protection Unit

Describes the optional interface protection unit (SPU1) for preventing lightning-induced transients.

2.2.11 External Interlocks

Details the external electrical interlock circuit connections and function for safety.

2.2.12 Remote Control Circuits

Explains how to control and monitor transmitter functions using remote interfaces or serial ports.

2.2.15 Serial Port Features

Outlines serial port features for interfacing with remote control centers and ATUs.

2.2.15.1 Remote Control and Monitoring Interface

Describes optional remote control and monitoring via serial connection (RS-232, RS-422, modem, USB, TCP/IP).

2.2.20.3 Interface Protection Unit

Describes the optional surge protector panel for protecting against lightning-induced transients.

2.3 Installation

States that all assemblies are installed in the transmitter cabinet for shipping.

2.3.6 Installing External Control;Monitor Wiring

Provides instructions for connecting external control/monitor wiring to the remote interface PWB.

2.3.7 Installing AC Power Wiring

Details the procedures for installing AC power wiring, including interface protection unit connection.

2.3.8 Installing DC Power Source Wiring (optional)

Explains connecting the DC power source wiring to the transmitter's terminals.

2.4 Commissioning

Provides step-by-step procedures for performing commissioning checks and initial turn-on.

2.4.2 Turn-On Prerequisites

Outlines essential steps to verify the transmitter is ready for turn-on.

2.4.3 Initial Turn-On

Details the initial turn-on procedure, including checking connections, GUI, and power status.

Operating Instructions

3.2 Emergency Shutdown

Explains the two types of emergency shutdown procedures: turning off RF output or complete shutdown.

3.2.1 Turn Off RF Output

Details how to turn off the RF output by inhibiting the power stage.

3.2.2 Complete Shutdown

Explains how to perform a complete shutdown by disabling power supplies.

3.3 External Safety Interlock

Describes the external electrical interlock circuit and its function in inhibiting RF output.

3.4 Electrostatic Discharge Protection

Provides precautions for handling assemblies with semiconductor devices susceptible to ESD damage.

3.4.1 Discharging of Personnel

Advises on electrically discharging personnel when handling assemblies.

3.4.4 Stress Current Protection

Advises on protecting static-sensitive devices from unnecessary stress current by ensuring connections are not broken and voltages are not present on external circuits.

3.5 Controls and Indicators

Recommends familiarizing oneself with controls and indicators before operating or diagnosing faults.

3.5.1 Front Panel

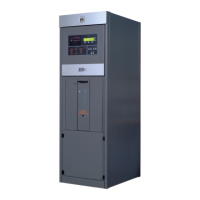
Describes the front panel as the primary local user interface, grouped into four sections: System Diagram, Control, Diagnostic Display, and Analog Meter.

3.6 Diagnostic Display

Describes the diagnostic display as the primary local interface for control and monitoring of parameters.

3.6.1 Pushbutton Switches

Explains how to navigate the diagnostic display using the five pushbutton switches.

3.6.2 Main Screens

Details the high-level screens of the diagnostic display, including status bar and sub-menu selections.

3.6.2.1 Transmitter Status Bar

Explains the information displayed on the transmitter status bar, such as time, power, and active side.

3.6.3 Viewing Faults

Explains how to view a list of current faults on the diagnostic display and attempt to clear them.

3.6.4 Changeover Control

Describes controlling the active exciter side (A or B) and monitor mode (BYPASS or NORMAL).

3.6.5 Viewing Events Log

Details how to view the stored transmitter events log, sorted chronologically with root-cause descriptions.

3.6.7 Setting RF Monitor Limits

Explains setting high/low power thresholds, modulation, and keying loss limits to ensure acceptable operation.

3.6.8 Meter Settings

Guides on determining parameters to be displayed on the front panel analog meter or diagnostic display's meters screen.

3.6.9 Selecting Power Source

Explains how to select the transmitter's power source and view related parameters.

3.6.10 Configuring the Sonalert

Guides on configuring the status of the audible alarm (sonalert) for all transmitter alarms.

3.6.11 Setting a Timed Shutdown

Explains modifying timed shutdown parameters, including interval and auto-assert settings.

3.6.12 Changing Factory Calibrated Settings

Describes restoring factory calibrated settings for parameters like thresholds and gain.

3.6.12.1 Calibrating Diagnostic Display Meters

Provides steps to re-align out-of-tolerance meter readings on the diagnostic display.

3.6.12.2 Setting Protection Threshold Levels

Details adjusting critical transmitter shutback thresholds for RF current, AC voltage, and reflected power.

3.6.12.3 Setting Maximum Output Limitations

Explains adjusting maximum allowable output gain in terms of carrier reference.

3.6.12.4 Using Factory Settings

Describes how to restore setup, calibration values, and thresholds to factory settings.

3.6.13 Viewing and Setting Peripherals

Guides on viewing and setting parameters related to auxiliary items like the keyer, ATU, or standby side.

3.6.13.1 Setting the Keyer

Details setting up the keyer, including audio levels, modulation, and sequence parameters.

3.6.13.2 Viewing Power Module Status

Explains how to check the software revision of various modules and view RF power module status.

3.6.13.3 ATU Controls

Guides on viewing and editing control parameters for a Nautel antenna tuning unit (ATU).

3.6.13.4 Testing the Standby Side

Details testing the operation of the transmitter’s inactive (standby) side.

3.6.13.5 Selecting Peripherals

Explains configuring transmitter software for peripheral equipment like ATU or site interface PWB.

3.6.14 Remote Control Monitor System Settings

Explains configuring active logic states of control and monitor points for the NDB site interface PWB.

3.6.14.1 Setting Control Points

Details setting the site interface PWB’s control points and logic levels.

3.6.14.2 Setting Monitor Points

Explains setting the site interface PWB’s monitor points and their default/current values.

3.6.14.3 Serial Settings

Guides on setting up the serial connection, including Tx Address, Modem Line, and Passkey.

3.6.14.4 Automatic Reporting

Describes configuring the serial connection to automatically report transmitter alarms.

3.6.15 Viewing Power Related Parameters and Setting ATU Current Feedback

Guides on viewing power menu parameters and setting ATU current feedback status.

Testing and Adjustment

4.2 Operating Precautions

Warns about protection circuits monitoring critical parameters and potential power reduction or shutdown.

4.3 Functional Tests

Outlines completing tests to verify transmitter circuits are within factory specifications.

4.3.4 Initial Turn-On

Details the initial turn-on procedure after installation or major repairs.

4.3.3 Test Prerequisites

Lists essential steps to be completed before performing functional tests.

4.3.5 Standard Adjustments

Lists standard adjustments to be verified after transmitter commissioning.

4.3.5.4 Adjusting Audio Limiter

Provides steps for adjusting the audio limiter threshold and verifying alarm reaction.

4.3.5.5 Setting Changeover Mode and RF Monitor Thresholds

Guides on adjusting transmitter limits (power, modulation, tone) and monitor delay when using a standby side.

4.3.5.6 Verifying Exciter Changeover Thresholds

Explains verifying exciter changeover thresholds by adjusting power and modulation levels.

4.3.6.3 Calibrating Transmitter Output Power

Provides steps for calibrating transmitter forward power and related parameters.

4.3.6.6 Calibrating Reflected Power Threshold and Output Network Alarm

Details calibrating reflected power thresholds and the output network alarm by adjusting shutback levels.

4.3.6.14 Reading Modulation Level

Details how to read modulation levels using an oscilloscope and the diagnostic display.

Maintenance and Troubleshooting

5.3 Corrective Maintenance

Defines corrective maintenance as identifying and fixing defects or deficiencies that arise during operation.

5.3.2 Off-Air and Standby Side Troubleshooting

Describes off-air troubleshooting when operation cannot be restored, including safe replacement of defective components.

5.4 Electrostatic Protection

Provides precautions for handling semiconductor devices susceptible to electrostatic discharge before removal or servicing.

5.5 Troubleshooting Front Panel Alarms

Explains how to use the front panel and diagnostic display to determine fault occurrence and origin.

5.6 Replacing an RF Power Module

Explains how to replace an RF power module, noting diagnostic display messages indicate the faulty module.

5.7 FET Checking;Replacement

Details the procedure for checking and replacing FETs, particularly those in RF power modules, using a digital multimeter.

5.8 Exciter Panel PWB Replacement

Outlines replacing defective PWBs on the exciter panel and performing necessary adjustments.

5.9 Battery Boost Assembly Replacement

Provides steps for replacing the battery boost assembly, including jumper settings and connection verification.

Theory of Operation

6.4.3.6 PDM Fault Detector

Explains the PDM fault detector circuit's role in controlling the shutback latch and on/off status of relay K1.

6.4.3.7 Shutback Latch

Describes the shutback latch circuit's function in inhibiting PDM output and RF output when faults are detected.

6.4.3.8 PDM Inhibit

Explains the PDM inhibit circuit's function in clamping the PDM generator output to ground when faults or inhibit commands are sensed.

6.4.4.3 Modulation Depth Functions

Details how modulation depth is controlled using digital pots and microcontroller adjustments.

6.5 Control;Monitor Stage

Describes the control/monitor stage, including the control/display PWB, remote interface, and optional NDB site interface.

6.5.1.2 Alarm Threshold Circuits

Describes how monitored parameters can initiate alarms and control transmitter functions when out of tolerance.

6.5.1.5 CPLD

Describes the Complex Programmable Logic Device's role in reading alarm inputs, performing fault detection, and generating shutback outputs.

6.5.3.2 Diagnostic Display

Details the diagnostic display (GUI) for navigation, control, and monitoring of transmitter functions.

6.5.3.3 Control Switches

Explains how control switches determine transmitter control location and RF status.

6.6 RF Power Stage

Explains that the RF power stage produces the transmitter’s final RF output, containing modules, filter, and probe.

6.6.1 RF Power Module(s)

Describes RF power modules, their output power, and internal components like amplifiers and modulators.

6.6.3.1 Forward;Reflected Power Probe

Explains the forward/reflected power probe circuit's components and how they sample RF output.

6.6.3.2 RF Current Probe

Describes the RF current probe circuit's components and how they provide RF current samples for detection and alarm.

Nautel Vector-LP VR250 Specifications

General IconGeneral
Power Output250 W
ModulationFM
CoolingForced Air
Maximum Power250 W
Input Voltage100-240 VAC, 50/60 Hz
Transmitter TypeSolid State
Frequency Range87.5 MHz to 108 MHz

Related product manuals