14 | Install the radar
3.4 Yacht installations
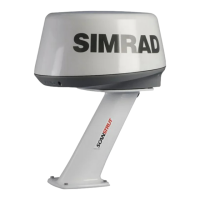
Normally you should install the scanner horizontally, to produce an equal sweep around the
yacht. However, a yacht heels over to the lee side, and when the heel angle exceeds 50% of
the vertical beam width of the radar, this can cause two problems:
• On the windward side of the yacht, the beam is projected too high to sweep the water
surface effectively. Targets can be missed completely or appear at very poor resolution on
the display unit.
• On the lee side of the yacht, the beam is projected too low and is concentrated over a small
area of water so that sea clutter becomes a problem on the display unit.
In this case, you're recommended to install the scanner on a gimbal mounting so that it can
operate effectively in a heavy swell or when the yacht is heeled over.
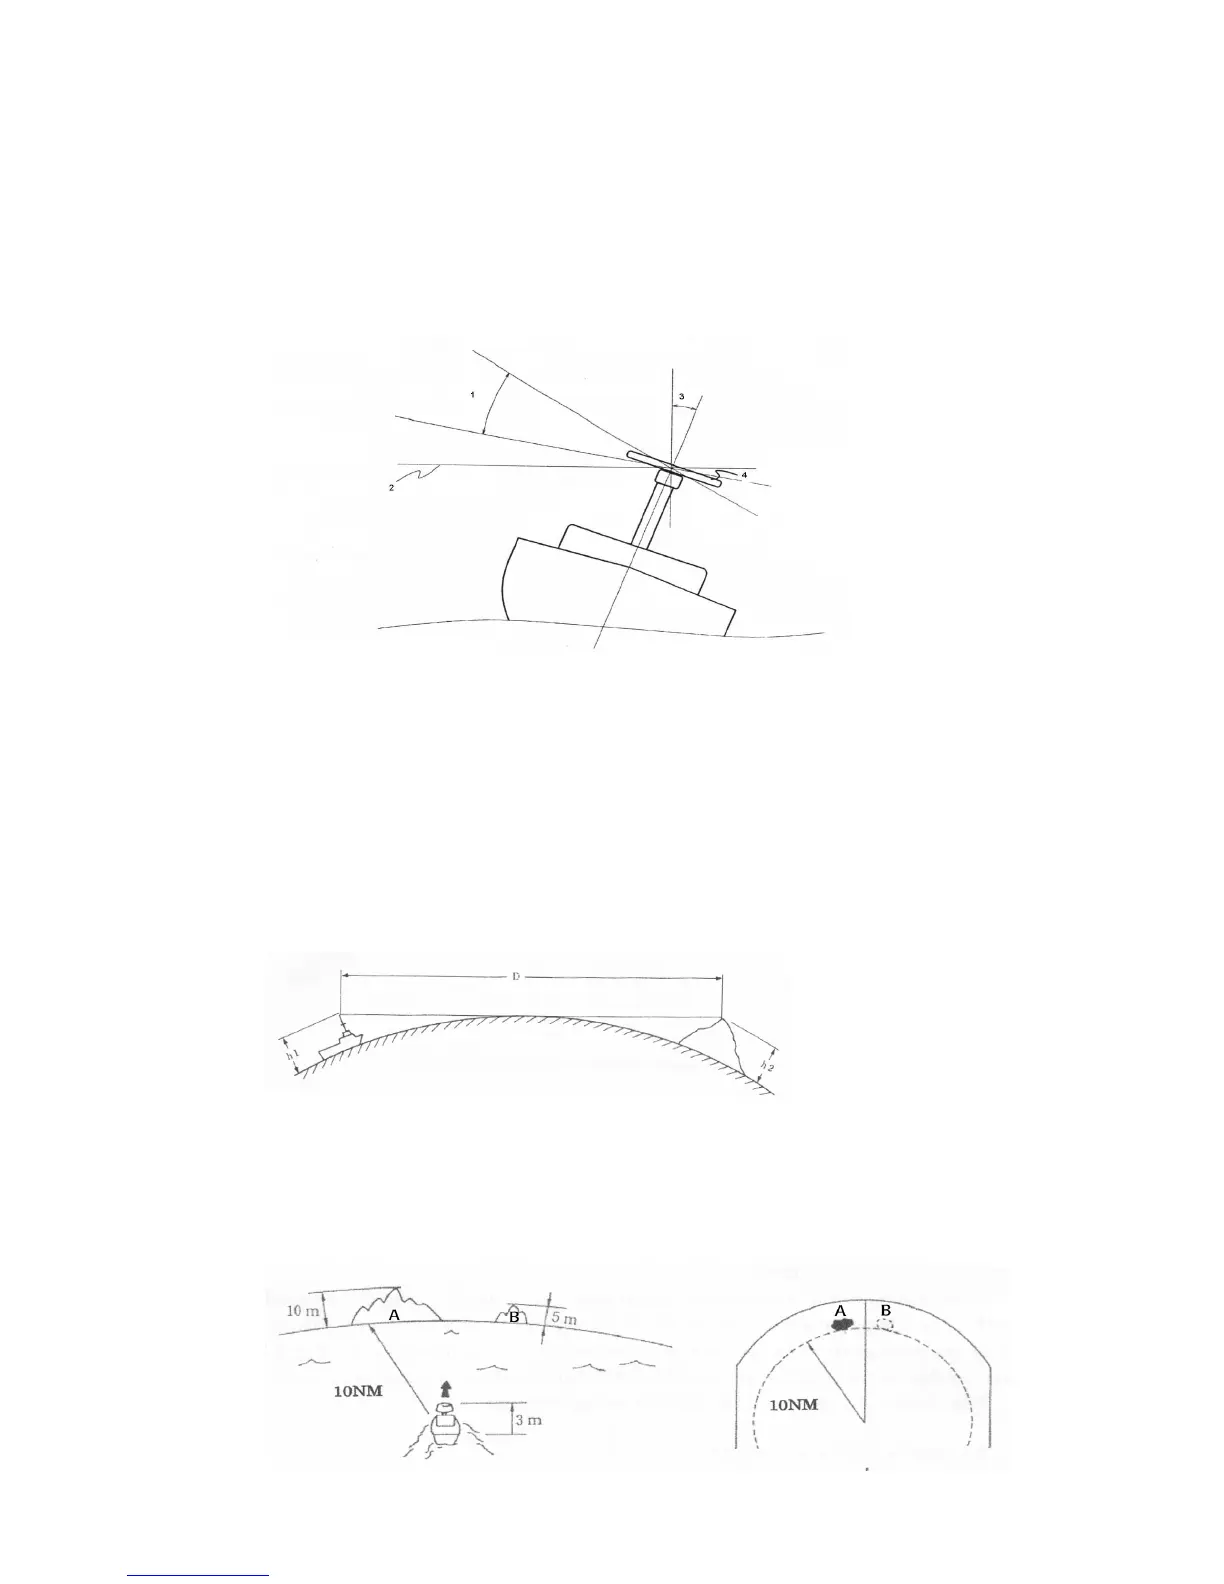
3.5 How to find the theoretical maximum detection range
Propagation of the radar beam can vary, depending on the properties of the air through which it
is traveling. Under normal conditions, the distance that the radar beam travels is approximately
10% further than the distance to the optical horizon.
You can calculate the theoretical distance traveled by the radar beam using the following
formula:
D = 2.23 (√h1 + √h2)
where:
• D is distance traveled by the radar beam
• h1 is the height above sea level of the scanner
• h2 is the height above sea level of a target
An example is shown below:
 Loading...