INSTALLATION/ SERVICE MANUAL
15
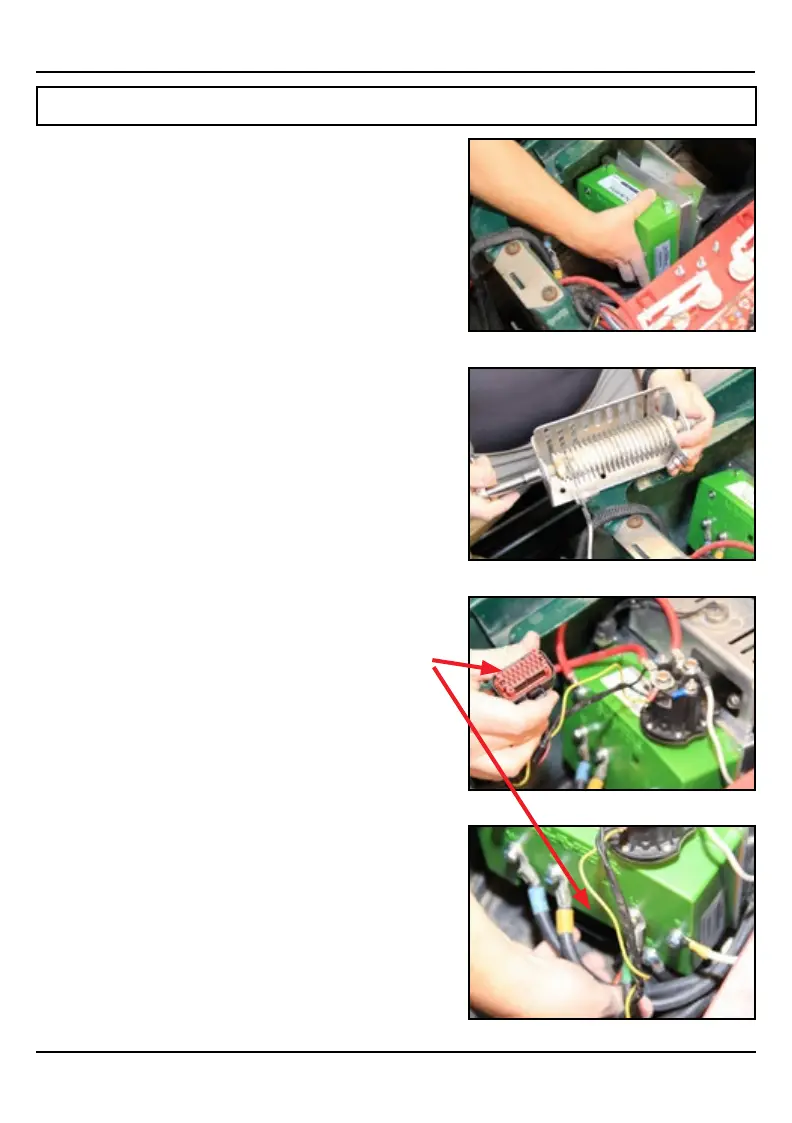
4. Mount Controller (Fig. 3)
• Use supplied bolts / washers / lock washers
• Bolt plate from back side
• Connect harness at bottom
5. Connect Controller
• Replace existing resistor cable (with NEW
included longer resistor cable) to resistor output
on controller
• Re-fasten resistor cage to the plate
• Re-fasten solenoid to the cage using 2 of the OEM
bolts
(Fig. 4)
• Connect battery B- cable from battery pack to
controller
• Connect motor phase cables (U,V,W)
• Connect battery to B+ from solenoid
6. Connect OEM Wire Harness (Fig. 5 & 6)
• Connect OEM wire harness to adaptor module
7. Install On-The-Fly Programmer (optional)
• Install OTF (optional) (see install description in
RXV INSTALL instructions, p12)
• Connect OTF to Navitas adaptor module
• Zip Tie loose cables
8. TESTING INSTALLATION
• Lift drive wheels off ground
• Reconnect battery pack
• Turn Key to Forward Position
• Press on Throttle to activate wheels
INSTALLATION INSTRUCTIONS
RXV 23 (Danaher) Installation cont’d
Fig. 6
Fig. 5
Fig. 4
Fig. 3
 Loading...

