Do you have a question about the NEC Express5800 120Ed and is the answer not in the manual?
Lists the necessary tools and materials required for assembling the server unit.
Measures to prevent electrostatic discharge damage to system components during handling.
Procedure to detach the front bezel from the server chassis.
Steps to detach the server's left and right side panels.
Relocating LEDs and applying new labels to the server's front bezel.
Procedure to remove the server's four foot stands from the unit's base.
Attaching the rack-mount front bezel with handles to the server unit.
Reattaching the server's side panels after preparation steps.
Mounting the rail bracket assemblies to the front and rear rack rails.
Procedure for connecting the system's AC power cord to the power supply.
This document outlines the installation procedures for the Express5800/120Ed Rack Mount Kit, designed to integrate the Express5800/120Ed Server small tower unit into a standard system rack. The guide provides comprehensive instructions for preparing the server unit, assembling the rack mount components, and securely installing the server into a rack cabinet.
The primary function of this kit is to convert a standalone Express5800/120Ed small tower server into a rack-mountable unit, allowing for efficient use of space and centralized management within a data center or server room environment. This transformation involves several key steps, including the removal of original server components and the installation of new rack-specific parts.
The installation process begins with unpacking and inspecting the rack mount kit, ensuring all components listed in the parts list (Table 1) are present and undamaged. The kit includes essential items such as left and right mounting rails, a new front bezel assembly, an LED holder, various labels (sleep, status, name plate logo), and all necessary screws and documentation.
Before commencing the physical installation, users are advised to review important cautions, warnings, and general guidelines. A critical warning emphasizes the need to power off and unplug the server unit to remove all voltage before any work begins. Users are also cautioned against excessive vibration, shock, disconnecting unspecified parts, touching I/O connector pins, and are reminded that all screws are Phillips-head unless otherwise noted. Upon reassembly, a power-on test is recommended to verify correct installation.
The guide highlights the importance of static precautions, recommending the use of an anti-static wrist strap attached to chassis ground to prevent electrostatic discharge (ESD) damage to sensitive components like disk drives and option boards. Electronic devices should remain in their protective packaging until ready for installation.
The server unit's dimensions are specified in Us, with 1U equaling 1.75 inches, and the server itself occupying 5Us (8.75 inches) of rack space.
The preparation of the server unit for rack mounting involves several steps:
Once the server unit is prepared, the mounting bracket assemblies are prepared and attached to the rack. The server uses two rail assemblies, each consisting of a front and rear rack mounting bracket that can be adjusted to fit the rack's vertical rails. Screws securing these brackets are removed, and an appropriate location in the rack cabinet is selected, with heavier items ideally mounted towards the bottom for stability. The left and right front mounting brackets are attached to the front of the rack using supplied Phillips flange head screws. Similarly, the left and right rear mounting brackets are attached to the rear of the rack. The front and rear brackets on each side are then connected using Phillips-head self-tapping screws and flat washers, and all installed screws are securely tightened.
The final stage is installing the server into the system rack. This is a critical step that requires two people due to the server's weight (approximately 45 pounds, potentially more with optional devices). Users are warned that improper installation can create an unstable condition in the rack cabinet. The rack-mount server unit is lifted onto the two support brackets and slid toward the rear of the rack cabinet. The front bezel is then secured to the rack cabinet's front vertical mounting rails using four screws and plastic washers provided.
The manual implicitly supports maintenance by providing clear, step-by-step instructions for disassembling and reassembling key external components of the server. This clarity is crucial for technicians or users who may need to access internal components for upgrades, repairs, or further maintenance tasks after the server has been rack-mounted. For instance, the instructions for removing side panels and the front bezel are fundamental for gaining access to the server's interior.
The emphasis on saving removed screws and brackets, as well as the "Device Bay Door," ensures that all original components are retained for potential reinstallation or future use, facilitating proper maintenance and preventing loss of parts.
The guide also touches upon post-installation checks, such as performing a power-on test after reassembly to verify correct installation. This is a basic but essential maintenance step to confirm the server's functionality after physical modifications. In case of faults, users are directed to the "Problem Solving" chapter in their System User's Guide, indicating a structured approach to troubleshooting.
Connecting external devices like keyboards, monitors, and mice, along with other peripherals, is detailed, with warnings against connecting/disconnecting keyboard/mouse cables while power is applied to prevent system damage. A specific warning about inserting telephone line connectors into LAN board RJ-45 ports highlights a common user error that can lead to personal injury and equipment damage, promoting correct usage and preventing unnecessary repairs.
Power cord connection instructions emphasize using the correct type of power cord for the region and ensuring it meets specific current ratings and termination standards (NEMA 5-15R or 6-15R, IEC CEE-22 female connector). The warning against modifying or using an incorrect power cord, and the caution about connecting the power cord to a powered-on UPS, are critical for electrical safety and preventing damage to the power supply or server, thereby reducing the need for electrical system maintenance.
Finally, the powering-on sequence, including checking external device connections and pressing the power button, is outlined. The note about the 1-5 second delay due to server management logic helps users understand normal operation, preventing unnecessary troubleshooting during startup. The caution to always allow POST to complete before powering down is a key operational guideline that helps maintain system integrity and prevent data corruption or hardware issues that might require maintenance. The mention of EXPRESSBUILDER CD-ROM for system setup after successful power-on points to the software aspect of server maintenance and configuration.
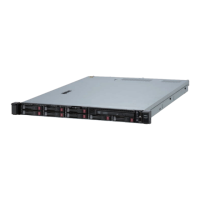
| Form Factor | 2U Rackmount |
|---|---|
| Storage | HDD/SSD |
| RAID Support | RAID 0, 1, 5, 10 |
| Network | Gigabit Ethernet |
| Operating System Support | Windows Server, Red Hat Enterprise Linux, VMware ESXi |