7
PROCEED VIDEO 1
EXIT
VIDEO 2 RGB 1 RGB 2/DTV
POWER
/STANDBY
▼
▼
−
+
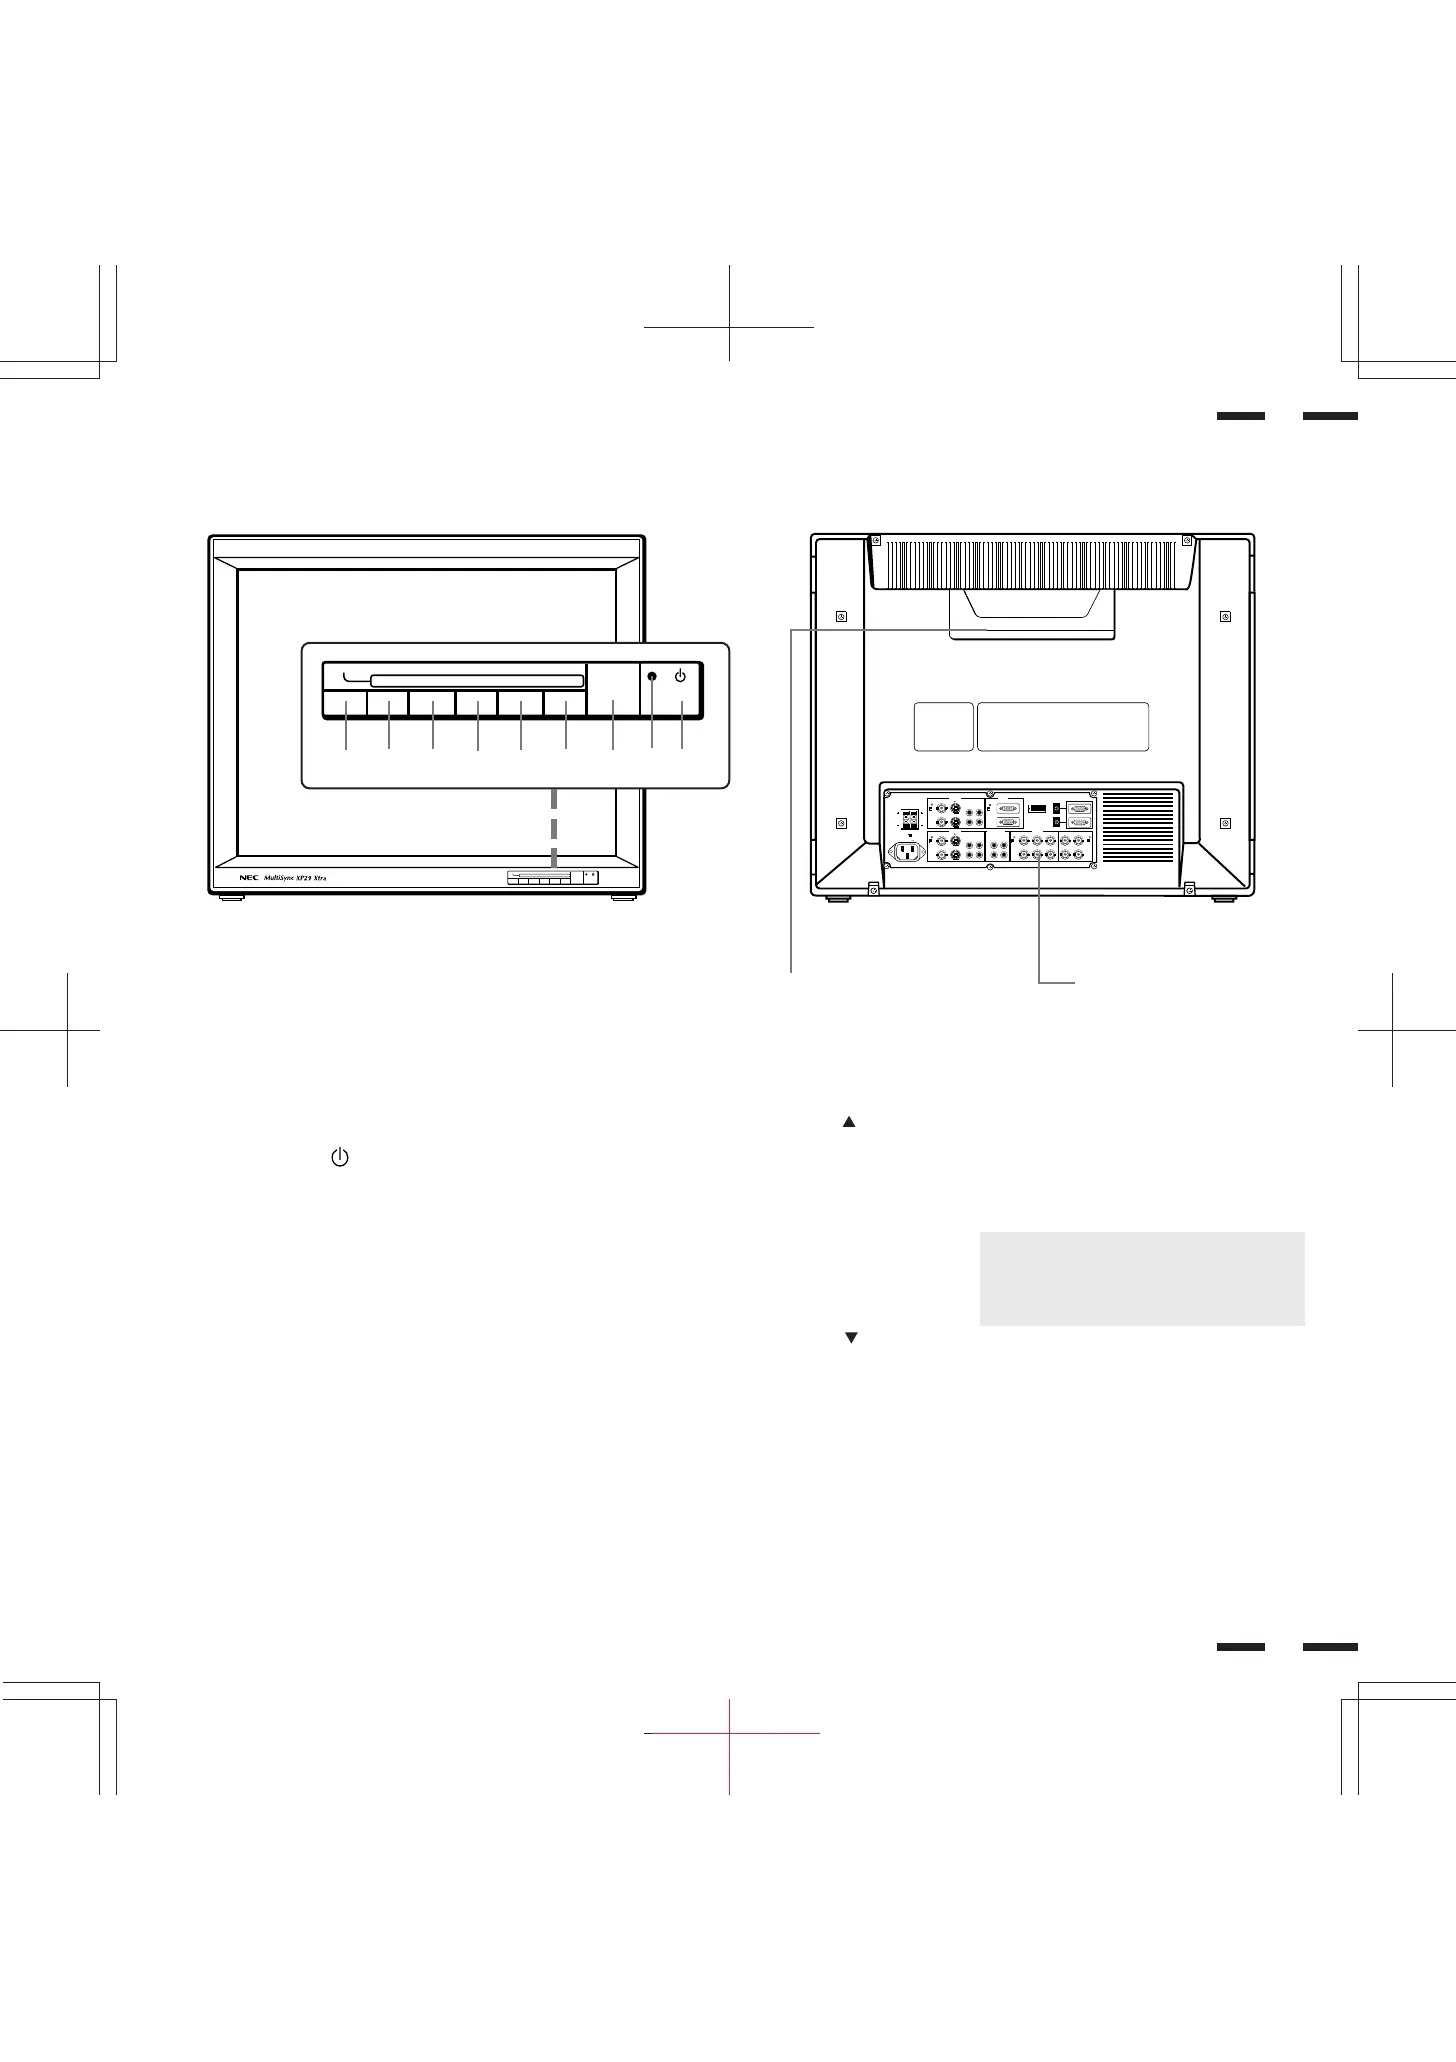
Part Names and Functions
DIP SW REMOTE
EXT SPEAKERS
SPEAKERS MUST HAVE
MORE THAN 5WATT RATING
IMPEDANCE 8 OHM
AC IN
SPEAKER SELECT
RIGHT LEFT
75
HIGH
INT EXT
BNC
IN
IN
R L(MONO)
AUDIO
VIDEO 1
S
1 2 3 4 5 6 7 8
ON
75
HIGH
THROUGH
OUT
THROUGH
OUT
THROUGH
OUT
THROUGH
OUT
THROUGH
OUT
THROUGH
OUT
THROUGH
OUT
IN
RGB1
PC / EXT CTL
75
HIGH
BNC
IN
IN
R L(MONO)
AUDIO
VIDEO 2
S
IN
R
R/C
R
/P
R
G/Y/Y B/C
B
P
B
IN
OUT
HV
L(MONO)
IN
75
HIGH
75
HIGH
RGB AUDIO RGB 2
4
Rear View
Front View
3
2
1
3
4
Terminal Board
PROCEED VIDEO 1
EXIT
VIDEO 2 RGB 1 RGB 2/DTV
POWER
/STANDBY
▼
▼
−
+
1 POWER .............................. Press to turn the main power on and off when
the AC power is supplied.
2 POWER/STANDBY
........
When this indicator is green, the monitor is
on; when the indicator is amber, it is in stand
by.
3 Remote Sensor Window ... Receives infrared signal from the handheld
remote control.
4 RGB 2/DTV/+ ...................... Press to select an RGB or component video
source that is connected to the RGB 2 input
terminals (BNC type). When you are in the
OSM mode, this button works as the plus
button.
5 RGB 1/- ............................... Press to select an RGB video source that is
connected to the RGB 1 input terminal (D-
SUB 15 pin type).
When you are in the OSM mode, this button
works as the minus button.
6 VIDEO 2/ .......................... Press to select an NTSC, PAL, SECAM or M-
NTSC compatible video source that is
connected to the VIDEO 2 input terminal (BNC
type or S-VIDEO 2 IN). When you are in the
OSM mode, this button works as the up button.
NOTE: S-VIDEO IN terminals will take
preference over VIDEO IN terminals when
the video source is connected to each
terminal and VIDEO 1 or 2 selected.
7 VIDEO 1/ ......................... Press to select an NTSC, PAL, SECAM or M-
NTSC compatible video source that is
connected to the VIDEO 1 input terminal (BNC
type or S-VIDEO 1 IN). When you are in the
OSM mode, this button works as the down
button.
8 EXIT .................................... Press to exit the OSM mode. The OSM screen
disappears.
9 PROCEED .......................... Press to access OSM. The OSM screen is
displayed.
0 Remote Control Holder..... Place remote control unit here when not in
use.
56789
0