14
Left and right edges
10˚
10˚
2
3
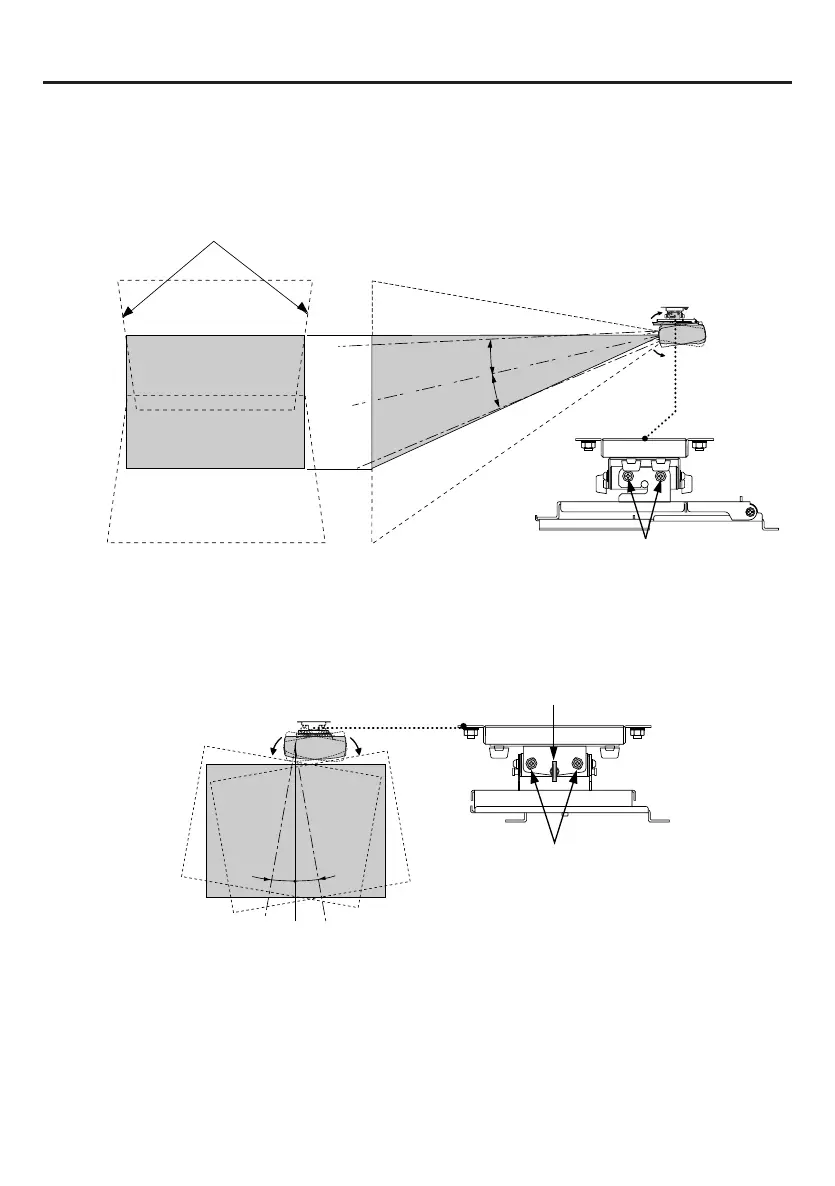
Adjustment of the Projection Angle
Adjust the Up-Down Angle
Turn the projector up and down so that the left and right edges of the screen are
parallel, then firmly tighten the four up-down angle adjustment screws. It is acceptable
if the image extends beyond the screen.
Maximum adjustment angle +/-10˚
Up-down angle adjustment screws
(There are also screws on the opposite side.)
Adjust the Inclination
Adjust so that the image is projected to the screen without being slanted, then firmly
tighten the four inclination adjustment screws. Lastly, tighten the two inclination axis
screws if they are loose.
Maximum adjustment angle +/-10˚
Inclination adjustment screws
(There are also screws on the opposite side.)
Inclination axis screw
If the adjustment does not work out, readjust from Step 1.
NP03CME07.3.122:15PMページ14
 Loading...