English Deutsch Français Español Italiano
日本語
12
- Read the markings on the axles before mounting the pedals. “R” is the right pedal and “L” is the left pedal.
You will notice that the left pedal tightens anti-clockwise, not clockwise as you are used to because it is has
a left-handed thread. Screw each pedal two or three turns into the thread of its crank by hand, before using
a pedal spanner to tighten them firmly.
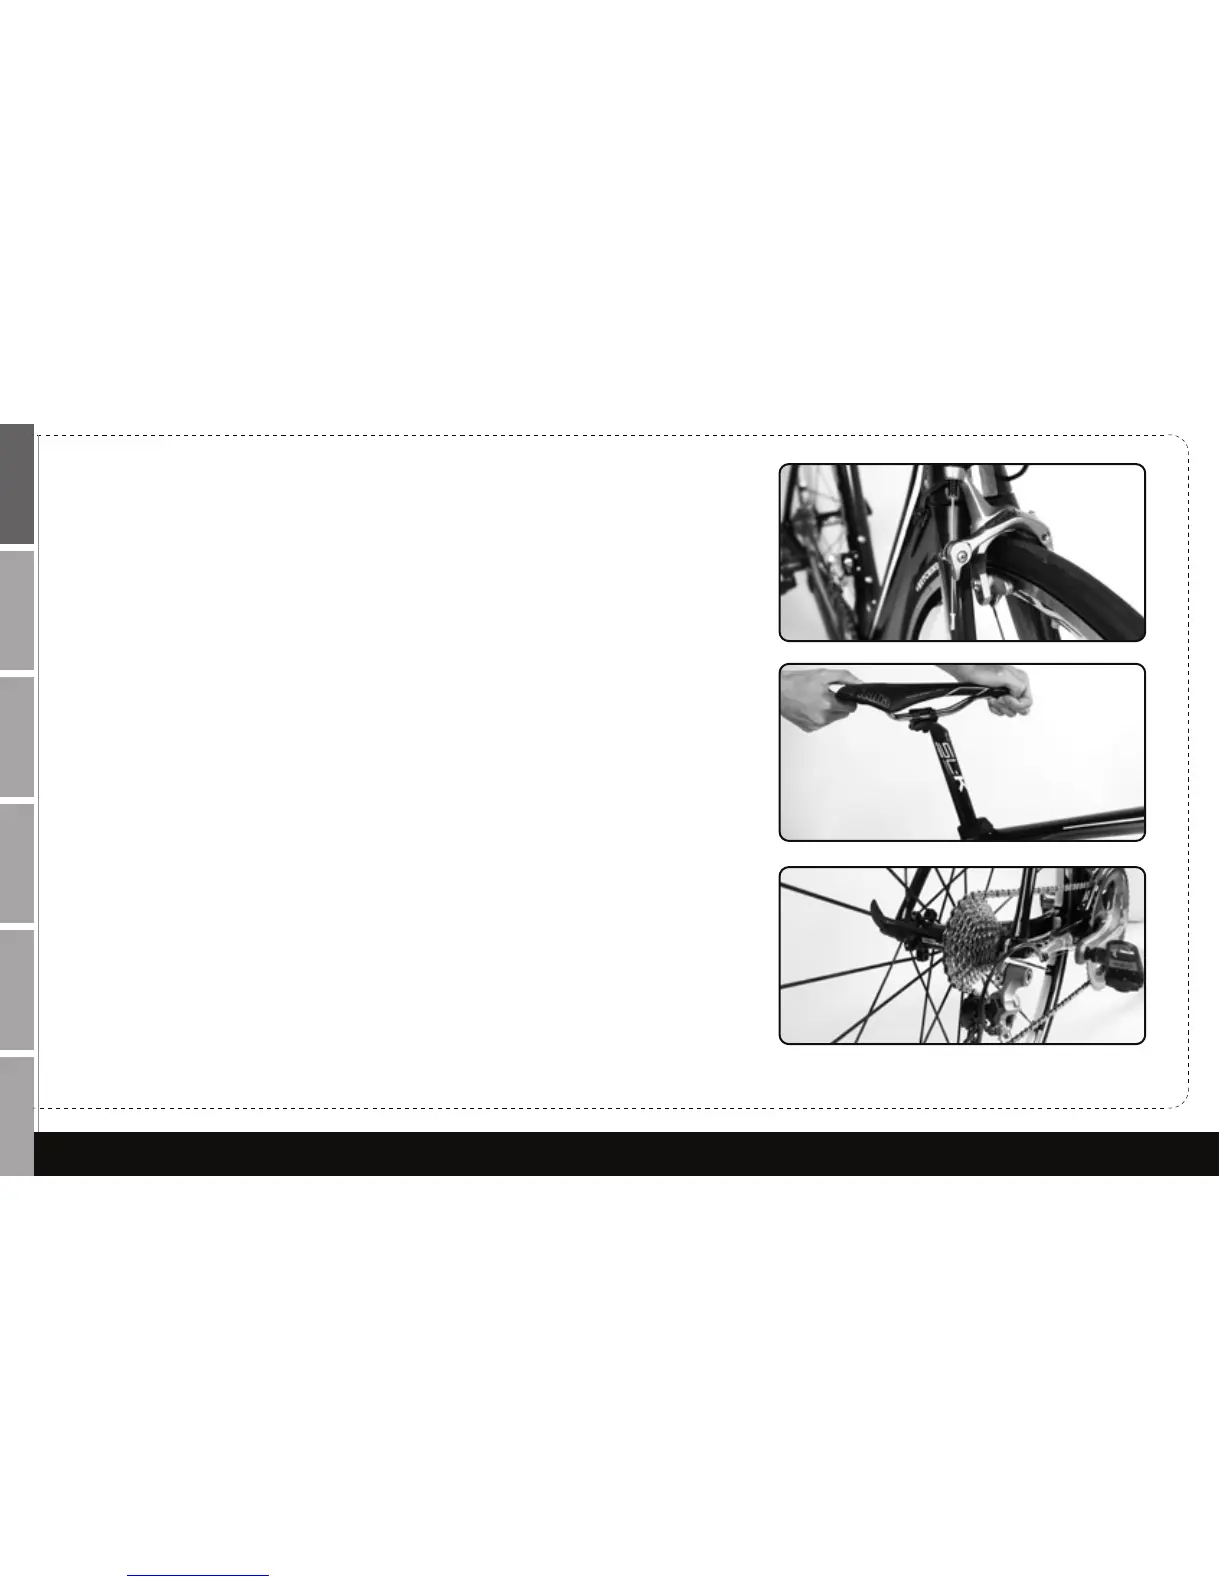
- Place the seat post into its tube and orient it so the saddle is correctly aligned with the top tube. Tighten the
seat clamp using the correct torque.
- Make final adjustments as to the position of the saddle and handlebars, and then make sure that the
handlebars, grips and seat post are fastened securely in place with the specified torque.
- Check that the rear wheel can spin freely and then check the gears are functioning correctly. To do this,
you should switch through each gear one by one, making sure that when the chain is running on the largest
sprocket the rear derailleur does not impact with the spokes.
- Now inflate the tires according to the pressure level that is indicated on the side of each tire.
- Finally, complete the assembly of your bike by carrying out the tests mentioned previously in this manual.
Closed brake lever
Check the saddle to see if the saddle is tight
Make sure rear derailleur is not colliding with the spokes