www.nektartech.com Nektar Impact iX49 & iX61 User Guide 13
Reaper Installation and Setup
The Impact iX Reaper Integration is compatible with Reaper 4.59 or later. We recommend that you upgrade to the latest
version if you have not already done so.
These instructions assumes you have a compatible Reaper program installed running on either Windows (Vista, 7, 8 or
higher) or Mac OS X 10.6 or higher.
Installation
If you have just completed a fresh install of Reaper, make sure to
first open Reaper once and quit again, before installing the Impact
Reaper support files.
Locate the “Impact iX DAW Integration” folder on the included DVD.
Alternatively, download the Reaper zip file from “My Downloads” on
www.nektartech.com after registering your product
Run the “Impact_Reaper_Support” installer and follow the on-screen
instructions
Plug-in your Impact iX and make sure it’s switched on (if you didn’t
do so already)
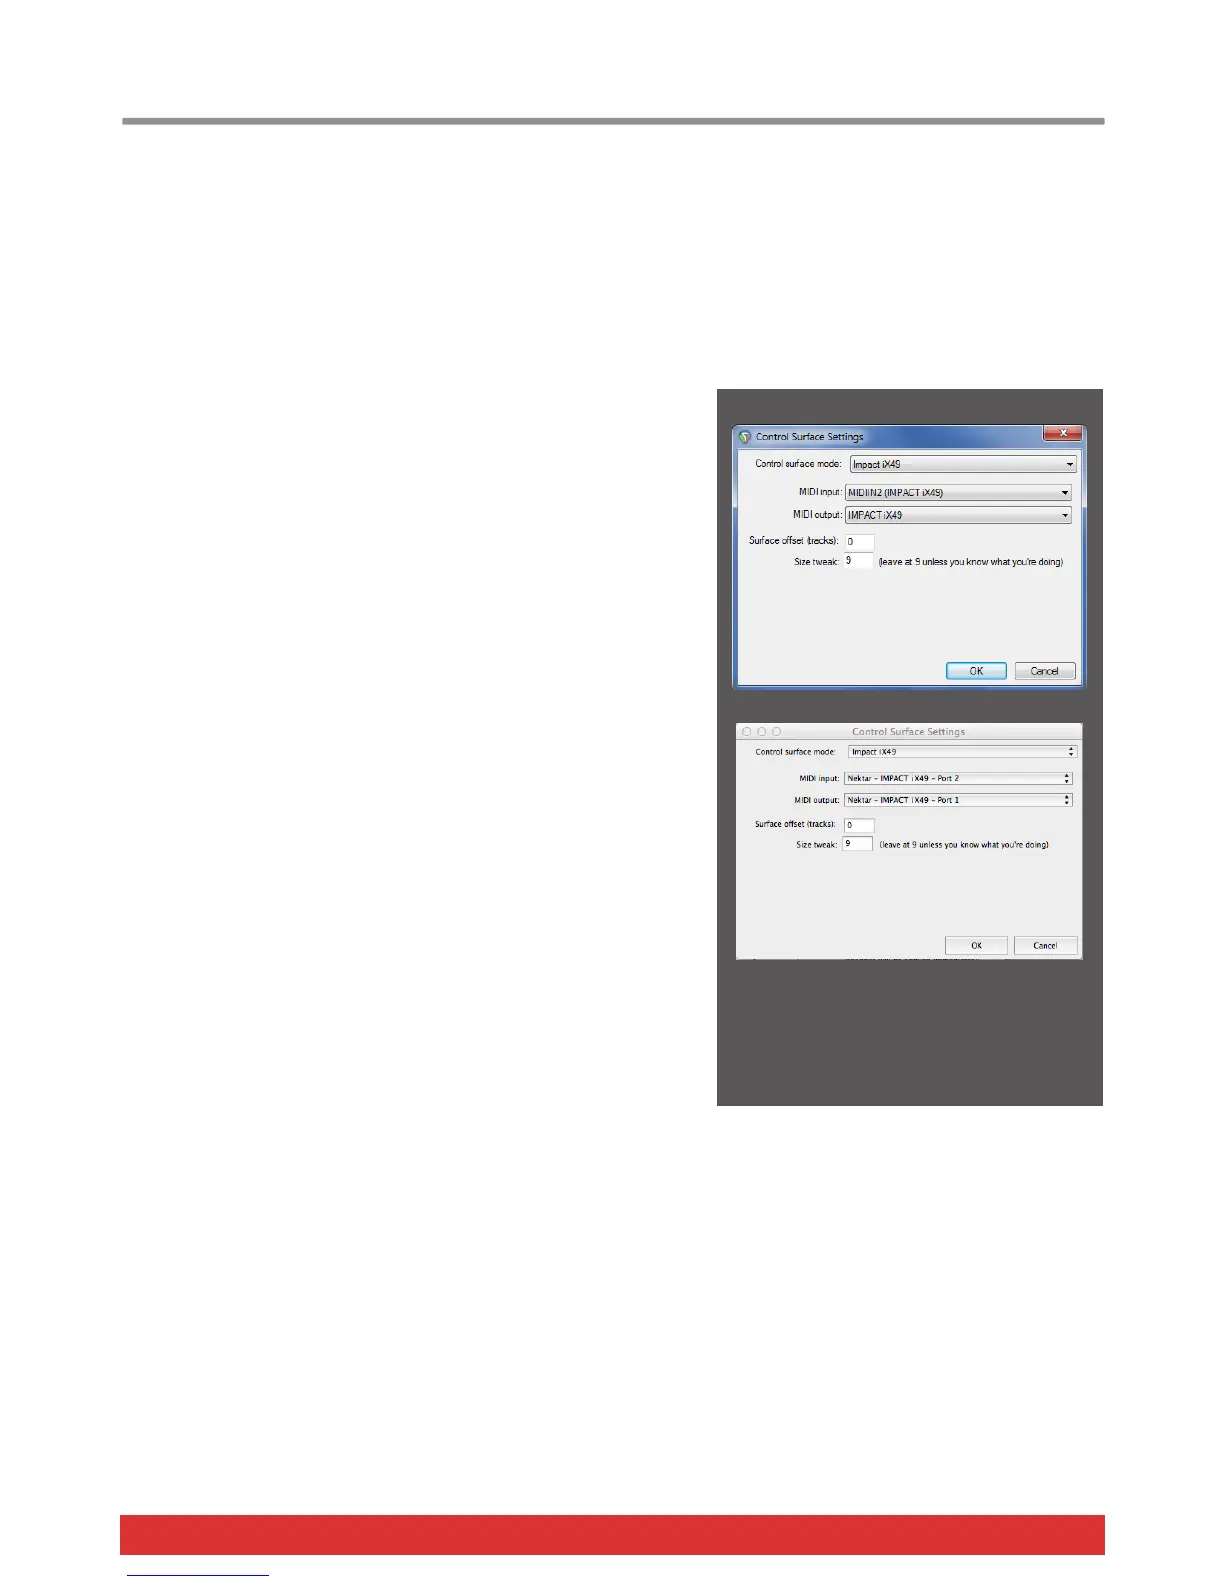
Launch Reaper and go to Options/Preferences/Control Surfaces
Click “Add”, then in the pop-up window, select your Impact iX model
in the “Control surface mode” list. As long as your Impact iX is
connected and switched on, Reaper should automatically detect the
correct ports. (See Image 1 for Windows setup and Image 2 for OS
X). Click “Ok”
Go to Preferences/Audio/MIDI Devices next and enable Port 1 for
your Impact iX. The mode should be “Enable+Control”. The other 2
Impact iX ports should remain disabled.
Click “Apply” and OK
That’s it, setup is now complete and you can move on to the fun part,
learning how it all works.
Image 1 - Windows
Image 2 - OS X