EasyManua.ls Logo

NetApp AFF C800 - User Manual

NetApp AFF C800
4 pages
Print Icon
To Next Page IconTo Next Page
Loading...
Jan_2024_Rev3_AFFC800_ISI
1. Unpack all boxes and inventory contents.
Attention: Customers with specific power requirements must check Hardware Universe for their configuration options.
2. Gather information about your storage system by completing the cluster setup worksheets:
Get started with ONTAP cluster set up.
3. Review the requirements and procedure steps for Configure ONTAP on a new cluster with System Manager.
Note: For MetroCluster configurations, use the MetroCluster installation content.
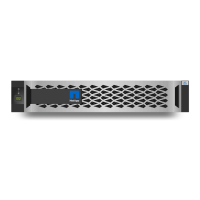
AFF C800 Systems
Installation and Setup Instructions
Prepare and install | Stage 1
Contents
in the box
Cables shown are
the most common.
See Hardware Universe
for more options.
You provide
Pre-setup
Prepare and install Cable controllers
Storage system bring-up
1 2 3
32 Gb FC (SFP+ Op)
FC optical network cable
Part numbers X66250-2, 2m;
X66250-5, 5m; X66250-15, 15m;
X66250-30, 30m
Laptop or console
With a USB/serial connection
and access to a Web browser to
configure your storage system
Additional network cables
For connecting your storage system
to your network switch and laptop
or console
Rack space
4U for platform +2U
for each NS224 shelf
Screwdriver
Phillips #2
Install storage
system in a rack
or cabinet
Slide rail kit
24 SSDs
119.2 lbs (54.2 kg)
48 SSDs
132.4 lbs (60.2 kg)
Power cables
Ethernet cables
Additional cables
100 Gb Ethernet, QSFP28
Cluster interconnect,
HA interconnect, storage
Part numbers X66211A-05, 0.5m;
X66211-1, 1m; X6566B-5-R6, 5m
10 Gb Ethernet, SFP
Network cable
Part numbers X6566B-3-R6, 3m;
X6566B-5-R6, 5m
Attention: Airflow through the platform and shelves enters from the front where the bezel
or end caps are installed and exhausts out the rear where the ports are located.
1. Install the rail kits for the platform and shelves, as needed,
using the instructions included with the kits.
2. Install the platform chassis into the rack or cabinet.
3. Attach the cable management devices to the rear of the platform.
4. Install the bezel on the front of the platform.
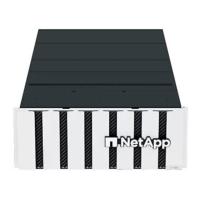
5. Install any drive shelves into the rack or cabinet.
Cable
management
devices
Handles
Question and Answer IconNeed help?

Do you have a question about the NetApp AFF C800 and is the answer not in the manual?

Overview

This document outlines the installation and setup procedures for the NetApp AFF C800 storage systems, covering everything from initial unpacking to final configuration.

Function Description:

The NetApp AFF C800 is a high-performance storage system designed for enterprise environments, offering robust data storage and management capabilities. It supports various network configurations, including switchless and switched clusters, and provides options for both Ethernet and Fibre Channel host networks. The system is designed for rack or cabinet installation and integrates with NetApp's ONTAP software for comprehensive data management.

Important Technical Specifications:

Physical Dimensions and Weight:

  • The platform requires 4U of rack space, with an additional 2U for each NS224 shelf.
  • A 24-SSD configuration has a lifting hazard weight of 119.2 lbs (54.2 kg).
  • A 48-SSD configuration has a lifting hazard weight of 132.4 lbs (60.2 kg).

Connectivity:

  • 100 Gb Ethernet, QSFP28: Used for cluster interconnect, HA interconnect, and storage. Part numbers include X66211A-05 (0.5m), X66211-1 (1m), and X6566B-5-R6 (5m).
  • 10 Gb Ethernet, SFP: Network cable with part numbers X6566B-3-R6 (3m) and X6566B-5-R6 (5m).
  • 32 Gb FC (SFP+ Op): FC optical network cable with part numbers X66250-2 (2m), X66250-5 (5m), X66250-15 (15m), and X66250-30 (30m).
  • Host Network Options:
    • 25 GbE Host Network: Uses 10 GbE SFP copper cables, connecting ports e4a through e4d to the host network.
    • FC Host Network: Uses SFP optical cables, connecting ports e2a through e2d to fibre channel switches.
  • Management Ports: e0M and BMC ports are cabled to management switches.

Power:

  • The system requires power connections to each controller's power supplies (PSU 1 and PSU 2) and to the drive shelves.
  • Power sources should be on different circuits for redundancy.
  • NS224 shelves power on automatically when plugged in.

Usage Features:

Installation Process (Stage 1: Prepare and Install):

  1. Unpacking and Inventory: Unpack all boxes and verify contents against the inventory. Customers with specific power needs should consult Hardware Universe.
  2. Information Gathering: Complete cluster setup worksheets using "Get started with ONTAP cluster setup."
  3. Configuration Review: Review "Configure ONTAP on a new cluster with System Manager" or "MetroCluster installation content" for MetroCluster configurations.
  4. Rack Installation:
    • Install rail kits for the platform and shelves.
    • Install the platform chassis into the rack or cabinet.
    • Attach cable management devices to the rear of the platform.
    • Install the bezel on the front of the platform.
    • Install any drive shelves.
    • Airflow: Airflow enters from the front (where bezel/end caps are installed) and exhausts from the rear (where ports are located).

Cabling (Stage 2: Cable Controllers):

  1. Controller Cabling (Switchless or Switched Cluster):
    • HA Interconnect: Connect port e1b to e1b and port e0b to e0b using 100 GbE QSFP28 copper cables.
    • Switchless Cluster: Connect port e1a to e1a and port e0a to e0a using 100 GbE QSFP28 cables.
    • Switched Cluster: Connect port e1a of each node and port e0a of each node to the cluster interconnect switches using 100 GbE QSFP28 cables.
    • Management: Cable the e0M port and BMC ports to the management switches using Ethernet cables.
    • Important: Ensure proper cable connector pull-tab orientation. Do not plug power cords into the power source at this point.
  2. Host Network Options:
    • 25 GbE Host Network: Cable ports e4a through e4d to the host network using 10 GbE SFP copper cables.
    • FC Host Network: Cable ports e2a through e2d to fibre channel switches using SFP optical cables.
  3. Storage Cabling:
    • One NS224 Shelf: Connect controllers to the NS224 shelf using 100 GbE for storage cables, following the provided diagrams for NSM A and NSM B connections.
    • Two NS224 Shelves: Connect controllers to both NS224 shelves using 100 GbE for storage cables, following the provided diagrams for NSM A and NSM B connections across both shelves.

System Bring-up (Stage 3: Storage System Bring-up):

  1. Power On Shelves and Set Shelf IDs:
    • Plug power cords into shelf power supplies and connect to power sources on different circuits.
    • NS224 shelves have pre-set IDs (00 and 01). To change IDs, use a paperclip or narrow-tipped pen to access the ID button behind the faceplate.
  2. Connect Power Cables:
    • Connect power cables to each controller's power supplies (PSU 1 and PSU 2) and to power sources on different circuits.
    • Secure power cables using the securing device. The storage system powers on when plugged in.
  3. Initial Cluster Setup with Network Discovery:
    • Connect a laptop to the management switch.
    • Access network computers and devices via File Explorer (Network section).
    • Double-click either ONTAP icon to begin setup.
  4. Configure Cluster with System Manager: Follow the "Configure ONTAP on a new cluster with System Manager" procedure.
  5. Complete Setup:
    • Access mysupport.netapp.com to create/log in to an account and register the system.
    • Download and install Active IQ Config Advisor and run it to verify system health.
    • Refer to the NetApp ONTAP Resources page for additional ONTAP feature configuration.

Maintenance Features:

  • Cable Management Devices: These are attached to the rear of the platform to help organize cables.
  • Troubleshooting: The manual provides guidance on ensuring proper cable connections (e.g., feeling a "click" when inserting connectors) and advises on consulting Hardware Universe for specific power requirements.
  • Active IQ Config Advisor: This tool helps verify the health of the storage system post-installation.
  • ONTAP Resources: The NetApp ONTAP Resources page provides information for configuring additional features and ongoing management.
  • Shelf ID Adjustment: Shelf IDs for NS224 drives can be changed using a simple tool (paperclip) if needed.

NetApp AFF C800 Specifications

General IconGeneral
BrandNetApp
ModelAFF C800
CategoryStorage
LanguageEnglish

Related product manuals