3. Repeat Step 2 for the right half of the telco tray.
4. If you are installing your equipment in a mid-mount position, go to Step 5; otherwise, slide the equipment onto the telco tray,
and secure it to the two-post rack using the screws that came with your kit.
Note: If applicable, you might need to remove the end caps to secure the equipment to the rack post; if so, you need to
replace the end caps when you are done.
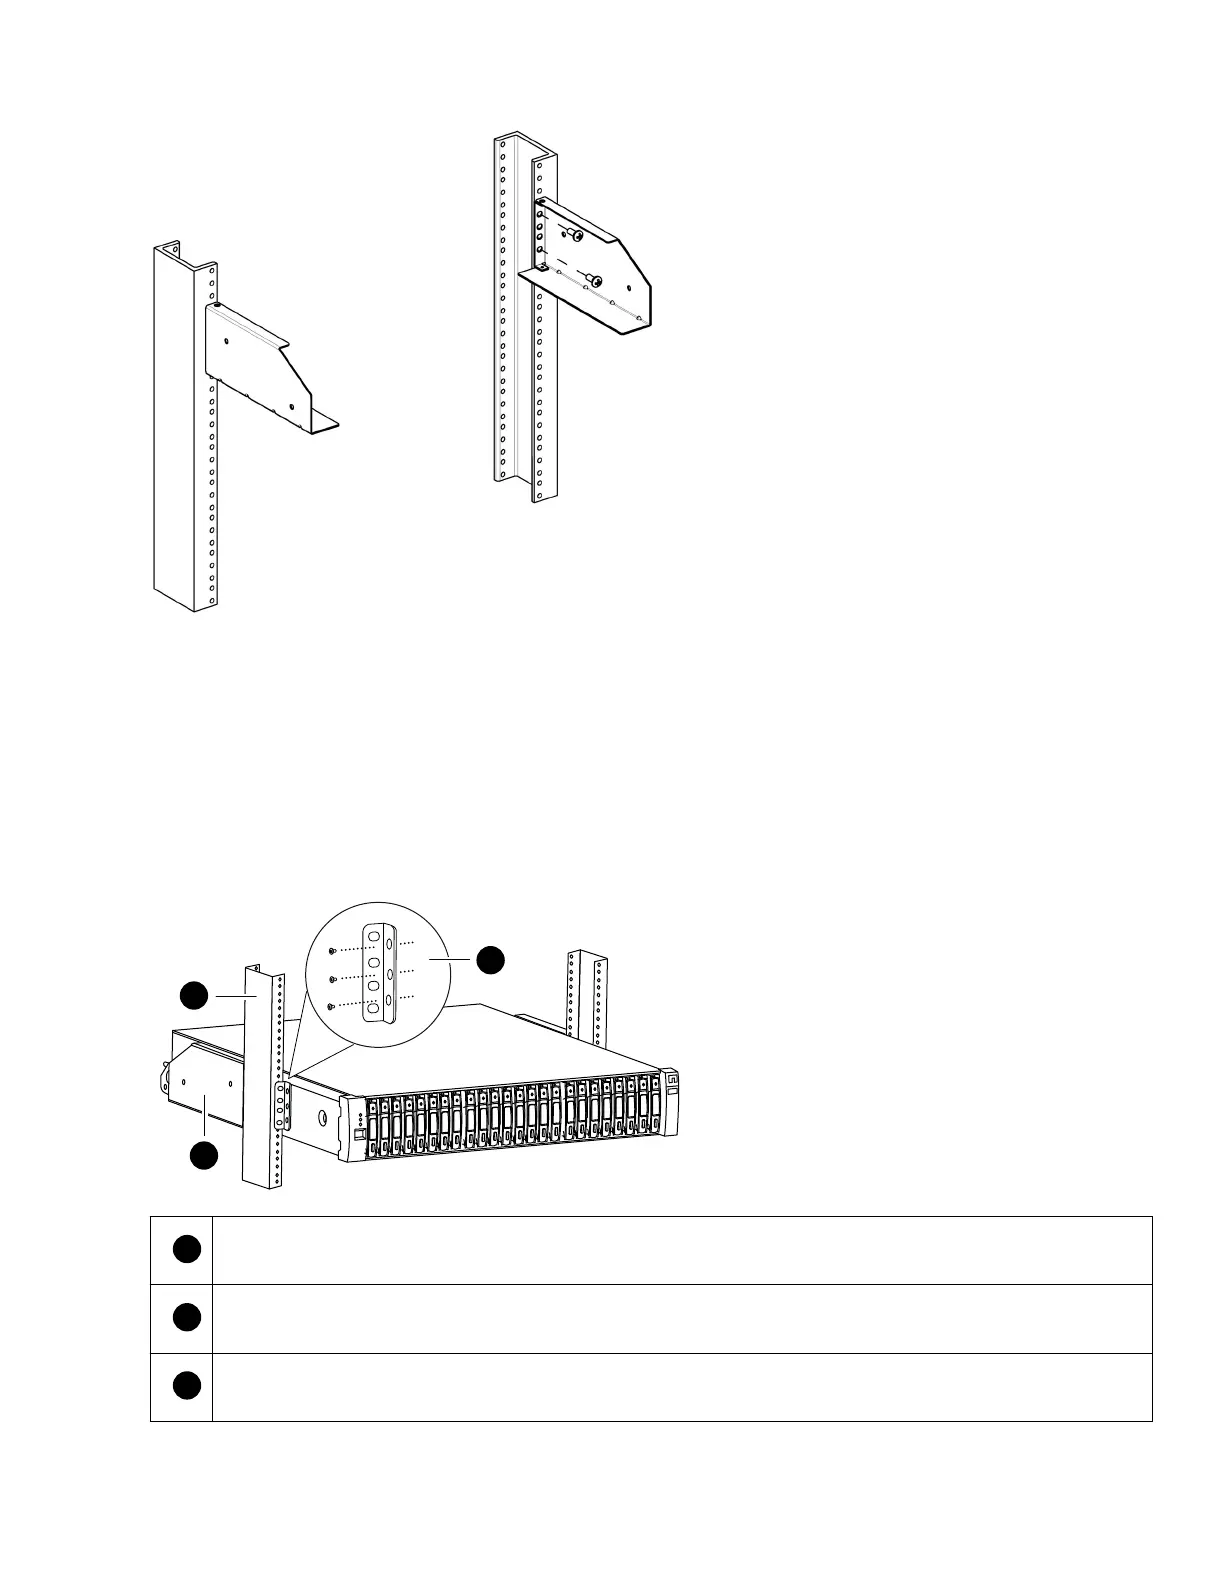
5. For mid-mount installations, align the screw holes on the equipment chassis with the screw holes on the mounting bracket,
and then secure the bracket to the chassis with three of the six M5 screws and star washers.
Telco tray
Rack post
Mid-mount bracket
6. Repeat Step 5 for the other mid-mount bracket.
2
Installing 2U equipment into a two-post rack