Step 4: Install new battery
After you have removed the failed battery from the controller canister, follow this step to install the new battery.
Steps
1. Unpack the new battery, and set it on a flat, static-free surface.
To comply with IATA safely regulations, replacement batteries are shipped with a state of
charge (SoC) of 30 percent or less. When you reapply power, keep in mind that write
caching does not resume until the replacement battery is fully charged and it has completed
its initial learn cycle.
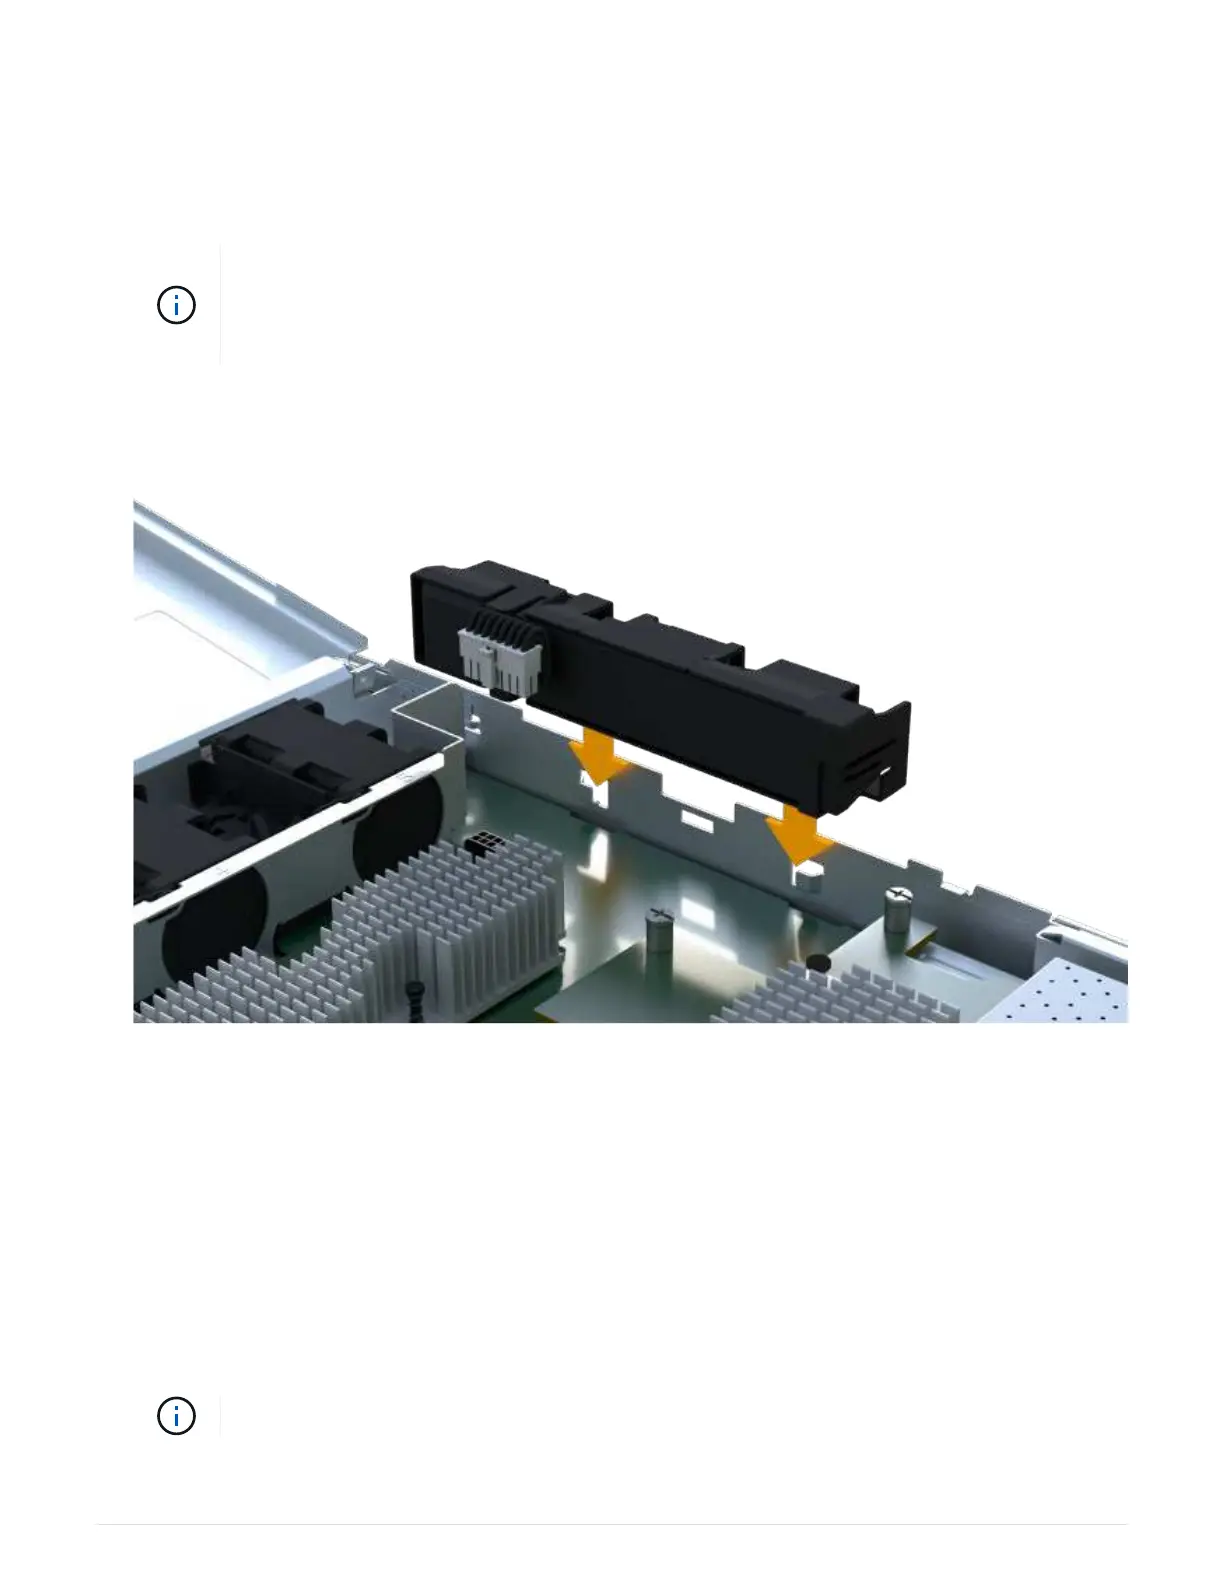
2. Insert the battery into the controller by lining up the battery casing with the metal latches on the side of the
controller.
The battery clicks into place.
3. Plug the battery connector back into the board.
Step 5: Reinstall controller canister
Reinstall the controller into the controller shelf.
Steps
1. Lower the cover on the controller canister and secure the thumbscrew.
2. While squeezing the controller handles, gently slide the controller canister all the way into the controller
shelf.
The controller audibly clicks when correctly installed into the shelf.
8
 Loading...


