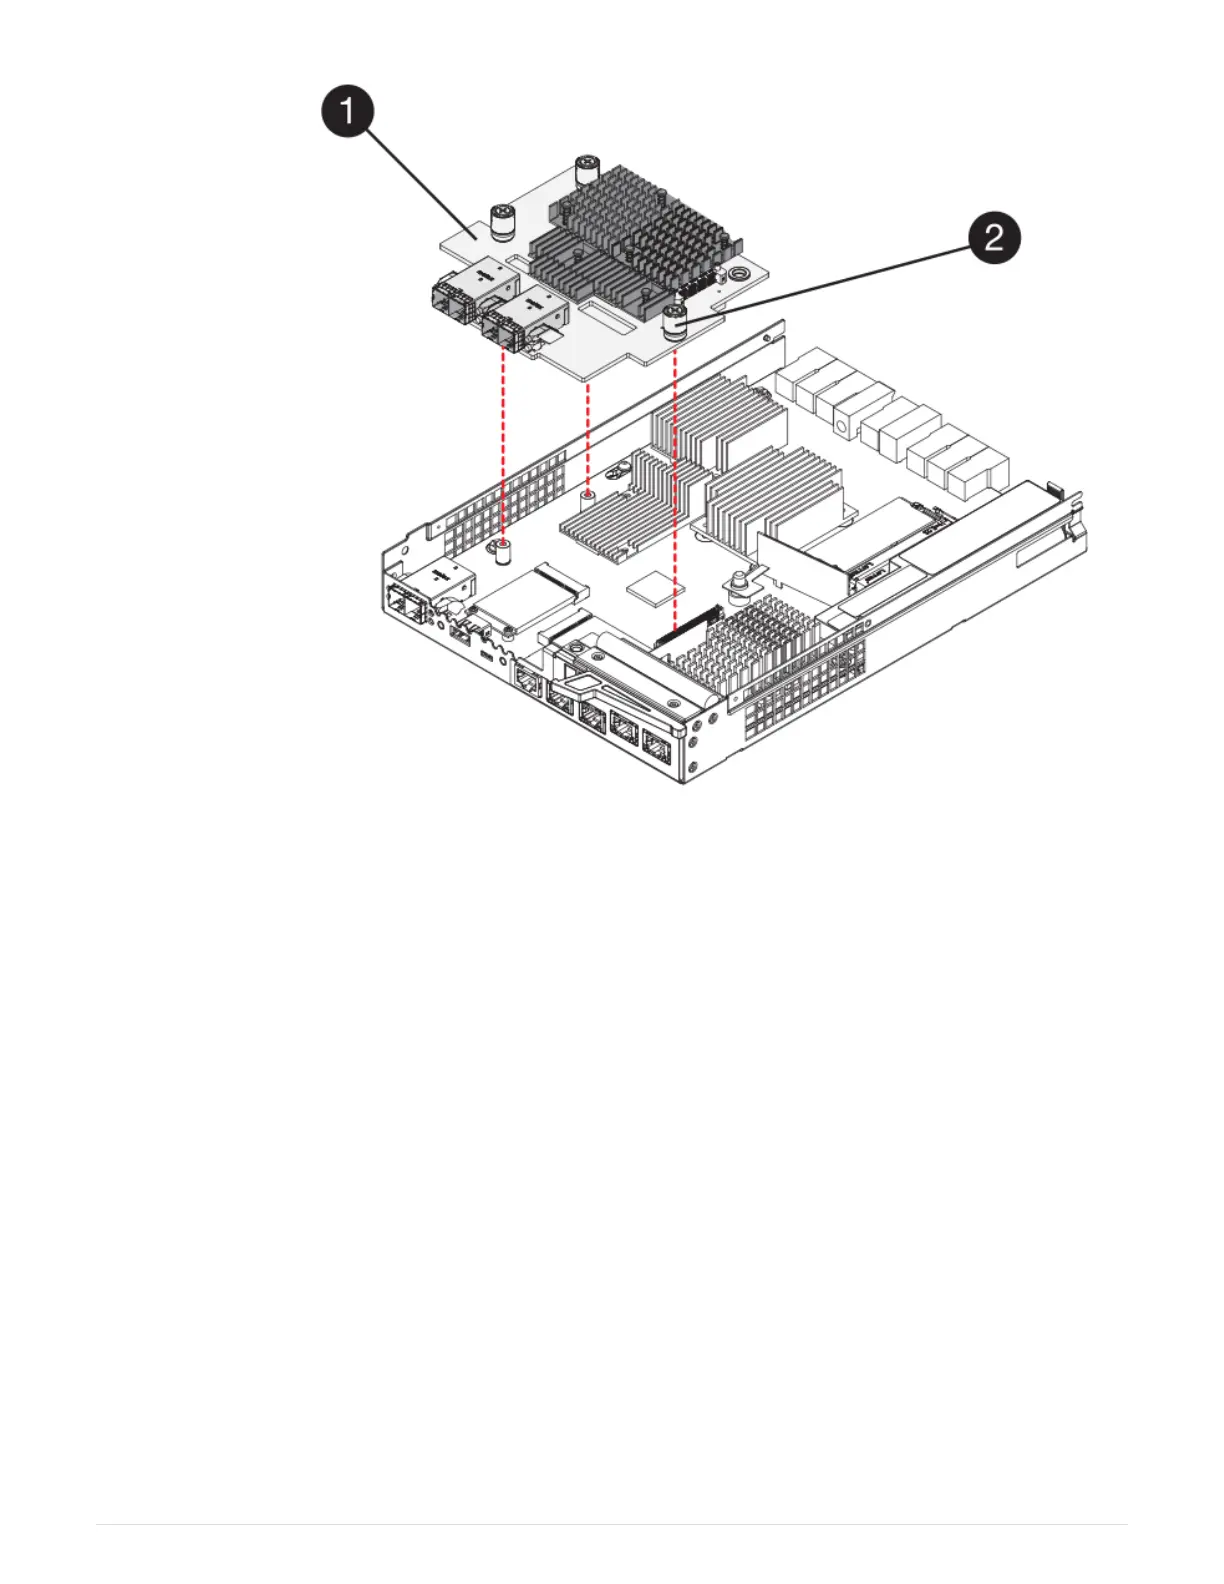
(1) Host interface card (HIC)
(2) Thumbscrews
5. Place the HIC on a static-free surface.
Step 3: Install new controller (duplex)
Install a new controller canister to replace the failed one. Perform this task only if your storage array has two
controllers (duplex configuration).
Step 3a: Install battery (duplex)
You must install the battery into the replacement controller canister. You can install the battery that you
removed from the original controller canister or install a new battery that you ordered.
Steps
1. Turn the replacement controller canister over, so that the removable cover faces up.
2. Press down on the cover button, and slide the cover off.
3. Orient the controller canister so that the slot for the battery faces toward you.
4. Insert the battery into the controller canister at a slight downward angle.
You must insert the metal flange at the front of the battery into the slot on the bottom of the controller
canister and slide the top of the battery beneath the small alignment pin on the left side of the canister.
136
 Loading...


