3
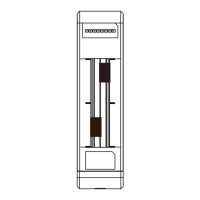
3) WF2520 (Power source:PoE switch)
A) Connect one end of the Ethernet cable into the WAN/PoE port of the device and the other end to
the Ethernet port of PoE switch.
B) Connect one end of the Ethernet cable into an Ethernet port of the PoE switch and the other end
to the Ethernet port of PC.
netis Wireless High Power Ceiling/Wall mounted AP Router Quick Installation Guide
WF2520
PoE switch
3. Configure the AP Router via Web Management Page
This device works in AP mode by default, so if you are intend to change the working mode or
any settings, please connect your computer to WAN/PoE or LAN Port of AP and set a static
IP for you computer as below steps:
3.1 Set a Static IP for PC
Manually set the IP address of the wired network adapter on your computer as below.
IP Address/ IPv4 Address: 192.168.1.x (1<x<255)
Subnet Mask: 255.255.255.0
Default Gateway/ Router: 192.168.1.1
For Windows 8/ 7/Vista
1) Go to “Settings” (for Windows 8)/“Start” (for Windows 7/Vista) > “Control Panel”.
2) Left-click on “Network and Internet” > “Network and Sharing Center” > “Change
adapter settings” (for Windows 8/ 7)/”Manage network connections” (for Windows Vista).
3) Right-click on “Local Area Connection” and left-click on “Properties”.
4) Double-click on “Internet Protocol Version 4 (TCP/IPv4)”.
5) Select “Use the following IP address” then left-click on “OK”.
For Windows XP/2000
1) Go to “Start” > “Control Panel”.
2) Left-click on “Network and Internet Connections” > “Network Connections”.
3) Right-click on “Local Area Connection” and left-click on “Properties”.
4) Double-click on “Internet Protocol (TCP/IP)”.
5) Select “Use the following IP address” then left-click on “OK”.
For MAC OS
1) Click on the “Apple” menu > “System Preferences”.
2) Click on the “Network” icon.
3) Click on “Ethernet” in the left side box and click on “Advanced” in the lower right corner.
4) In the top options, select “TCP/IP”.
5) In the pull-down menu next to “Configure IPv4” select “Manually”.
6) Fill in the “IPv4 Address/Subnet Mask/Router” parameters, and click “OK” then “Apply”.