8.
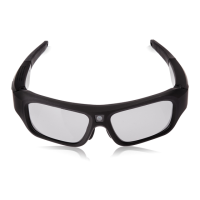
Connecting OpticHD Glasses to a Computer
To access the recorded video
on the OpticHD Glasses from a laptop or desktop
provided USB cable
. Locate the mini USB port on the glasses using the diagram on page 4 of this
document, and plug in the small end of the USB cable. Plug the other end of the USB cable in
laptop or PC. Once plugged in, the OpticHD Glasses will begin to charge and the microSD card should
mount and appear on the laptop or PC as an accessible hard drive.
either t
ransfer the files to computer, or
installed in the OpticHD Glasses.
9. Battery Operation
The OpticHD Glasses have a
either plugged into a laptop/PC
using the Charging/Capacity Indicator LED, as shown on the diagram on page 4. The following table
defines the LED colors used to indicate remaining battery life:
LED Color
GREEN
Battery life is at 75% or above
BLUE
Battery life is between 45% and 75%
RED
Battery life is 10% or below
Note: When the remaining battery life is
9.1. Charging Time
The charging time for the
approximately
10.
Formatting the microSD Card
When powering on
blue recording LED will
flash very fast. To prepare the microSD card for use,
the Glasses will format the micro
turn off. Press the On/Off button to t
process fails, repeat the steps above or replace the microSD card. A C
required.
Connecting OpticHD Glasses to a Computer
on the OpticHD Glasses from a laptop or desktop
. Locate the mini USB port on the glasses using the diagram on page 4 of this
document, and plug in the small end of the USB cable. Plug the other end of the USB cable in
laptop or PC. Once plugged in, the OpticHD Glasses will begin to charge and the microSD card should
mount and appear on the laptop or PC as an accessible hard drive.
At this point, it is possible to
ransfer the files to computer, or
play the videos directly from the
-in lithium ion battery
, which can be charged using the USB cable
(not provided). The battery status is reflected
using the Charging/Capacity Indicator LED, as shown on the diagram on page 4. The following table
defines the LED colors used to indicate remaining battery life:
Battery Life / Remaining Capacity
Battery life is at 75% or above
Battery life is between 45% and 75%
Battery life is 10% or below
Note: When the remaining battery life is
<
10%, the camera will automatically turn off.
The charging time for the
OpticHD Glasses when using a 5V/1A charger will
Formatting the microSD Card
the first time
with a newly formatted microSD card, the
flash very fast. To prepare the microSD card for use,
. Once the formatting is complete,
turn off. Press the On/Off button to t
urn on Glasses on and to start record
process fails, repeat the steps above or replace the microSD card. A C
lass 6 or above
use the
. Locate the mini USB port on the glasses using the diagram on page 4 of this
document, and plug in the small end of the USB cable. Plug the other end of the USB cable in
to the
laptop or PC. Once plugged in, the OpticHD Glasses will begin to charge and the microSD card should
At this point, it is possible to
which is
, which can be charged using the USB cable
(not provided). The battery status is reflected
using the Charging/Capacity Indicator LED, as shown on the diagram on page 4. The following table
10%, the camera will automatically turn off.
OpticHD Glasses when using a 5V/1A charger will
be
with a newly formatted microSD card, the
and
SD card is