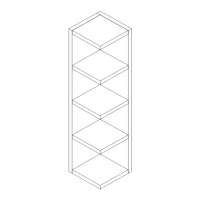
1. Please remove the protective film from the
surface of panel 1
2. Carefully turn over the assembled unit as shown.
3. Attach panel 1 to panels 3 (x5) & panel 2 with
15 x screws (G) using an Allen key (H) to tighten.
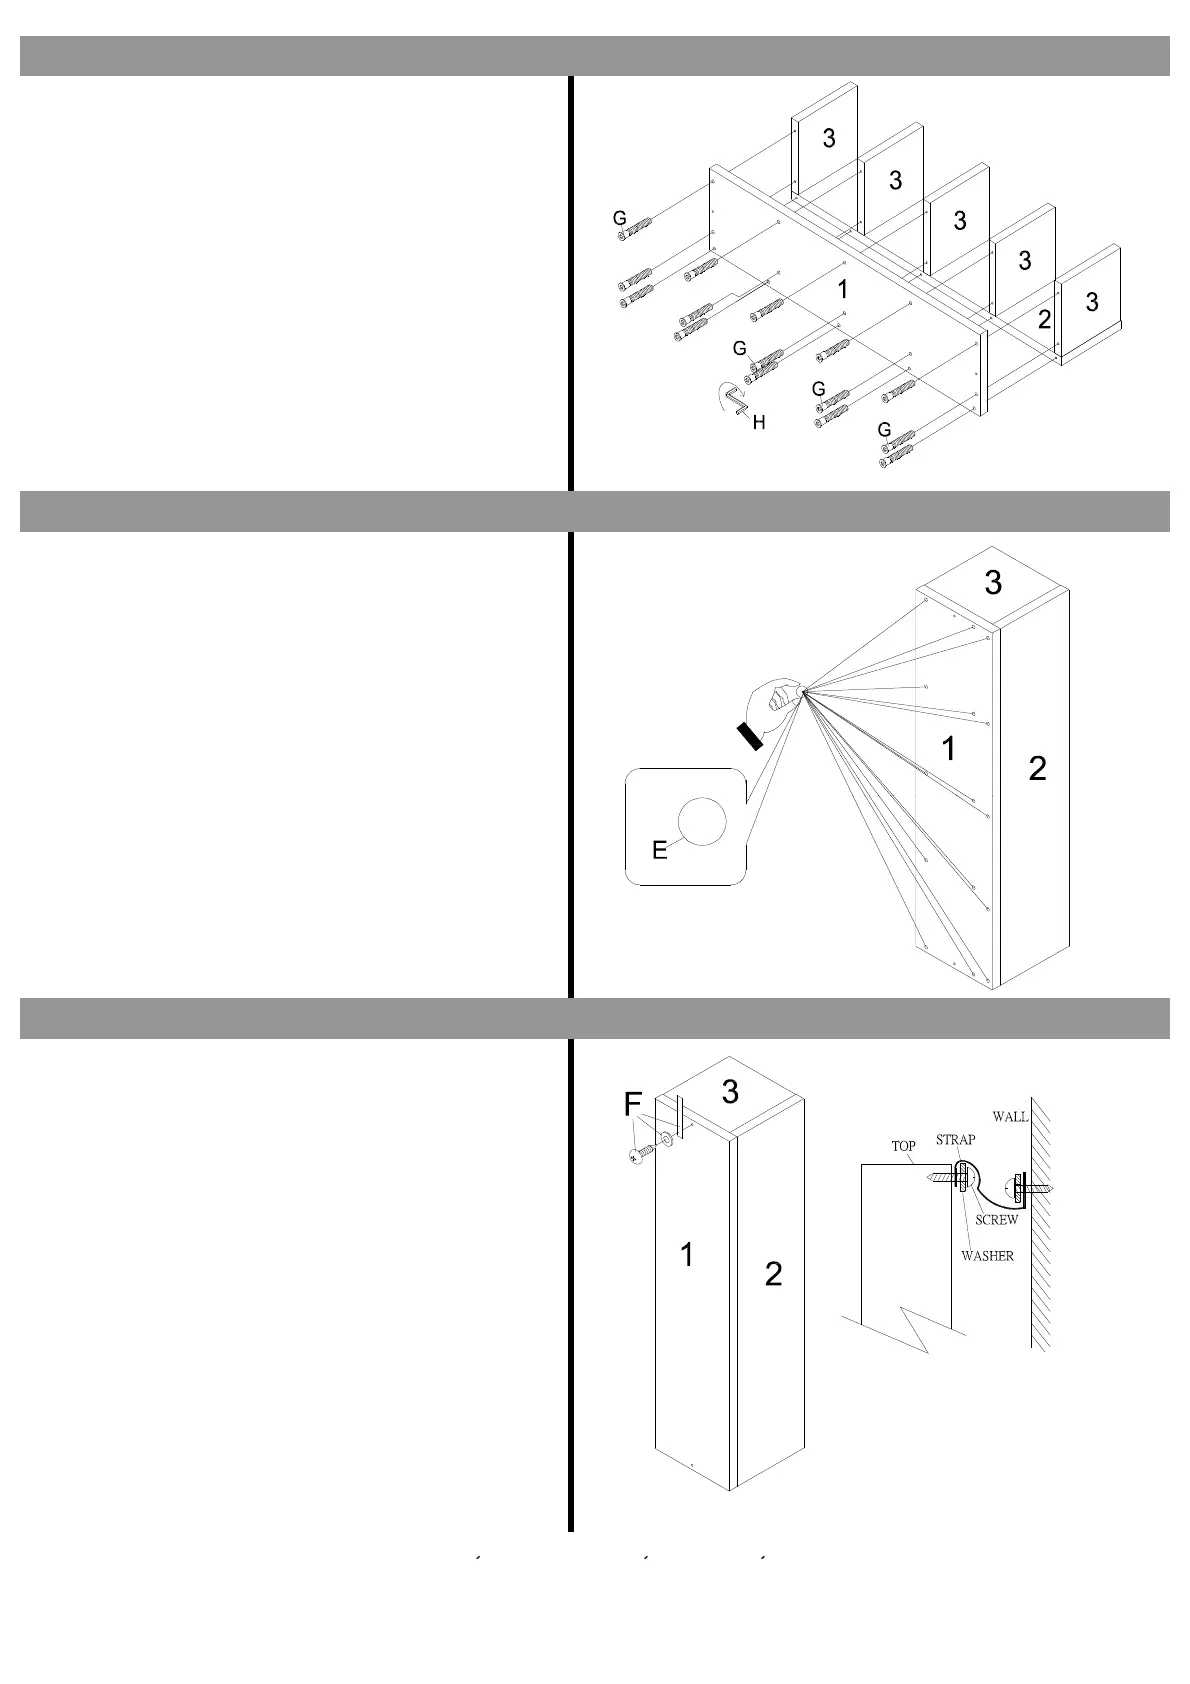
1.Use 15 x stickers (E) to cover the screw holes on
panel 1.
STEP THREE
STEP FOUR
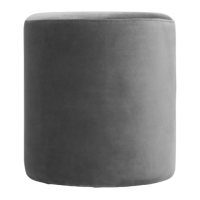
1.Using screw and washer secure the
nylon straps (F) to the back panel.
2.Secure the other end of the strap to the wall
with an appropriate screw and wall plug
for your wall type (not provided).
To hide the strap behind the unit ,drill the hole
lower than the top of unit.
Warning:
Always ensure intended wall area to be
drilled is free from hidden electrical wires,
water and gas pipes.
NB:Wall fixings are not included-Please source
suitable fixing for your wall type. If in doubt
please consult a qualified trades person.
Next Retail Ltd, Desford Road, Leicester, LE19 4AT
STEP FIVE
Next Retail Ltd, Desford Road, Leicester, LE19 4AT
Page 3 of 4