Power Supply Connections
Wire gauge: 12-18 AWG for either solid or stranded wire
Torque: 3.5 Lb-In
Branch circuit protection size should be 15 A.
The Nexus® 1500+ meter requires a separate power source. There are three control
power options: 115AC, D2 high-voltage, and D low-voltage.
CAUTION! The power supply voltage and connections vary depending on the power
supply Option being used. CAREFULLY follow the instructions and drawings for proper
wiring.
For all three power supply options, add a properly voltage-rated, 4 A, time-delayed (slow blow)
fuse in the power supply feed, for example, UL approved Littelfuse® part number FLQ4.
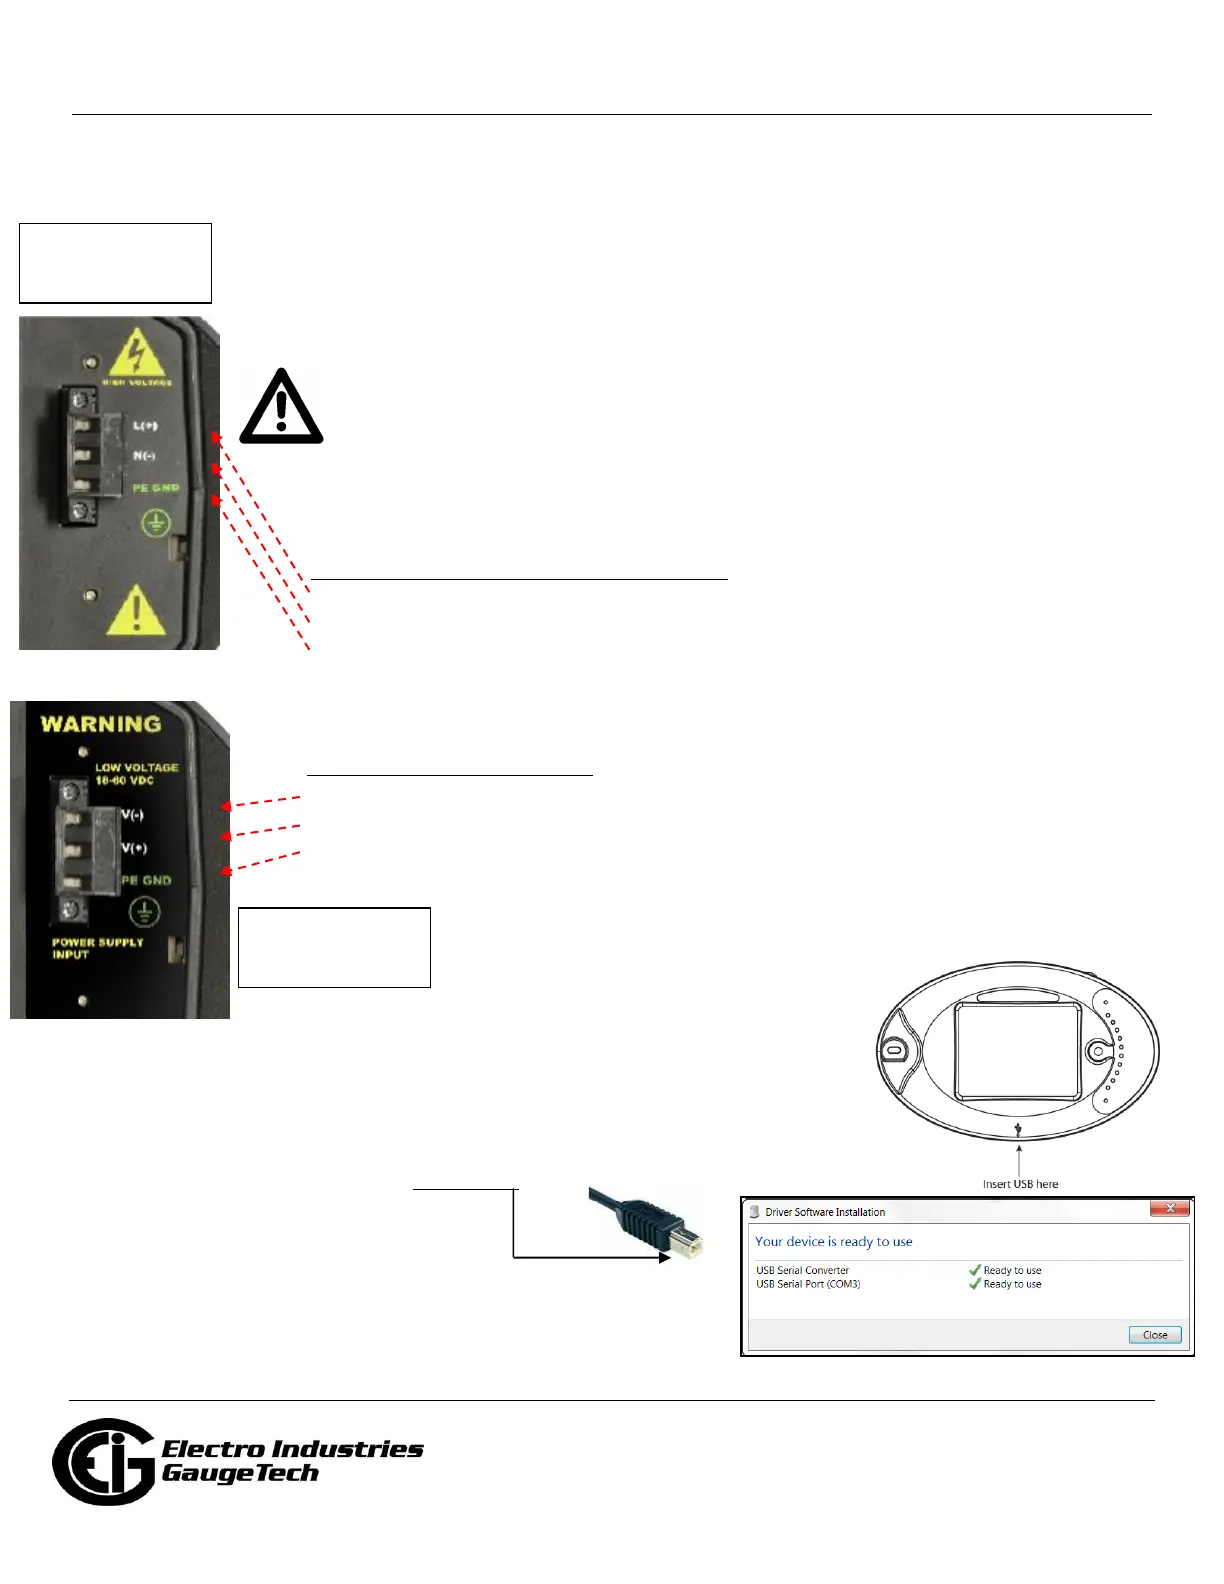
For the 115AC and D2 Option power supplies:
1. Connect the line supply wire to the L+ terminal.
2. Connect the neutral supply wire to the N(-) terminal.
3. Connect earth ground to the PE GND terminal.
For the D Option power supply:
1. Connect the negative voltage to the V(-) terminal.
2. Connect the positive voltage to the V(+) terminal.
3. Connect earth ground to the PE GND terminal.
Programming the Nexus® 1500+ Meter Using the USB Virtual Com Port
Connecting your PC to the Meter
1. Attach a USB cable from your PC's USB port to the meter's front panel USB
port. The meter’s USB port uses a USB Type B plug.
2. Windows® 7 and above operating systems install the USB driver
and display the screen shown on the right. Make note of the Com
port being used.