Page 5For technical questions, please call 1-888-866-5797.Item 56645
Assembly Instructions
Read the ENTIRE IMPORTANT SAFETY INFORMATION section at the beginning of this document
including all text under subheadings therein before set up or use of this product.
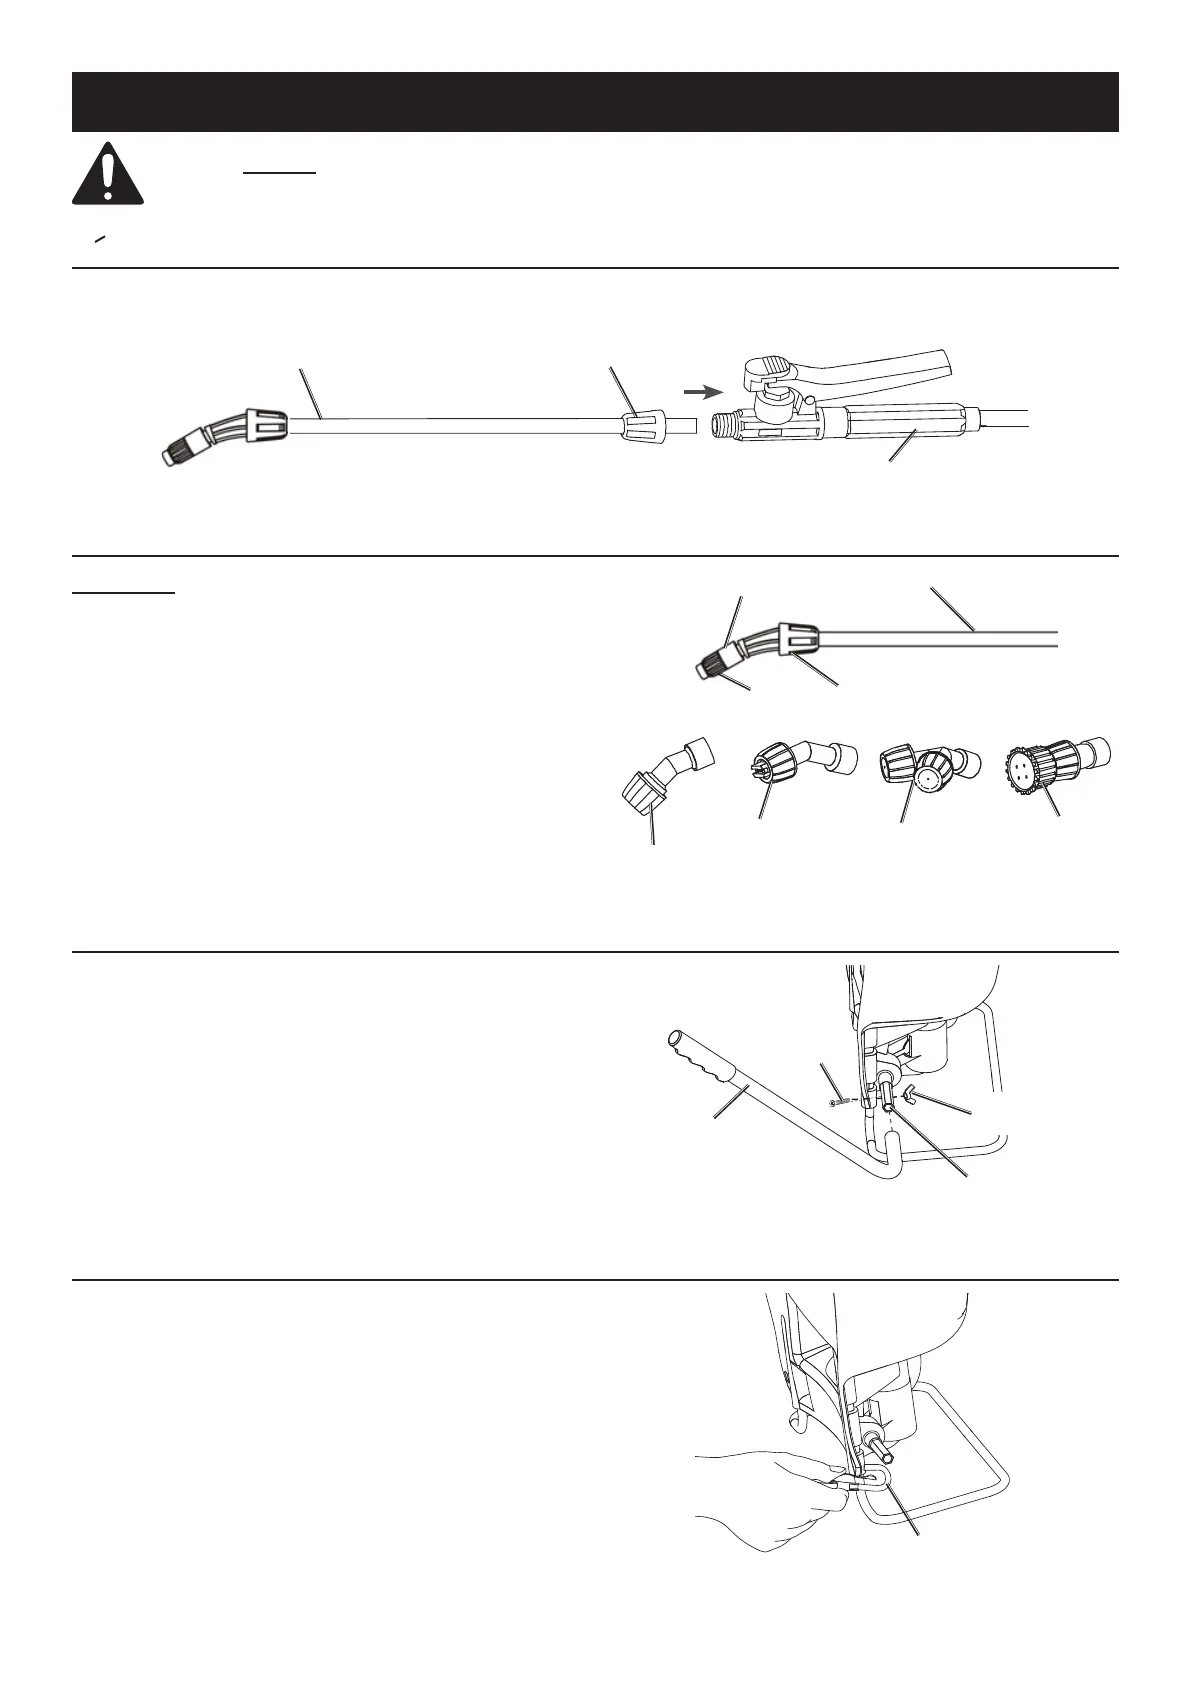
Attaching the Wand
1. Insert end of Wand into the end
of the Trigger Assembly.
2. Slide Nut over threaded end of Trigger Assembly,
then turn clockwise and tighten Nut securely.
Trigger Assembly
Nut
Wand
Changing the Nozzle
WARNING! TO PREVENT SERIOUS INJURY: Relieve
pressure and empty tank before changing Nozzles.
1. Loosen Nut by turning counterclockwise.
Remove Nozzle.
2. Replace Nozzle. Tighten Nut securely.
3. When using the Adjustable Nozzle, adjust the
output flow by turning the nozzle’s Cap.
Wand
Cone
Nozzle
Nut
Double
Cone Nozzle
Fan Nozzle
Sprinkler
Nozzle
Adjustable Nozzle
Cap
Pump Handle Orientation
The Pump Handle can be installed on either side of
the Tank. To change the side that the Handle is on:
1. Remove the Butterfly Nut and M5 Screw. Save
these parts and remove the Pump Handle.
2. Move the Pump Handle to the other side
of the Tank and attach it to the other end of
the Turning Rod using the saved parts.
Pump
Handle
Turning
Rod
Butterfly
Nut
M5 Screw
Tank
Attaching the Shoulder Straps
Attach each Shoulder Strap to bottom
of Tank, one on each side.
Shoulder Strap Hook