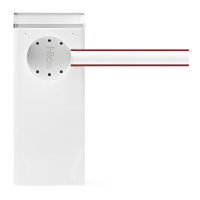
Advanced parameters
This item covers the commands available and associable with inputs 1 - 2 – 3 and the Loop Detector on the control unit of an automation. The commands
available for the inputs are given in Table 1; the command categories and modes are given in Table 1a, 1b, 1c etc.. Important – For correct operation
of the control unit, the command programmed on an input must be associated with the corresponding command category and lastly the
required operating mode.
For congure an input, proceed as follows:
01. In the section “Advanced parameters” select the item “input conguration” and then the input to be programmed. Select the command and conrm with
“OK”.
02. Then, still in “Advanced parameters”, select “command conguration” and select the category of the command selected in step 01. Finally, select the
operating mode. There are three available inputs:
• Input 1 (the common of this input is 24V)
This programs Input 1, by assigning a command from among those listed in Table 1. Input 1 is factory set to “step-by-step”, “step-by-step” category and
“open-stop-close-open” mode.
• Input 2 (the common of this input is 12V)
This programs Input 2, by assigning a command from among those listed in Table 1. Input 2 is factory set to “open”, “opening” category and “open-stop-
open” mode.
• Input 3 (the common of this input is 12V)
This programs Input 1, by assigning a command from among those listed in Table 1. Input 3 is factory set to “close”, “closing” category and “close-stop-
close” mode.
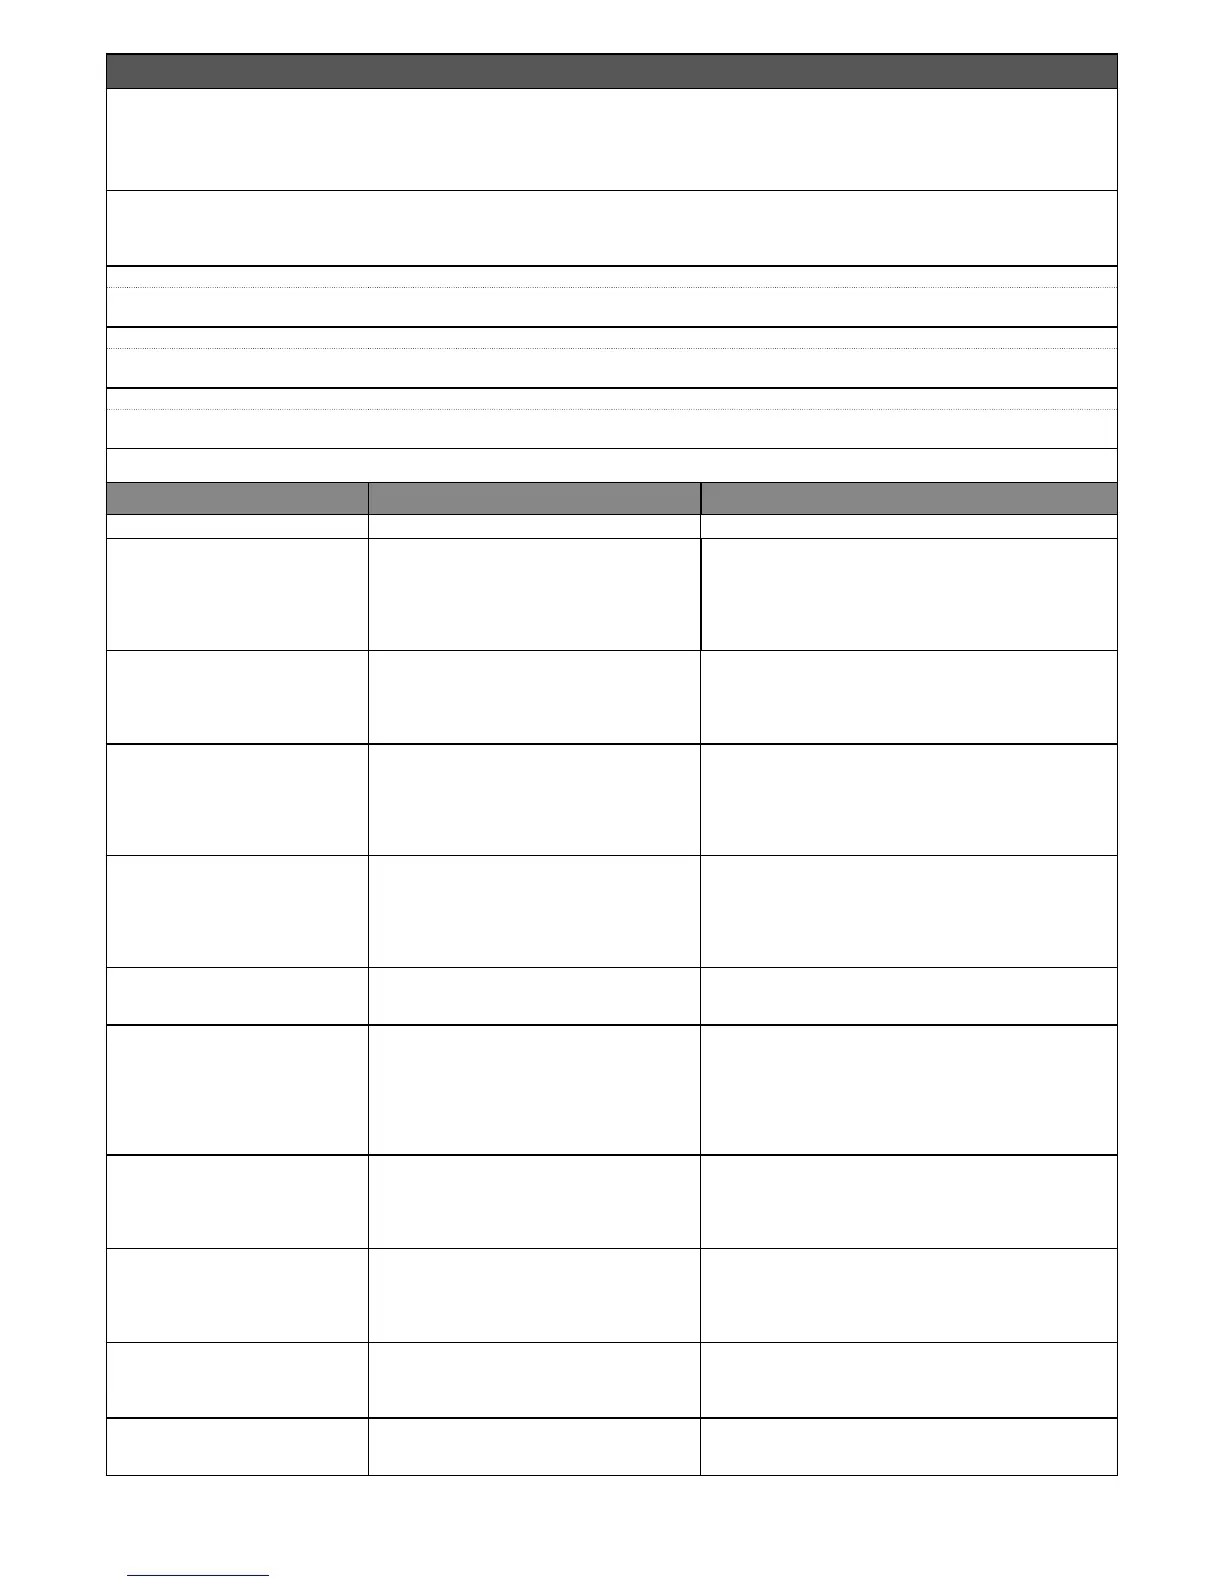
TABLE 1: INPUT CONFIGURATION
COMMAND COMMAND CATEGORY DESCRIPTION
No command Does not perform any command.
Step-by-step Step-by-step Program the desired mode from
those given in Table 1-A (“Command congura-
tion” > “step-by-step” > operating mode ...)
The command is factory assigned to Input 1, mode “step-by-
step” and sequence “open - stop - close - open”.
When the command is sent, the control unit makes the auto-
mation run the manoeuvre following that previously (or still) in
execution, according to the order of manoeuvres given in the
programmed sequence. Input congured as normally open.
Partial open 1 Partial open Program the desired mode from
those listed in Table 1-B (“Command congura-
tion” > “partial open” > mode ...)
When this command is sent the control unit activates the appli-
cation to complete the Opening manoeuvre until the position is
reached as set in the function “partial open 1”(Control unit func-
tions > installation > positions > partial open 1). Input congured
as normally open.
Open Opening Program the desired mode form those
listed in Table 1-C (“Command conguration” >
“opening” > mode ...)
This command is factory assigned to Input 2, in mode “open”.
When this command is sent the control unit activates the ap-
plication to complete the Opening manoeuvre until the position
is reached as set in the function “opening” (Control unit func-
tions > installation > positions > opening). Input congured as
normally open.
Close Closure Program the desired mode from those
listed in table 1-B (“command conguration” >
“closure” > mode ...)
This command is factory set to Input 3, with operating mode
“close”. When this command is sent the control unit activates
the application to complete the Closing manoeuvre until the po-
sition is reached as set in the function “closing” (Control unit
functions > installation > positions > closing). Input congured
as normally open.
Stop Stop Program the desired mode from those listed
in Table 1-E (“command conguration” > “stop” >
mode ...)
When this command is sent, the control unit stops the manoeu-
vre in progress gradually and in a short time (not instantly). Input
congured as normally open.
High priority step-by-step Step-by-step Program the desired mode from
those given in Table 1-A (“Command congura-
tion” > “step-by-step” > operating mode ...)
When this command is sent, the control unit activates the ap-
plication to complete the next manoeuvre following the previous
one (or still in progress) according to the sequence of manoeu-
vres as envisaged in the programmed sequence. Important –
This command is performed even if the control unit is set with
the command “block” (see Table 1). Input congured as nor-
mally open.
Open and block Opening Program the desired mode form those
listed in Table 1-C (“Command conguration” >
“opening” > mode ...)
When this command is sent the control unit activates the ap-
plication to complete the Opening manoeuvre until the position
is reached as set in the function “opening” (Control unit func-
tions > installation > positions > opening). Input congured as
normally open.
Close and block Closure Program the desired mode from those
listed in Table 1-D (“command conguration” >
“closure” > mode ...)
When this command is sent the control unit activates the ap-
plication to complete the Closing manoeuvre until the position
is reached as set in the function “closing”(Control unit functions
> installation > positions > closing) and the automation is then
blocked. Input congured as normally open.
Block When this command is sent, the control unit is blocked and
does not perform any type of command, with the exception of
“High priority step-step”, “Release”, “Release and close” and
“Release and open”. Input congured as normally open.
Release When this command is sent, the control unit is released restor-
ing normal operating status (all commands sent can be per-
formed). Input congured as normally open.
 Loading...