Do you have a question about the Nice NiceOne OXI Series and is the answer not in the manual?
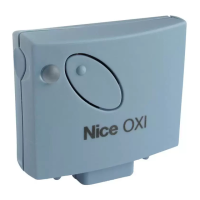
The NiceOne Receiver is a component of the "NiceOpera" system, designed to simplify the programming, use, and maintenance of automation systems for gates, garage doors, and road barriers. It is intended for use with control units equipped for these applications. Any use outside of these specified purposes is strictly prohibited, and the manufacturer disclaims all liability for damage resulting from improper use.
The NiceOne Receiver supports "O-Code" radio encoding with a variable code (rolling-code), enabling access to all new functions within the NiceOpera system. It is also compatible with "FloR," "TTS," "Smilo," and "Flo" encoding systems. However, when using these older encoding systems, some of the exclusive NiceOpera functions described in this manual may not be available.
The receiver has a memory capacity of 1024 spaces for storing transmitters. If a transmitter is memorized in "Mode I," all its associated keys will occupy a single memory allocation. If memorized in "Mode II," each individual key will occupy one memory allocation.
Each receiver possesses a unique identification number, referred to as a "Certificate." This certificate allows for various operations, such as memorizing new transmitters without direct intervention on the receiver, and utilizing the O-View unit via the "T4 Bus" connection. The certificate number is provided on a sealed coupon within the product packaging and should be kept in a safe place, as it grants access to data stored in the receiver, unless additional security measures like a password are in place.
Models with "SM" type connection: These models are exclusively designed for use with control units featuring an "SM" type connection. They automatically recognize the characteristics of the connected control unit and self-install. If the control unit supports the "T4 Bus," the receiver can provide up to 15 different commands. If the control unit does not manage the "T4 Bus," the receiver offers up to 4 different command channels. The number and variety of available commands depend on the specific control unit model, as detailed in its instruction manual.
Models with universal type connection: These models operate with two voltage-free contact relays, making them compatible with any type of control unit. They are connected via a 6-core cable. Before connecting, the power supply type (12 V ac/dc or 24 V ac/dc) must be selected by inserting or removing an electric jumper. The outputs are controlled by normally open (NO) relays, but can be converted to normally closed (NC) contacts by making specific modifications to the receiver's internal board.
Models with "T" in the model name (e.g., OXIT, OX2T): These models include a "Repeater" function, which extends the transmission range of transmitters. They also facilitate "wireless" communication with the O-Box programming unit.
The receiver can memorize transmitters from three encoding families: "O-Code," "FloR," and "TTS"; "Flo"; or "Smilo." The encoding family of the first memorized transmitter dictates the family for subsequent transmitters. To change the encoding family, a total receiver memory deletion (procedure 10) is required. The receiver's LED indicates the currently active encoding family or if no transmitters are memorized.
Mode I Memorization: This mode simultaneously memorizes all keys of a transmitter or a group of keys (for transmitters with multiple identity codes). After pressing and holding the receiver key until the green LED illuminates, any key on the transmitter is pressed and held until the receiver LED emits three green flashes, confirming memorization. A 10-second interval is available to memorize additional transmitters.
Mode II Memorization: This mode allows memorization of a single transmitter key. The user can choose which command (up to 4 for universal connection, or up to 15 for "SM" connector with "T4 Bus" in "Extended Mode II") to associate with the selected key. The receiver key is pressed a number of times corresponding to the desired command. Within 10 seconds, the selected transmitter key is pressed and held until the receiver LED emits three green flashes. This procedure can be repeated for other keys on the same or a new transmitter.
Memorization using "Enable Code": For "O-Code" transmitters, a new transmitter can be enabled by transferring the "enable code" from an already memorized "OLD" transmitter to its memory. The NEW transmitter then transmits its identity code and the "enable code" to the receiver, which automatically memorizes the NEW transmitter. This procedure requires referring to the transmitter manual.
Memorization in the vicinity of the receiver: A NEW transmitter can be memorized without direct interaction with the receiver's key, by operating within its reception range (10-20m). This requires an already memorized "OLD" transmitter.
Total Receiver Memory Deletion: All memorized transmitters or the entire receiver memory (including configurations and encoding families) can be deleted. This is done by pressing and holding the receiver key and releasing it on the 3rd flash (for all transmitters) or the 5th flash (for entire memory) of the green LED. This function can also be performed using the O-Box or O-View programming unit.
Deleting a Single Transmitter: A single memorized transmitter can be deleted by pressing and holding the receiver key until the green LED illuminates (approx. 4 seconds), then pressing and holding any key on the transmitter to be deleted until the receiver LED emits 5 green flashes.
Enabling/Disabling Receiver for Transmitter Memorization: This function prevents accidental memorization of new transmitters when using "in the vicinity" or "enable code" procedures. After disconnecting and reconnecting power, press the receiver key until 2 short orange flashes appear. Within 5 seconds, repeatedly press the receiver key to cycle through options: LED OFF (no lock), RED (memorization "in the vicinity" locked), GREEN (memorization with "enable code" locked), ORANGE (both modes locked). Press any key of an already memorized transmitter to save the selection. This can also be managed via O-Box or O-View.
Installation of an External Aerial: If the supplied aerial is in an unfavorable position or the radio signal is weak, an external aerial (mod. ABF or ABFKIT) can be installed to improve reception. The new aerial should be positioned as high as possible and clear of metal or reinforced concrete structures. A coaxial cable with 50 ohm impedance (e.g., RG58) should be used, kept as short as possible (max 10m) to reduce signal dispersion. For universal type connection models, the supplied aerial is disconnected, and the new aerial's cable is connected to terminals 1 (sheath) and 2 (core).
Protection of Programmed Function Settings: This function allows protection of all programmed receiver functions, disabling the key and LED functionality. A password (up to 10 digits) set by the installer must be entered on the programming unit to unlock the receiver for programming or maintenance.
Disposal of the Product: The product is an integral part of an automation system and must be disposed of accordingly. Disassembly and scrapping should be performed by qualified personnel at the end of its lifespan. The product contains various materials, some recyclable, others requiring specific disposal. Consult local regulations for recycling and disposal systems. Disposal in domestic waste is prohibited. The product may contain pollutant or hazardous substances that could harm the environment if improperly disposed of.
| Operating Temperature | -20°C to +50°C |
|---|---|
| Remote Control | Yes |
| Keypad | Optional |
| Battery Backup | Optional |
| Max Force | 1000 N |
| Power Supply | 230 V |
| Motor Power | 250 W |