8 – English
EN
Note - The PHW200 photocells are self-resetting, so do not require any deletion
procedure.
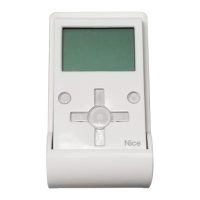
03. Press and hold the WM100 button (fig. 3) and release it once the led is lit with
a continuous green light: now, the interface unit is ready to acquire wireless
devices.
04. Insert the battery into every wireless device to be acquired: a short beep will
sound for each device to confirm the acquisition.
Right until the end of the procedure, the wireless devices will indicate the cur-
rent programming status: on the PHW200 photocells the side leds D and E
will continue to flash alternately; on the FLW200 flashing light, led A will flash
green and led B will flash red (fig. 4).
05. To acquire additional wireless devices, repeat the procedure from point 04 for
each device.
06. Lastly, press and release the WM100 interface button (fig. 3) to complete the
procedure.
07. The green led on WM100 will start flashing indicating that it already has a
system memorized on it (green led flashes) as explained in paragraph 7.1 and
a periodical beep will remind the fitter to scan for devices from the control unit.
5.2 - ADDING FURTHER WIRELESS DEVICES TO AN EXISTING
SYSTEM
This procedure allows you to add more wireless devices to an existing wireless
network without needing to again acquire the already installed devices.
Warning – The new wireless devices to be acquired must not have any data in
their memory. If a device has already been used on another system, you must
reset the factory values by following the procedure described in section 5.5.
01. Press and hold the WM100 button (fig. 3) and release it after the green led
comes on. The led will begin to flash rapidly and WM100 will try to com-
municate with each of the devices already on the system and these will go
into programming status. On completion, the interface led will come on with
a continuous green light, placing the interface into “radio listen” mode for the
acquisition of new devices.