EasyManuals Logo

Nikon 1 AW1 Quick Start Guide

Nikon 1 AW1
11 pages
To Next Page IconTo Next Page
To Previous Page IconTo Previous Page
Page #10 background imageLoading...
Page #10 background image
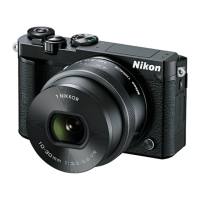
Because the O-ring ensures the waterproof integrity of the Nikon 1 AW1 and its waterproof lens,
it is important to protect the O-ring when you are not using the camera with a waterproof lens.
Place the O-ring protector over the O-ring before attaching a non-waterproof 1 NIKKOR lens on
the camera.
To place it on the camera, simply remove the O-ring protector from the body cap,
and place it over the O-ring, on the AW1 camera body.
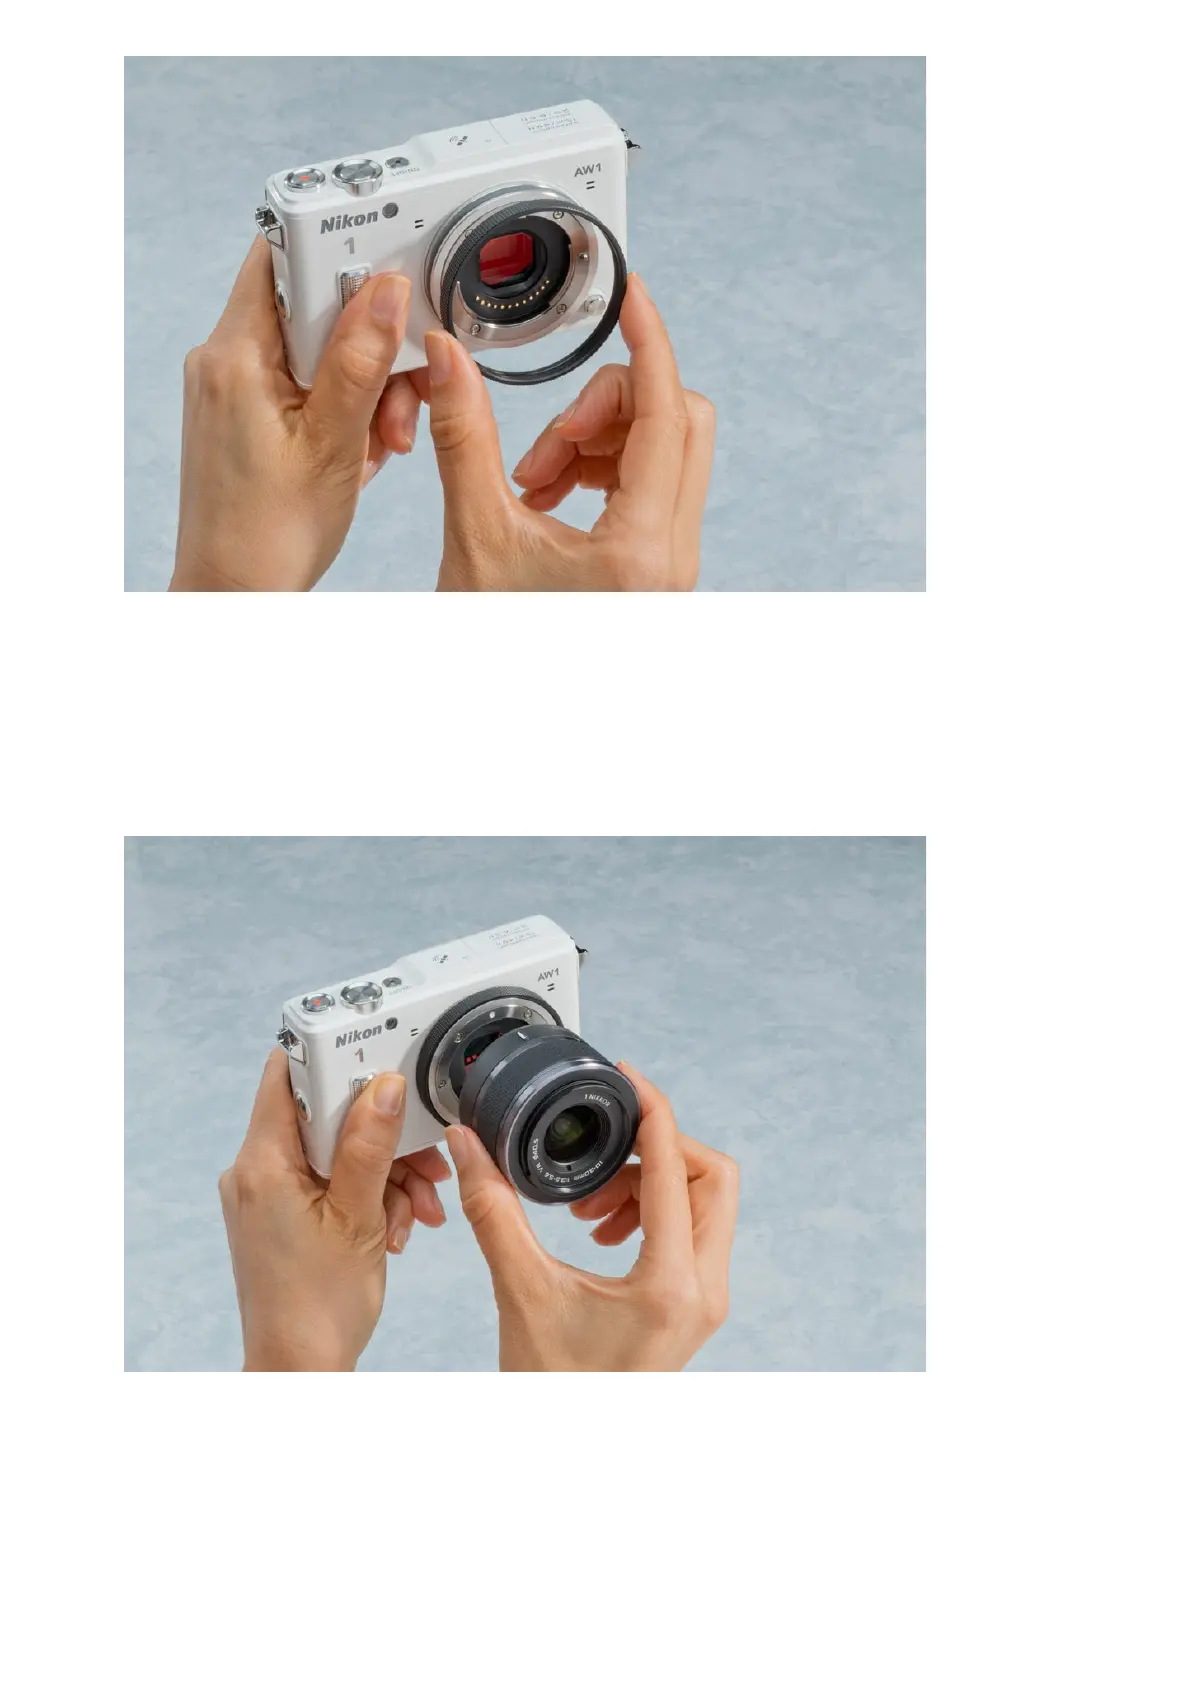
With the O-ring protector covering the O-ring, you can now attach a non-waterproof 1 NIKKOR
lens to the Nikon 1 AW1 camera.
With the O-ring protector in place, the O-ring is protected from dirt and damage,
and you are now able to place a non-waterproof 1 NIKKOR lens on the camera.
To do so, just make sure you’ve got the mounting mark on the lens and on the
camera body lined up, and position the lens on the camera. Then rotate the lens

Other manuals for Nikon 1 AW1

Questions and Answers:

Question and Answer IconNeed help?

Do you have a question about the Nikon 1 AW1 and is the answer not in the manual?

Nikon 1 AW1 Specifications

General IconGeneral
Sensor TypeCMOS
Effective Pixels14.2 million
ISO Sensitivity160-6400
Lens MountNikon 1 mount
Autofocus SystemHybrid AF (phase-detection/contrast-detect AF)
Display Size3.0 inches
Camera TypeMirrorless
Screen TypeTFT LCD
Built-in FlashYes
GPSNo
Wi-FiNo
Dimensions113.3 x 71.5 x 37.5 mm
Sensor Size13.2 x 8.8 mm
Continuous Shooting Speed15 fps
Video Recording1080/30p
WaterproofYes (15m)
ShockproofYes (2m)
FreezeproofYes (-10°C)
Battery LifeApprox. 220 shots
Image StabilizationLens-based
Shutter Speed1/16000 to 30 s
LCD Screen921, 000 dots

Related product manuals