Do you have a question about the Nikon 1 v3 and is the answer not in the manual?
Learn how to take photos by pressing the shutter-release button.
Discover how to record videos using the dedicated movie-record button.
Understand camera settings and default assumptions used in the manual.
Learn about icons and symbols used for clarity in the manual.
Read essential safety precautions to prevent injury and product damage.
Follow precautions for handling batteries and chargers to ensure safety.
Review additional safety measures for flash, liquid crystal, and cables.
Learn proper methods for disposing of data storage devices to ensure privacy.
Guidelines for regular camera inspection and servicing by authorized representatives.
Lists items included with the camera and accessories available separately.
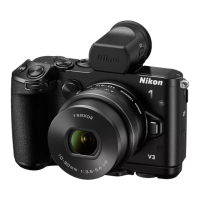
Detailed identification of external camera components and their functions.
Comprehensive guide to all indicators and icons displayed on the camera monitor.
Learn to change the display mode using the $ (Display) button.
Overview of various shooting modes like Auto, Creative, and Manual exposure.
Learn how to access shooting, playback, and setup menus using the G button.
Assign frequently-used settings to Fn1 and Fn2 buttons for quick access.
How to position the monitor for capturing shots close to the ground.
How to position the monitor for capturing shots overhead.
Learn basic touch screen operations like tapping, flicking, and sliding.
Understand how to use pinch and stretch gestures for zooming and other functions.
Use the touch screen to focus on a subject and take a picture in various modes.
Tap icons and sliders to adjust settings and save changes.
Securely attach the camera strap to the designated eyelets.
Instructions for charging the camera battery using the provided charger.
Proper procedure for inserting the battery and ensuring it locks securely.
Guidelines for inserting the memory card in the correct orientation to avoid damage.
How to align mounting marks to attach a lens correctly.
How to turn on the camera and what to expect upon startup.
Setting the camera language and configuring auto power off behavior.
Configure the camera's time zone, date format, and daylight saving options.
Rotate the mode dial to C (auto) to enable point-and-shoot operation.
How to use the zoom ring to frame subjects effectively.
Press shutter halfway to focus; indicator shows focus status.
Smoothly press the shutter-release button to capture the image.
Press K to view photos full frame; use multi selector to navigate.
Display photo, press O, confirm deletion. Deleted photos cannot be recovered.
Preserve highlight and shadow details for natural contrast using Active D-Lighting.
Soften background details or bring foreground and background into focus.
Rotate mode dial to w (creative) to apply special effects.
Photograph high-contrast scenes to preserve highlight and shadow details.
Shoot panoramas for later viewing on the camera.
Rotate the palette to choose effects, previewing them on the monitor.
Power on the camera to begin recording movies.
Choose appropriate shooting modes like Auto or Creative for movie recording.
Press the movie-record button to start recording; indicators show status.
Camera automatically sets shutter speed and aperture for optimal exposure.
Select shutter speed; camera sets aperture for correct exposure.
Select aperture; camera sets shutter speed for correct exposure.
Manually control both shutter speed and aperture for creative control.
Capture fleeting moments with modes like Active Selection or Slow View.
Select Smart Photo Selector to let the camera choose the best shot.
Record a still image with brief movie footage for Motion Snapshots.
Shoot a burst of photographs by selecting continuous shooting mode.
Choose between 10 or 2 second delays for shutter release.
Choose remote control mode for reduced shake or self-portraits.
Press the flash pop-up button to raise the flash unit.
Select desired flash mode from the list using the multi selector.
Use fill flash for extra light or red-eye reduction for portraits.
Tap subject to focus and take picture in Auto/Creative modes.
Connect to smart devices for remote control, downloads, and sharing.
Download and install the Nikon Wireless Mobile Utility app on your smart device.
Use push-button or PIN-entry WPS for secure wireless connection.
Select the camera's SSID from smart device Wi-Fi networks.
Use Wi-Fi upload option in playback menu to transfer the current photo.
Choose Wi-Fi upload option, then select photos using multi selector.
List of options available in the Playback menu for managing photos and movies.
Options for creative modes, image quality, size, and capture settings.
Configure display, sound, touch screen, and button assignment settings.
Instructions for installing the ViewNX 2 software for photo transfer.
Minimum and recommended system requirements for Windows OS.
Transfer pictures via direct USB connection or card reader/slot.
Information on compatible lenses and mount adapters for the camera.
Details on supported flash units and wireless remote controls.
List of tested and approved memory cards, recommended for movie recording.
Instructions for storing the camera in cool, dry conditions to prevent damage.
Methods for cleaning the camera body, lens, and monitor gently.
Avoid dropping, moisture, temperature changes, and magnetic fields.
Do not touch or apply pressure to the image sensor; handle with extreme care.
Solutions for camera not responding or displays being off.
Adjust ISO, shutter speed, aperture, or flash for incorrect exposure.
Solutions for unformatted, full, or damaged memory cards.
Specifications for camera type, lens mount, effective pixels, and image sensor.
Details on file formats like NEF/JPEG and available shooting modes.
Specifications for shutter types, speeds, and release modes like self-timer.
Information on autofocus system, flash modes, and white balance settings.
Details on frame sizes, recording rates, and file formats for movies.
Sample figures for shots and movie time with a fully-charged battery.
| Sensor | CMOS |
|---|---|
| ISO Range | 160-12800 |
| Continuous Shooting | Yes |
| Display Resolution | 1, 037, 000 dots |
| Battery Life | 310 shots (CIPA) |
| Camera Type | Mirrorless |
| Image Resolution | 18.4 MP |
| Lens Mount | Nikon 1 mount |
| Image Processor | EXPEED 4A |
| Sensor Size | 13.2 x 8.8 mm |
| Autofocus System | Hybrid autofocus (contrast-detect/phase-detect) |
| Continuous Shooting Speed | 20 fps |
| Video Recording | 1080p at 60/30 fps |
| Display | Tilting LCD |
| Connectivity | Wi-Fi |
| Shutter Speed | 30 s to 1/16000 s |
| Viewfinder Type | Optional electronic viewfinder |
| Storage Media | microSD/SDHC/SDXC |
| Battery | EN-EL20a rechargeable Li-ion |
| Weight | 324 g (including battery and memory card) |
| Dimensions | 110.9 x 65 x 33.2 mm |