Do you have a question about the Nikon Coolpix 5600 and is the answer not in the manual?
Instructions for charging the camera's rechargeable batteries using the provided charger.
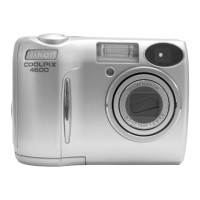
Securing the camera strap to the camera body for safe handling and carrying.
Guide on correctly inserting the camera's batteries into the battery chamber.
Steps to power on the digital camera using the power switch.
Initial camera setup for language selection and setting the date and time.
Holding the camera steadily in both hands for optimal shooting.
Composing the shot by centering the subject in the monitor or viewfinder.
Using the shutter-release button halfway to set focus and exposure.
Pressing the shutter-release button fully to take the photograph.
Accessing and viewing captured images on the camera's monitor.
Safely powering down the digital camera after use.
Step-by-step guide to installing PictureProject software on Windows operating systems.
Step-by-step guide to installing PictureProject software on Macintosh operating systems.
Selecting the appropriate USB mode (Mass storage or PTP) for data transfer.
Connecting the camera and using PictureProject Transfer to copy photos.
Procedures for safely disconnecting the camera from the computer after data transfer.
| Megapixel | 5.1 MP |
|---|---|
| Sensor type | CCD |
| Image sensor size | 1/2.5 \ |
| Digital zoom | 4 x |
| Optical zoom | 3 x |
| Focal length range | 34 - 102 mm |
| Interface | USB |
| Power source | LR6 |
| Built-in flash | Yes |
| Dimensions (WxDxH) | 85 x 60 x 35 mm |
| Camera shutter speed | 4 - 1/3000 s |
| Minimum system requirements | PC, Mac CD-ROM |
| Compatible operating systems | Windows 98SE/2000/ME/XP MacOS X 10.1.5 |
| Focus adjustment | Auto |
| Internal memory | 13.5 MB |
| Compatible memory cards | sd |
| Display diagonal | 1.8 \ |
| Display resolution (numeric) | 80.000 pixels |
| I/O ports | 1 x USB 1 x composite video/audio output 1 x DC power input 1 x SD Memory Card |
| Bundled software | Drivers & Utilities, Nikon PictureProject |
| Motion JPEG frame rate | 15 fps |
| Video formats supported | QuickTime |
| Maximum video resolution | 640 x 480 pixels |
| Product color | Silver |
| Battery type | AA |
| Battery technology | Alkaline |
| Flash modes | auto, Fill-in, flash OFF, Red-eye reduction, red-eye reduction |
| Weight | 130 g |
|---|