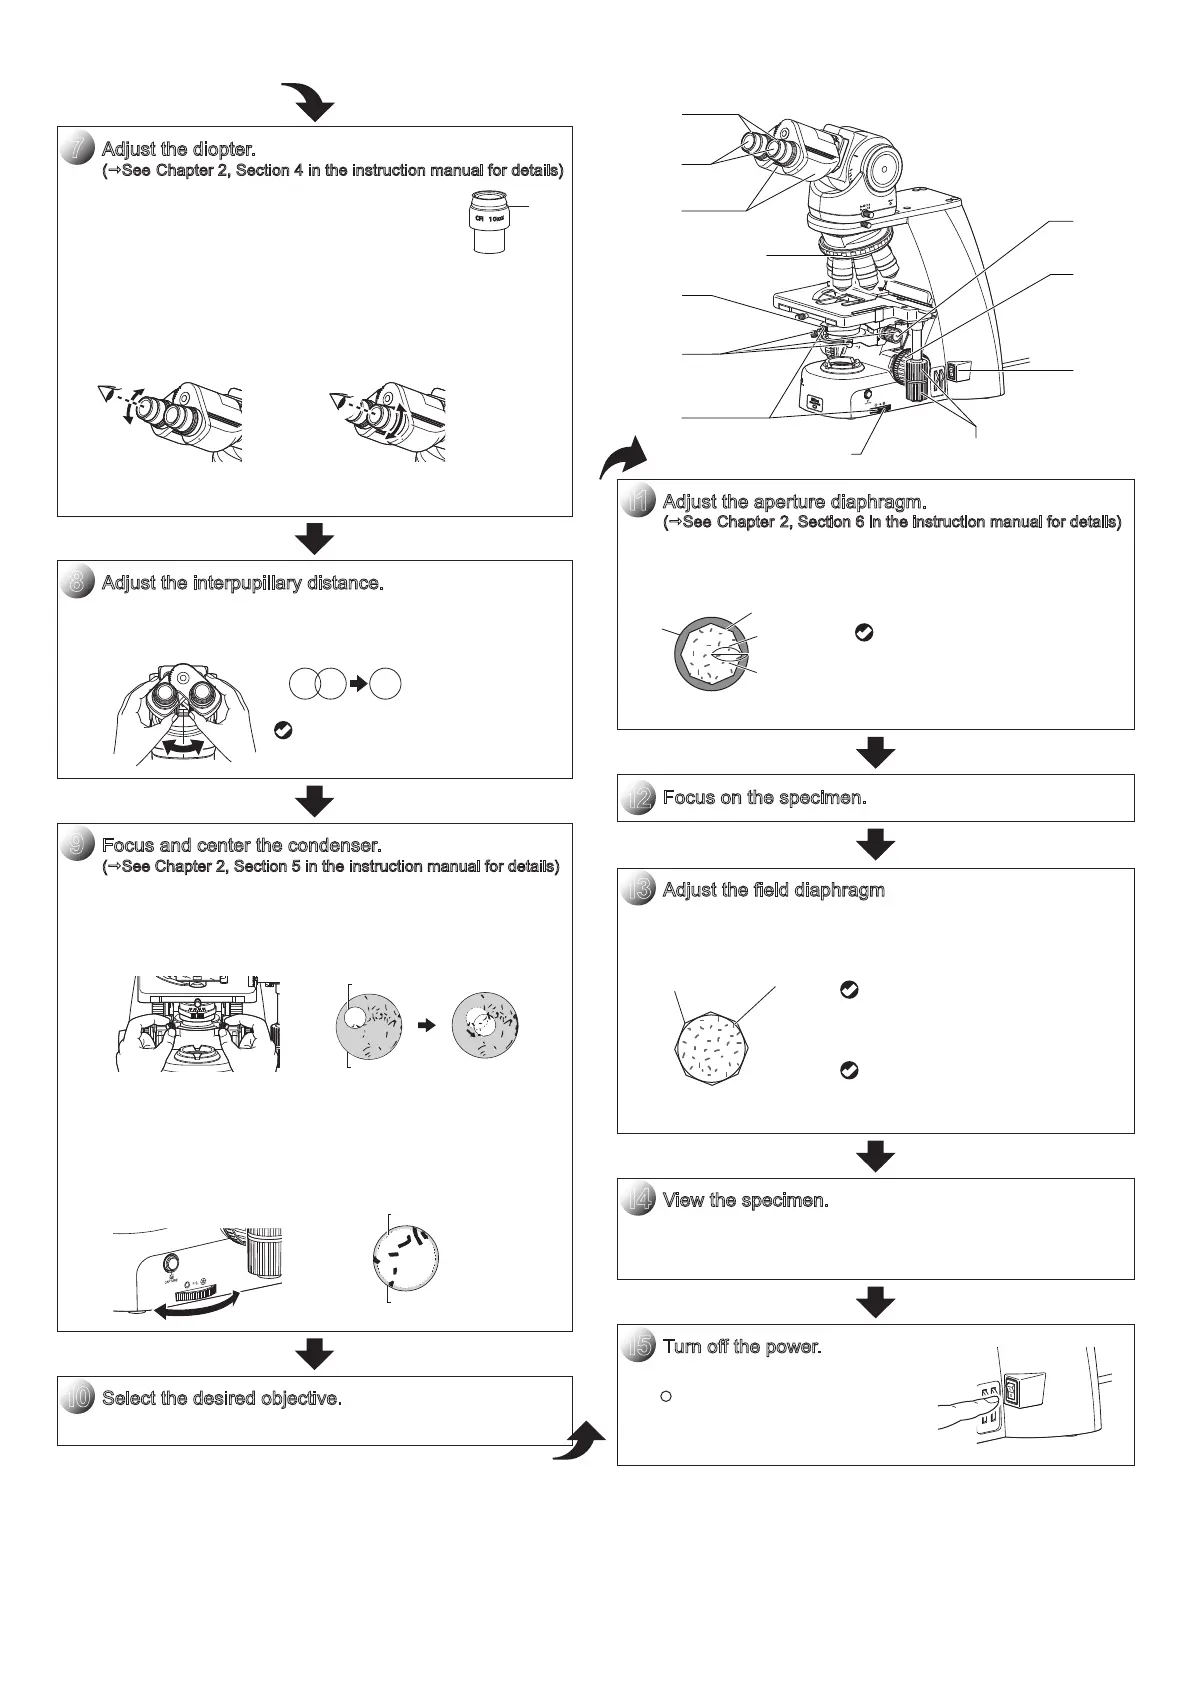
Adjust the diopter.
(See Chapter 2, Section 4 in the instruction manual for details)
(1)
(2)
(3)
(4)
Turn the diopter adjustment ring on the right and
left eyepieces to align the end face of the diopter
adjustment ring with the line.
(This is the diopter adjustment reference position.)
Focus on the specimen using the 40x objective.
Bring the 10x (or 4x) objective into the optical path.
Look into the right eyepiece with your right eye and the left
eyepiece with your left eye. Turn the diopter adjustment ring
of each eyepiece to focus on the specimen.
At this point no focus knobs are used.
Line
(5) Repeat steps (2) through (4) to make sure the focus has been
adjusted properly.
7
For easy adjustment, look into
the eyepiece as if you were looking
at a distant object.
Focus and center the condenser.
(See Chapter 2, Section 5 in the instruction manual for details)
(1) Look into the eyepiece with the field diaphragm stopped down
to the minimum. Focus on the field diaphragm image using
the condenser focus knob, then adjust the condenser centering
screws to center the diaphragm image within the field of view.
(2)
(3)
Bring the 40x objective into the optical path to check the focus
and centering of the field diaphragm image. Make adjustments
in the same way as step (1) as necessary.
Turn the field diaphragm dial and adjust the field diaphragm image
so that its size is almost the same as the field of view.
9
Adjust the interpupillary distance.
Look into both eyepieces and rotate the binocular part to adjust
the binocular part's opening until the fields of view for the right
and left eyes coincide.
8
Be sure to adjust the aperture
diaphragm each time you change
the objective.
(You can see the aperture diaphragm
image with the centering telescope.)
Opening the field diaphragm too much
results in stray light entering the field
of view, generating flare and reducing
the image contrast.
Be sure to adjust the field diaphragm
each time you change the objective.
Adjust the field diaphragm
Turn the field diaphragm dial to adjust the field diaphragm so that
it almost circumscribes the field of view.
13
View the specimen.
Rotate the stage knob to move the target. If the target is not in focus,
use the focus knob to adjust the focus.
Turn off the power switch (press to
the " " position) for the microscope.
(The power LED on the front of
the main body will turn off.)
14
Turn off the power.
15
Select the desired objective.
Turn the nosepiece to bring the desired objective into the optical path.
10
Adjust the aperture diaphragm.
(See Chapter 2, Section 6 in the instruction manual for details)
Turn the aperture diaphragm lever on the condenser to adjust
the aperture diaphragm so that it is set to 70 to 80% of
the numerical aperture of the objective used.
11
Focus on the specimen.
12
Field diaphragm
image
Eyepiece field
of view
Field diaphragm
image
Eyepiece field
of view
Pupil of
objective
Appropriate size of
the aperture diaphragm
70 to 80
100
Field of view
Circumscribe around
the field of view
OFF
CLAMP
TOR
Q
UE
ND4
ND8
OUT
IN
1
15
12
2
6
4
8
14
10
11
5
3
7
13
9
Aperture diaphragm
image
Field diaphragm
 Loading...


