14
E
Available picture area
Areas cut off in the final print differ
depending on the print type (C/H/P).
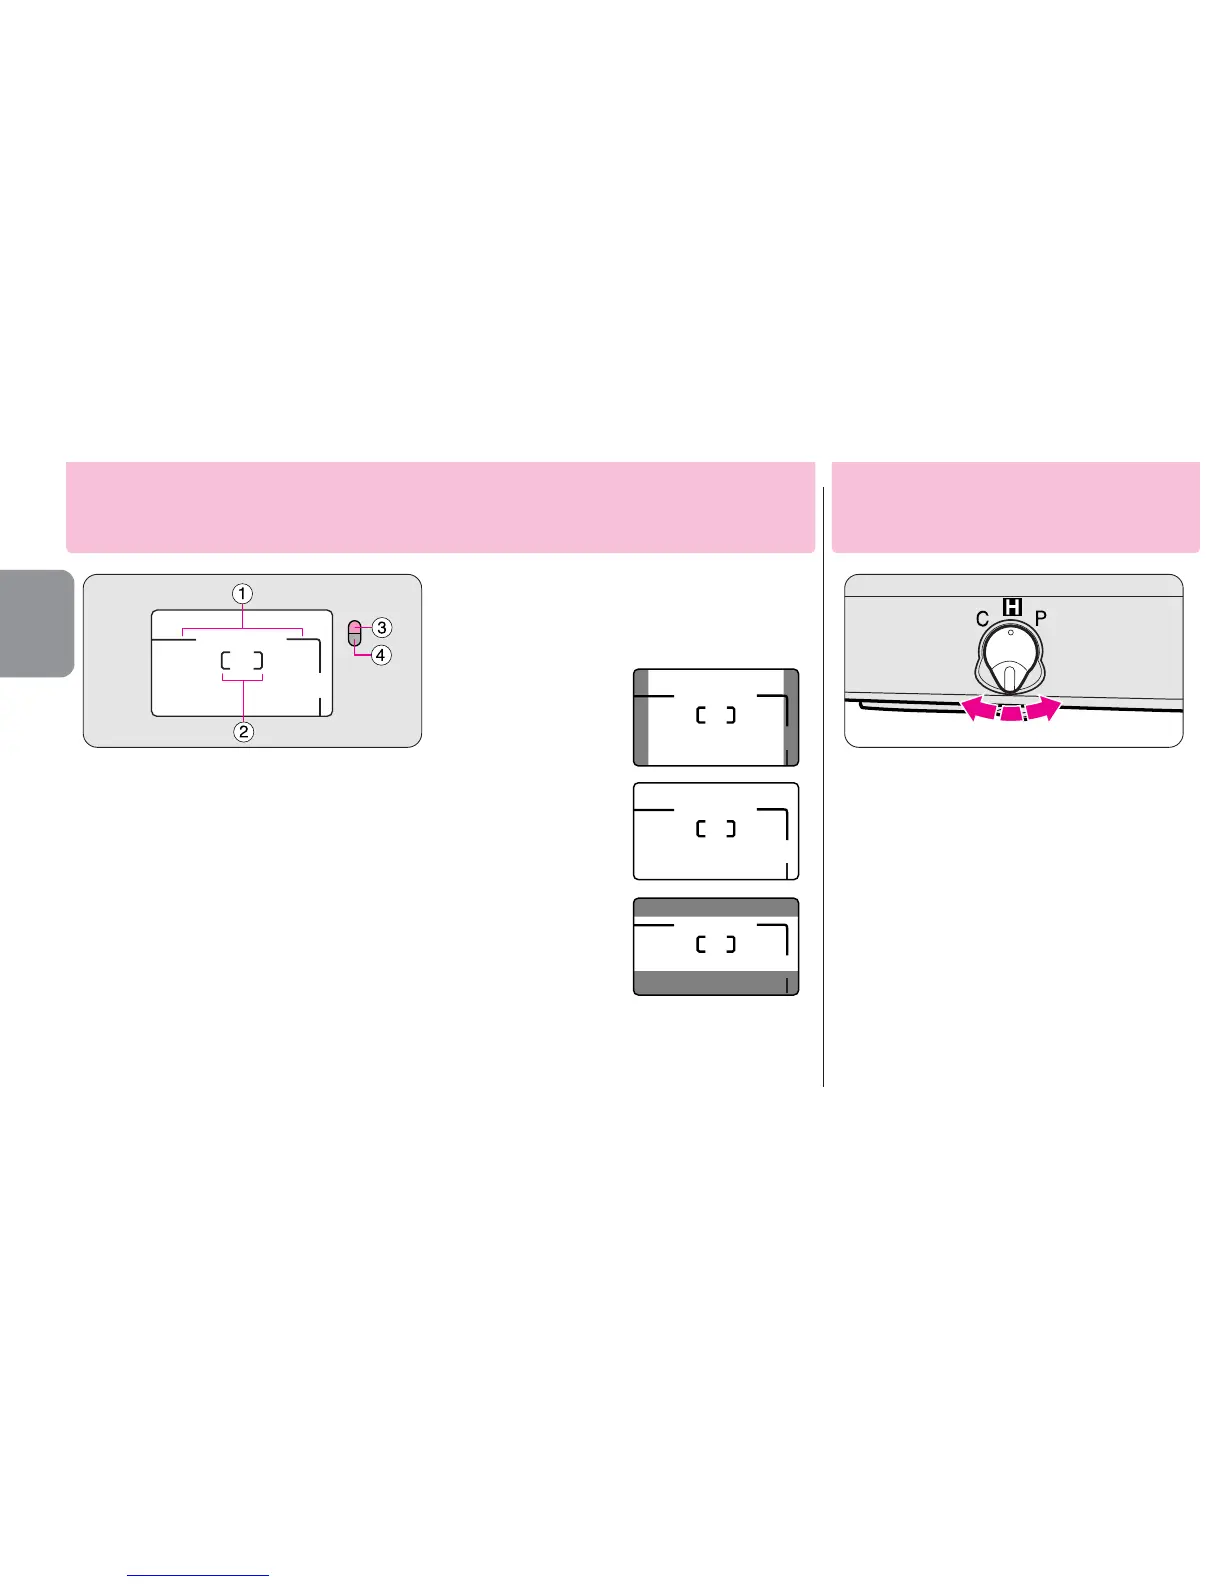
1
Parallax compensation marks
For close-up shooting in C and H print
types at a distance of approx. 1m to
0.45m (3.3 ft to 1.5 ft.) (- P. 26)
2
Autofocus frame mark
Center this mark on the subject.
3
Orange LED
If lit continuously: Flash is ready to fire.
If blinking: Flash is being charged and
not ready to fire.
4
Green LED
If lit continuously: Correct focus has been
achieved. If blinking: Correct focus has not
been achieved or the shooting distance is
closer than approx. 0.45m (1.5 ft.)
Use the CHP selector to select your
desired print type before shooting.
•You can select any one of three print types
(C, H or P) by switching the CHP selector
at any time while film is loaded. (- P. 4)
Available picture area differs depending on
the print type selected.
•You can also change the type of print when
ordering extra prints at the photo lab.
CAUTION!
To prevent possible injury to your eye,
hold the camera away from your face
when you operate the CHP selector.
C-type
(classic)
Aspect ratio = 2 : 3
H-type
(wide-vision)
Aspect ratio = 9 : 16
P-type
(panorama)
Aspect ratio = 1 : 3
(Parallax
compensation marks
not usable.)
Viewfinder indications
Selecting a print type
 Loading...