†
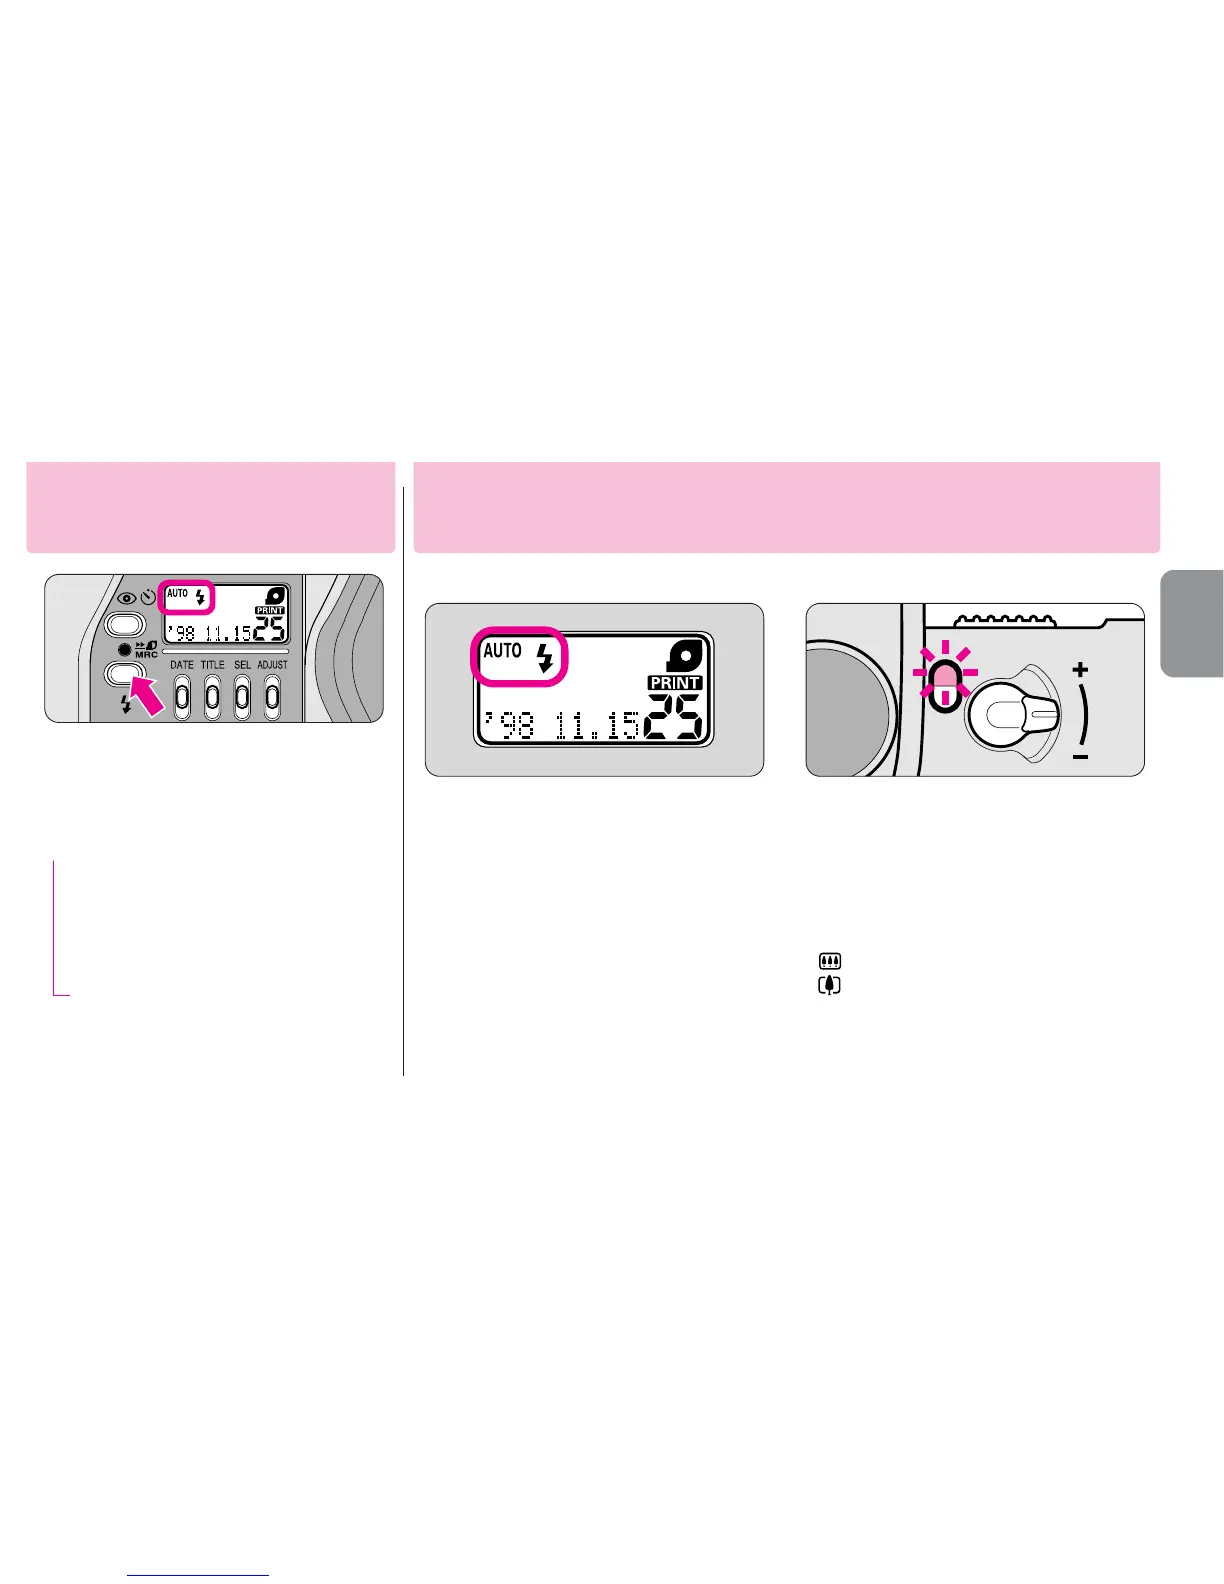
Press the
J
button until the desired
flash mode indicator appears.
•For details, see the reference page of each
flash mode.
AUTOJ Auto flash (-P. 21)
↓
#
Flash cancel
(-P. 22)
↓
J Anytime flash (-P. 22)
↓
Auto flash with slow sync
(-P. 23)
•When the camera power is turned off,
the flash mode reverts to auto flash.
21
1
Open the slide cover to turn
the camera on.
•When the camera is turned on,
AUTOJ
appears on the LCD panel.
Auto flash mode is automatically
activated.
•The camera senses when the available
light is low or the subject is backlit and
automatically fires the flash.
•When “
#
”
appears on the LCD panel, the
flash does not fire.
→
2
Check that the orange LED
comes on, then shoot.
•Before shooting with flash, make sure
the subject is within the flash shooting
distance range. Refer to the following
guide (ISO 200).
(22.5mm): approx. 0.45 to 3.7m (1.5 to 12.1 ft.)
(66mm) : approx. 0.45 to 2.6m (1.5 to 8.5 ft.)
•
If the orange LED is blinking, the flash is being
charged and the shutter is locked. Reshoot after
making sure that the orange LED lights up.
The flash automatically fires when the available light is low or the subject is backlit.
Auto flash photography
Selecting the flash mode




 To Next Page