Measurement
1. Press the POWER button for power-on.
(Power turns off 8 seconds after the last
operation.)
Immediately after power-on.
(Initializing)
Stand-by.
3. Press POWER button once to start single measurement.
Measuring.
4. After measurement, “distance” or “fail to measure” indicator are displayed for 8 seconds, then power turns off. If you press the POWER
button during power-on (while the internal display is lit), another single measurement starts.
Failure to measure or
unable to measure distance.
Displays the measured
figure. (Target 1)
Displays the measured
figure. (Target 2)
3. Keep pressing POWER button to start continuous measurement up to 20 seconds. The internal display shows “distance” and
“fail to measure” indicator alternately.
Note: Laser irradiaton mark is blinking during the measurement.
Note: If you stop pressing the button, the continuous measuremen stops
Target focusing.
2. Aim at the target
.
Positionthetargetatthecenterofthereticle
[Single measurement]
Failure to measure or
unable to measure distance.
Upward measurement. Downward measurement.
Displays the measured figure.
[Continuous measurement]
4. After continuous measurement, the measure results are displayed for 8 seconds, then power turns off. If you press the POWER
button during power-on (while the internal display is lit), another measrement starts.
Medición
Precaución — La utilización de controles, ajustes o parámetros de procedimiento distintos de los aquí
indicados puede provocar una exposición a radiaciones peligrosas.
1. Preparación
Coloque una batería en el compartimento de la batería (consulte "Cambio de la batería").
2. Ojera de goma
Tanto quienes llevan gafas como quienes no lo hacen pueden usar este rangefinder directamente.
3. Ajuste de dioptrías
Ajuste las dioptrías para conseguir una indicación clara del LCD en el visor.
Enprimerlugargireelarodeajustededioptríasensentidocontrarioaldelasagujasdel
relojhastaquellegueasutope.AcontinuaciónpulseelbotónPOWERON/Measurement
para encender el aparato (confirme que la pantalla interna está encendida). Mire por el
ocular y gire el aro de ajuste de dioptrías en el sentido de las agujas del reloj hasta que el
LCD quede enfocado.
Si gira demasiado el aro, hágalo girar en sentido contrario al de las agujas del reloj y
vuelva a ajustar.
Si no ajusta las dioptrías a su graduación, quizás no pueda enfocar correctamente su sujeto.
4. Medición
Antes de medir asegúrese de confirmar los ajustes de cada modo (Modo de indicación de
lamedición/Mododeprioridadalsujeto/Unidaddeindicacióndeladistancia).
*
Consulte en las correspondientes secciones cómo ajustar cada modo.
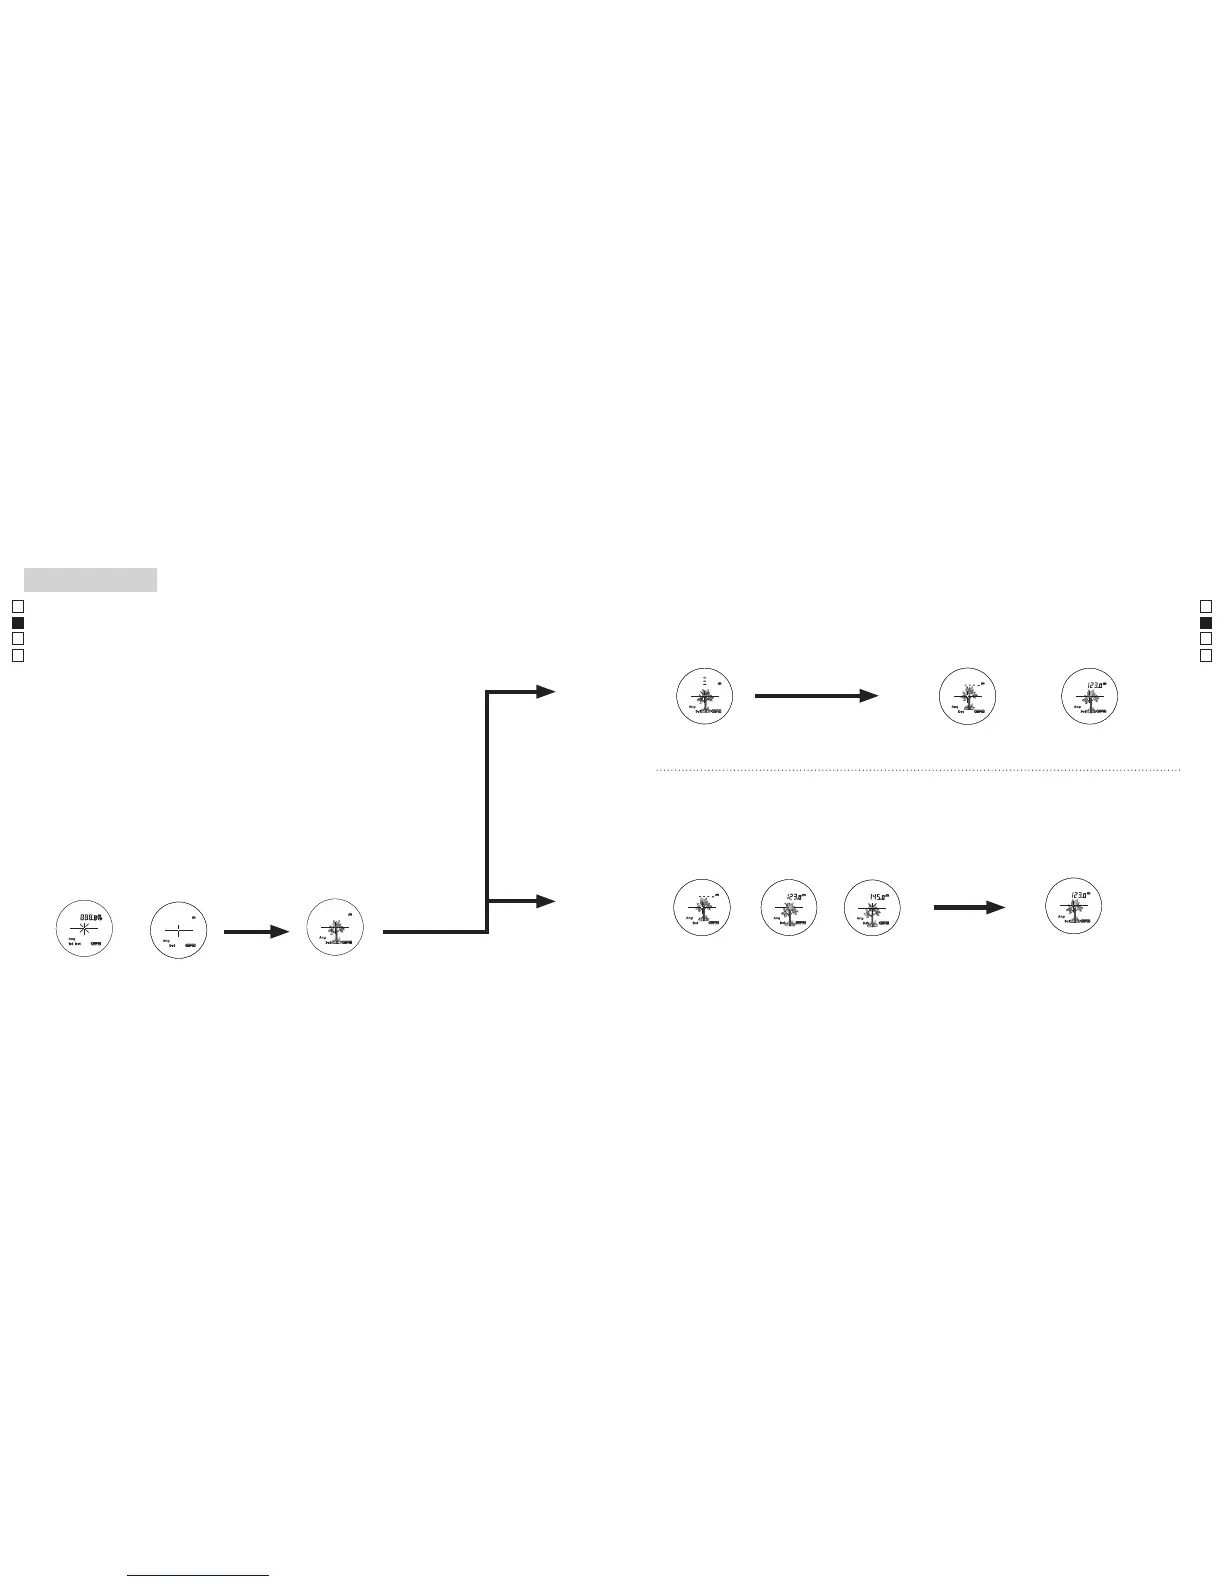
1.Enciendaelaparato(confirmeque
la pantalla interna está encendida
2. Apunte al sujeto.
Coloque el sujeto en el centro
de la retícula.
Inmediatamente
después del encendido
(inicializando).
Espera Apuntar al sujeto
(Apagado automático después de
aprox. 8 s sin utilizar)
【
Medición única
】
【
Función de medición continua
】
3. Presione el
botónPOWERON/
Measurement una vez para iniciar
una medición única.
Measurement
1. Press the POWER button for power-on.
(Power turns off 8 seconds after the last
operation.)
Immediately after power-on.
(Initializing)
Stand-by.
3. Press POWER button once to start single measurement.
Measuring.
4. After measurement, “distance” or “fail to measure” indicator are displayed for 8 seconds, then power turns off. If you press the POWER
button during power-on (while the internal display is lit), another single measurement starts.
Failure to measure or
unable to measure distance.
Displays the measured
figure. (Target 1)
Displays the measured
figure. (Target 2)
3. Keep pressing POWER button to start continuous measurement up to 20 seconds. The internal display shows “distance” and
“fail to measure” indicator alternately.
Note: Laser irradiaton mark is blinking during the measurement.
Note: If you stop pressing the button, the continuous measuremen stops
Target focusing.
2. Aim at the target
.
Positionthetargetatthecenterofthereticle
[Single measurement]
Failure to measure or
unable to measure distance.
Upward measurement. Downward measurement.
Displays the measured figure.
[Continuous measurement]
4. After continuous measurement, the measure results are displayed for 8 seconds, then power turns off. If you press the POWER
button during power-on (while the internal display is lit), another measrement starts.
4. Después de la medición, se visualiza el indicador "no se pudo medir" o
"distancia medida" y después se apaga. Si presiona el botón
POWERON/
Measurement
con el aparato encendido (con la pantalla interna encendida),
se inicia otra medición única.
3. Mantenga pulsado el botón
POWERON/Measurementpara
empezar una medición continua de ocho segundos. La pantalla
interna muestra alternativamente los indicadores "distancia" y
"no se pudo medir".
*
La marca de radiación láser destella durante la medición.
*
Si levanta el dedo del botón la medición continua se detiene.
"Medición fallida"
o "No se pudo
medir" la distancia
Muestra la cifra
medida (Sujeto 1).
Muestra la cifra
medida (Sujeto 2).
4. Después de la medición continua, se visualizan los resultados
de la medición final (distancia medida) durante 8 segundos y
después se apaga la corriente.
Si presiona el botón
POWERON/Measurement
con el aparato
encendido (con la pantalla interna encendida), se inicia otra
medición.
Medición
"Medición fallida" o "No se
pudo medir" la distancia
Muestra la cifra medida
 Loading...