SQUEEGEE DISASSEMBLY/ASSEMBLY [MICROMATIC M17B - MICROMATIC M17E]
Check that the switches (5 and 6) are turned to “0”.
Lower the squeegee (17) by means of the lever (25).
Disconnect the vacuum hose (29) from the squeegee.
Loosen the handwheels (18) and remove the squeegee (17).
Assemble in the reverse order of disassembly.
SQUEEGEE CLEANING/CHECK AND BLADE REPLACEMENT [MICROMATIC M17B - MICROMATIC
M17E]
CAUTION!
It is advisable to use protective gloves when cleaning the squeegee because there may be cutting debris.
Preliminary procedures
Remove the squeegee.
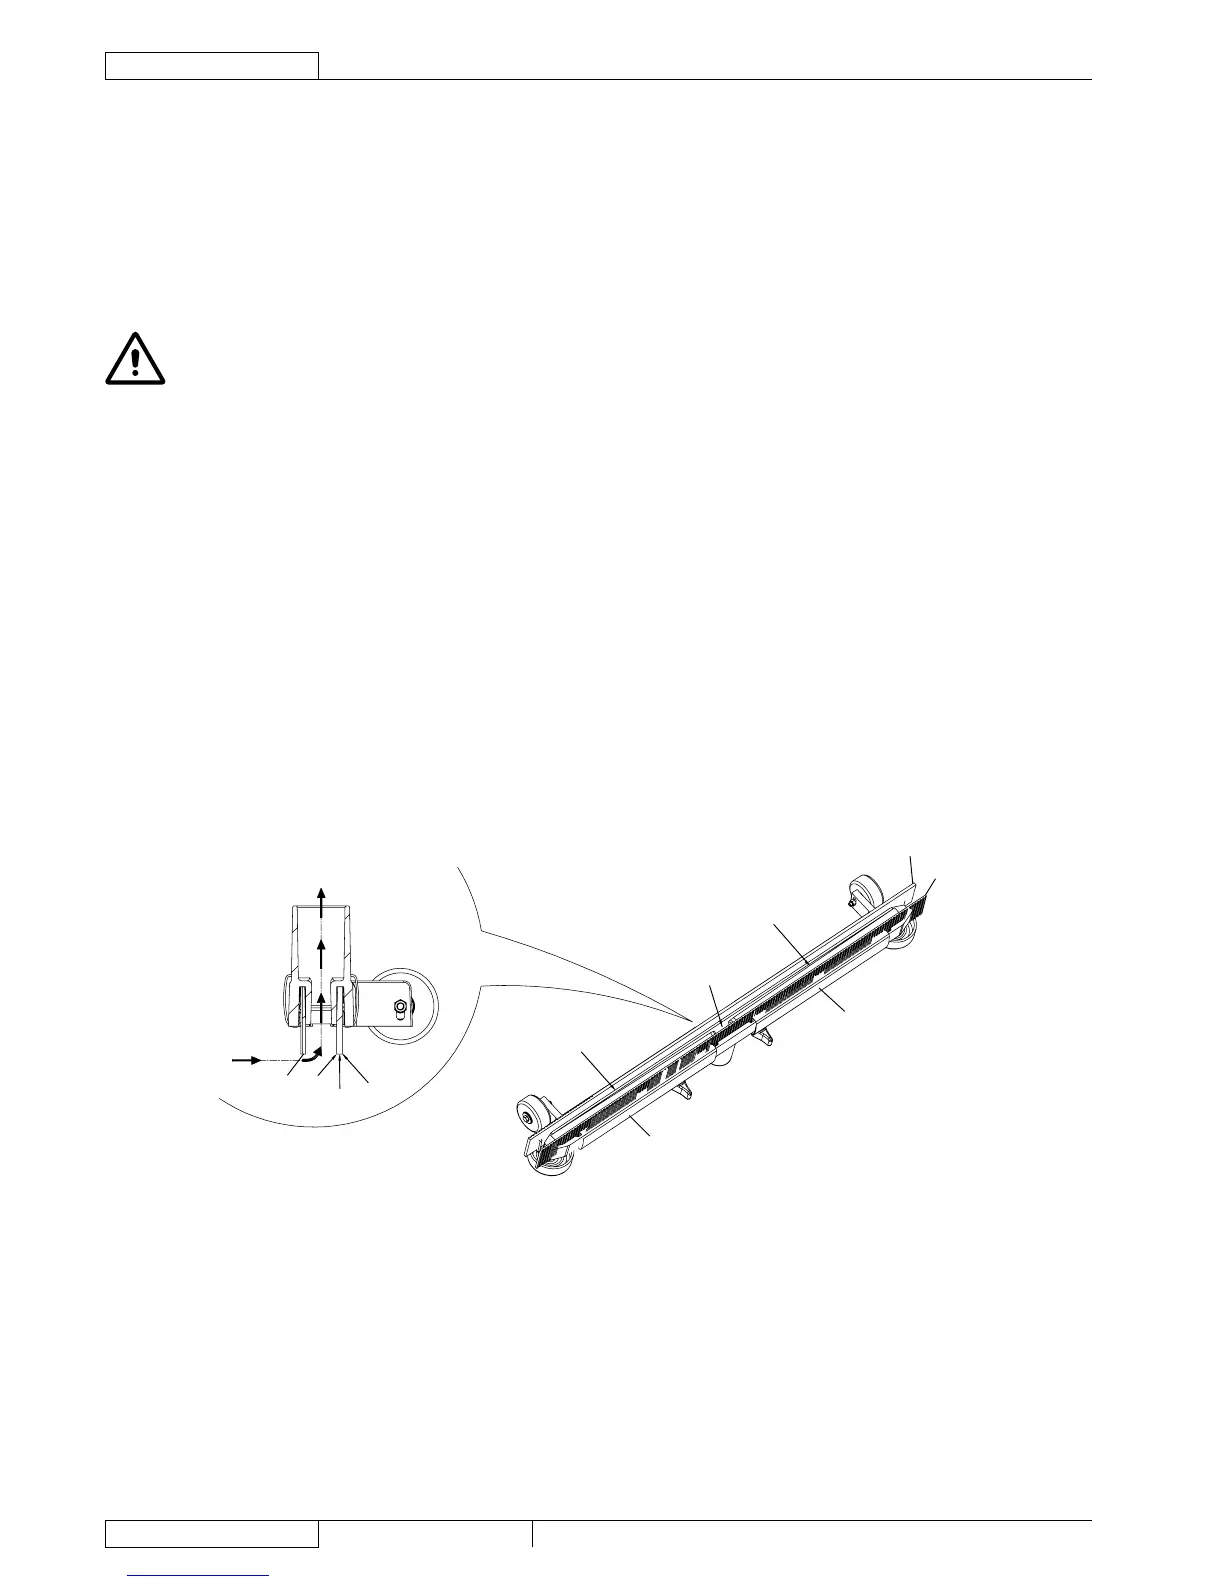
Cleaning
Wash and clean the squeegee; in particular, clean the compartments (A) and the vacuum hole (B) from dirt and debris.
Check the front blade (C) and the rear blade (D) for integrity, cuts and tears; otherwise replace them.
Blade check and overturning/replacement
Check that the edges (E) of the front blade and the edges (F) of the rear blade lay down on the same level, along their length;
otherwise adjust their height according to the following procedure:
Remove the xing springs (G) and adjust the front blade (C) and the rear blade (D). Reinstall the xing springs on the
properly adjusted front and rear blades.
Check the front blade (C) and rear blade (D) for integrity, cuts and tears; otherwise replace them according to the following
procedure. Also check the front corner (H) of the rear blade for wear; if it is worn, overturn the blade to replace the worn corner
with the other one (I), provided that it is integral. If the other corner (I) is worn too, replace the blade according to the following
procedure:
Remove the xing springs (G) and replace (or overturn) the rear blade (D). Reinstall the xing springs on the properly
adjusted front and rear blades, according to the procedure shown in the previous step.
Reset
Assemble the squeegee.
 Loading...