EasyManua.ls Logo

Nilfisk-Advance ROS1300 - User Manual

Nilfisk-Advance ROS1300
84 pages
Print Icon
To Next Page IconTo Next Page
Loading...
English
10/2021 (Rev.01) Form No. 55940922
ROS1300
50000605/ 50000606/ 50000607
ROS1300 Service Manual

Table of Contents

Questions and Answers

  • J
    Jaime JonesSep 23, 2025
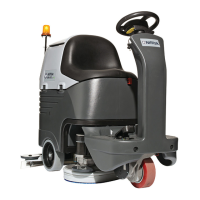
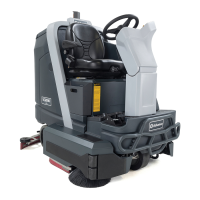
    What to do if the Nilfisk-Advance ROS1300 Scrubber displays 'Please release the drive pedal'?
    • T
      Tony PooleSep 23, 2025
      If the Nilfisk-Advance Scrubber displays 'Please release the drive pedal', release the accelerator pedal before turning on the key switch.
  • K
    Kevin WilliamsAug 25, 2025
    What to do if the Nilfisk-Advance ROS1300 Scrubber displays 'AC power low'?
    • K
      Kimberly SchmidtAug 25, 2025
      If the Nilfisk-Advance Scrubber displays 'AC power low', it means the charger's input voltage is low. Check if the supply voltage is normal by plugging into another power outlet. If the problem persists, replace the charger.
  • M
    Mr. Thomas JonesAug 25, 2025
    What to do if the Nilfisk-Advance ROS1300 displays 'Battery Charging High Vol'?
    • D
      David JohnsonAug 26, 2025
      If the Nilfisk-Advance Scrubber displays 'Battery Charging High Vol', check the batteries and consider replacing the charger.
  • C
    Carla WarrenAug 27, 2025
    What to do if the Nilfisk-Advance ROS1300 Scrubber displays 'Battery charging Low voltage'?
    • C
      Christopher PerryAug 27, 2025
      If the Nilfisk-Advance Scrubber displays 'Battery charging Low voltage', check the batteries and consider replacing the charger.
  • L
    Laurie CarrAug 27, 2025
    What to do if the Nilfisk-Advance Scrubber displays 'TPPL Bat. Charger match Error'?
    • F
      frederickkristinaAug 27, 2025
      If the Nilfisk-Advance Scrubber displays 'TPPL Bat. Charger match Error', use a charger that is suitable for charging a TPPL battery.
  • J
    John SmithSep 13, 2025
    What to do if the Nilfisk-Advance ROS1300 displays 'Side Broom Speed Limit ADJ ERR'?
    • T
      Thomas HughesSep 13, 2025
      If the Nilfisk-Advance Scrubber displays 'Side Broom Speed Limit ADJ ERR', check the connections between the side broom speed adjusting button (VR2) and Dashboard (EB1). Also, check the side broom speed adjusting button (VR2).
  • A
    amanda84Sep 12, 2025
    Why Nilfisk-Advance ROS1300 displays 'Tract Motor over- temperature'?
    • L
      Laurie AustinSep 12, 2025
      If the Nilfisk-Advance Scrubber displays 'Tract Motor over- temperature', stop working until it is cold. This can also be caused by physical resistance to machine movement, such as a dragging brake or going up a steep incline.
  • T
    Troy MaySep 12, 2025
    What to do if the Nilfisk-Advance ROS1300 Scrubber displays 'Rmotor THERMO- SENSOR open'?
    • L
      Laurie AndersonSep 12, 2025
      If the Nilfisk-Advance Scrubber displays 'Rmotor THERMO- SENSOR open', it means the temperature probe of the traction motor is disconnected. Check the wire harness in the Temp Sensor and Main Controller (EB2), and check the temperature sensor.
  • J
    jashleySep 4, 2025
    What to do if the Nilfisk-Advance Scrubber displays 'Electric Brake Failure'?
    • R
      Robert SmithSep 4, 2025
      If the Nilfisk-Advance Scrubber displays 'Electric Brake Failure', check the wire harness in the Electric Brake and Main Controller (EB2).
  • R
    rbrewerSep 2, 2025
    What to do if the Nilfisk-Advance Scrubber displays 'Charger to controller connect Error'?
    • B
      Barbara MirandaSep 2, 2025
      If the Nilfisk-Advance Scrubber displays a 'Charger to controller connect Error', check the wire harness in the Charger and Main Controller (EB2).

Summary

03 General Information

Machine General Description

Overview of the ROS1300 floor sweeping machine.

Service Manual Purpose and Field of Application

Purpose of the manual for service personnel.

Other Reference Manuals

Lists other related Nilfisk manuals and availability.

Conventions

Defines directional references (front, rear, etc.) relative to the operator.

Service and Spare Parts

Guidelines for service and obtaining spare parts.

Serial Number Label

Location and importance of serial number for ordering parts.

Safety

Symbols

Explains safety symbols used in the manual.

General Safety Instructions

Essential safety precautions for operating and maintaining the machine.

Property Damage Messages

Lists conditions and operations that can cause property damage.

Lifting Machine

Safety instructions for lifting the machine.

Transporting Machine

Precautions for safely transporting the machine.

Technical Data

Maintenance Schedule

Machine Structure

Control Panel

Service and Diagnostic Equipment

Dimension

04 Control System

Functional Description

Explains how the Dash Board and Main Controller operate.

Block Diagram

Visual representation of the control system components and connections.

CAN Bus Communication

Explains the CAN bus communication protocol used in the machine.

Component Locations

Identifies the physical locations of key control system components.

Maintenance and Adjustments

Access to Parameter Setting

Step-by-step guide to access machine parameter settings.

Dash Board (EB1) and Main Controller (EB2) Parameter Setting

Troubleshooting

Error Code List

Lists error codes, conditions, and initial troubleshooting steps.

Removal and Installation

Dash Board (EB1)

Steps for removing and installing the Dash Board.

Main Controller (EB2)

Steps for removing and installing the Main Controller.

Specifications

Sample Shop Voltage Measurement

Provides voltage measurements for diagnostics.

Parameter Setting Without Password

10 Chassis System

Functional Description

Details the chassis role and component mounting.

14 Wheel System

Functional Description

Explains the function and components of the wheel system.

Removal and Installation

Front Wheel

Step-by-step guide for front wheel R&I.

Rear Wheels

Procedures for removing and installing the rear wheels.

20 Drive system

Functional Description

Explains the function of the traction motor and speed control.

Wiring Diagram

Illustrates the electrical connections for the drive system.

Component Locations

Identifies key components of the drive system.

Troubleshooting

The machine cant move

Potential causes and remedies for the machine not moving.

The machine moves slowly

Causes and remedies for slow machine operation.

Traction Motor Amperage Check

Removal and Installation

Traction Motor (M1)

Detailed procedure for traction motor R&I.

Specifications

24 Electrical System

Functional Description

Explains power supply, control, and protection circuits.

K1 Contactor and SW3 Switch

Function of K1 Contactor and SW3 Switch.

Fuses and Circuit Breaker

Identifies main fuses and circuit breakers.

SW1 and SW2 Switch

Function of emergency and key switches.

Wiring Diagram

Illustrates electrical connections for the system.

Component Locations

Identifies physical locations of electrical system components.

Maintenance and Adjustment

Setting Installed Battery Type

Steps to select the correct battery type.

Battery Installation

Procedures for installing batteries into the machine.

Troubleshooting

Machine cant be turned on

Causes and remedies for the machine not powering on.

Warning light doesnt work

Causes and remedies for the warning light issue.

Headlight doesnt work

Causes and remedies for headlight malfunction.

Left and right taillight doesnt work

Causes and remedies for taillight malfunction.

LCD display still on when charging

Causes and remedies for LCD display issue.

Headlight

Left and Right Taillight

Specifications

Connector Pinout

Electrical Wiring Diagram(55942189 Rev.B)

30 Solution System

Functional Description

Explains the function of the solution delivery system.

Wiring Diagram

Illustrates electrical connections for the solution system.

Component Locations

Identifies physical locations of solution system components.

Removal and Installation

Water pump (M9)

Detailed steps for water pump R&I.

Troubleshooting

No water or less water comes out

Causes and remedies for low/no water flow.

Water comes out when machine is off

Causes and remedies for water leakage when off.

Specifications

Rear tank installation

Functional Description

Explains the purpose of the rear tank addition.

Installation

Step-by-step guide for rear tank installation.

42 Main Sweeping System

Functional Description

Explains how the main broom system operates.

Wiring Diagram

Illustrates electrical connections for the main sweeping system.

Main Broom Actuator System

Component Locations

Identifies key components of the main broom actuator system.

Maintenance and Adjustment

Side Blade Changing

Steps for replacing side broom blades.

Front Blade Changing

Steps for replacing front broom blades.

Behind Blade Changing

Troubleshooting

Broom does not clean properly

Causes and remedies for improper cleaning.

The main broom cant rotate

Causes and remedies for main broom rotation failure.

Cant raise;lower main broom

Causes and remedies for main broom lift/lower issues.

Main Broom Motor Amperage Check

Removal and Installation

Main Broom Actuator(M1)

Detailed steps for main broom actuator R&I.

Main Broom Motor (M4)

Main Broom

Specifications

48 Side Sweeping System

Functional Description

Explains how the side broom system operates.

Wiring Diagram

Illustrates electrical connections for the side sweeping system.

Side Broom Actuator System

Component Locations

Identifies key components of the side broom actuator system.

Troubleshooting

Broom does not clean properly

Causes and remedies for improper cleaning.

Only one broom rotates

Causes and remedies for only one broom rotating.

Cant raise;lower side brooms

Causes and remedies for side broom lift/lower issues.

Side Broom Motors Amperage Check

Removal and Installation

Side Broom Actuator(M2)

Detailed steps for side broom actuator R&I.

Side Broom Motors(M5&M6)

Side broom speed potentiometer (VR2)

Specifications

50 Dust Control System

Functional Description

Explains how the dust control system operates.

Wiring Diagram

Illustrates electrical connections for the dust control system.

Component Locations

Troubleshooting

The Suction motor cant be turned on

Causes and remedies for suction motor failure.

Filter shaker motor cant be turned on

Causes and remedies for filter shaker motor failure.

Filter Shaker Motor Current Draw Test

Suction Motor Current Draw Test

Removal and Installation

Suction Motor (M8)

Detailed steps for suction motor R&I.

Filter Shaker Motor (M7)

Specifications

Nilfisk-Advance ROS1300 Specifications

General IconGeneral
BrandNilfisk-Advance
ModelROS1300
CategoryScrubber
LanguageEnglish

Related product manuals