ENGLISH
16 17
1-877-646-5288
ninjakitchen.com
PREPARING & USING
THE NINJA
HOT & COLD BREW SYSTEM™ – CONT.
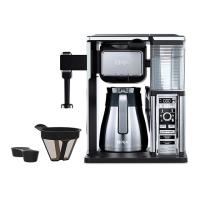
SIGNATURE BREW
SPECIALTY BREW
1 After filling the water reservoir, insert
either the COFFEE or TEA filter holder
into the brew basket. Add the ground
coee, loose leaf tea, or tea bags to
the filter.
2 Close the brew basket, ensuring it is
securely in place. The control panel will
display either COFFEE (Fig. 14a) or TEA
(Fig. 14b) settings based on the filter
holder that has been inserted.
3 Place the empty vessel you would like to
brew into under the brew basket.
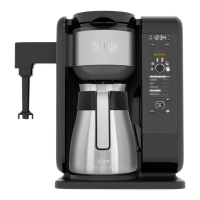
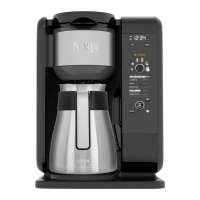
4 Turn the START/SELECT dial to choose
SPECIALTY (Fig. 17). If brewing tea,
press the Tea button
to toggle to the
tea menu, and use the dial to choose
your tea type. To change your brew
style while in the tea menu, press the
Tea button again.
5 Press the START/SELECT dial to start the
brew. A progress bar on the control panel
will show the status of the brewing cycle.
To cancel the brew at any time, press the
dial again or press the Power button.
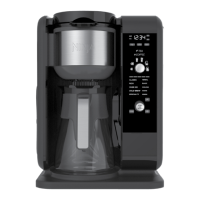
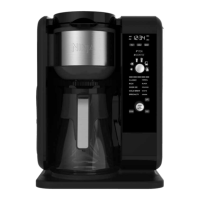
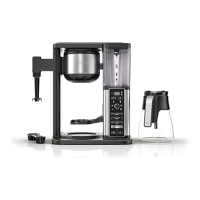
3 Press DELAY BREW. DELAY BREW will
illuminate and the clock will begin to flash
“12:00” or the last Delay Brew time that
was set (Fig. 18).
4 While the clock is flashing, press the
hour (H) or minute (M) button to set the
time that you would like the Delay Brew
to begin. The AM or PM indicator will
illuminate on the left side of the display
as you are setting the desired time.
5 Once the proper time has been set,
select the size of the vessel that you
would like to brew into.
6 Turn the START/SELECT dial to choose
your brew style. If brewing tea, press
the Tea button
to toggle to the
tea menu, and use the bottom dial to
choose your tea type. To change your
brew style while in the tea menu, press
the Tea button again.
7 Once the time, brew size, brew style, and
tea type (if applicable) have been set,
allow DELAY BREW to stop flashing, or
press DELAY BREW to activate. When
activated, the unit will beep and DELAY
BREW and your selected options will
remain illuminated. To cancel,
press DELAY BREW again.
6 The unit will beep and the clock
will display End when the brew
is complete.
SETTING THE DELAY BREW
1 Turn the unit on by pressing the
Power button.
2 After filling the water reservoir and
adding ground coee or tea to the
correct filter holder, be sure the
reservoir, brew basket, and filter are
securely in place. Place the appropriate-
size vessel under brew basket.
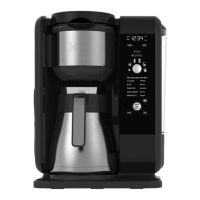
FROTHING MILK
1 Pour milk into cup, until it is about
1
/3 full. (Use more or less milk depending
on your preference.) Microwave for 45 to
60 seconds for hot milk.
2 Move the frother into the ready position
by swinging the arm toward the front.
3 Hold the cup under the frother and
submerge the whisk just below the
surface of the milk. This allows air to
fold into the milk for the frothiest results
(Fig. 19).
4 Press and hold the frothing button for
30 to 45 seconds (Fig. 20).
5 You can easily remove the frother whisk
by twisting it clockwise. To avoid spills,
keep your cup below the whisk and
carry it to your sink or dishwasher for
cleaning (Fig. 21).
NOTE: The brewing cycle will begin,
then pause for a short period before
resuming. This process is used to evenly
saturate the coee grounds or tea.
NOTE: If you attempt to change your
selections while Delay Brew is set, the
unit will beep and DELAY BREW will
flash. To change your selections, cancel
the Delay Brew.
NOTE: Specialty always yields 4 oz. of
coee and 6 oz. of tea.
NOTE: The unit must remain on for the
Delay Brew function to work. DO NOT
power o after setting Delay Brew.
NOTE: If brewing an iced blended
drink, fill the desired vessel with the
amount of ice recommended in the
recipe before brewing.
NOTE: The brew basket must be
securely closed with either the COFFEE
or TEA filter inserted to set Delay Brew.
NOTE: The clock will remain on even if
the unit is turned o. Ensure the unit is
powered on to set Delay Brew.
Fig. 17
Fig. 18
Fig. 19 Fig. 20 Fig. 21
 Loading...