EasyManua.ls Logo

Ninja Doodi SmartLid OL550UK - User Manual

Ninja Doodi SmartLid OL550UK
14 pages
Print Icon
To Next Page IconTo Next Page
Loading...
OL550UK
ninjakitchen.co.uk
INSTRUCTIONS
SharkNinja Europe Limited
3150 Century Way,
Thorpe Park, Leeds, LS15 8ZB, UK
0800 862 0453
ninjakitchen.co.uk
SharkNinja Germany GmbH, c/o Regus Management GmbH
Excellent Business Center 10. + 11/ Stock
Westhafenplatz 1, 60327 Frankfurt am Main, Germany
Illustrations may dier from actual product. We are constantly striving to improve our products,
therefore the specifications contained herein are subject to change withoutnotice.
FOODI & NINJA are registered trademarks of SharkNinja Operating LLC.
COOK & CRISP, SMARTLID & SMARTLID SLIDER are trademarks of SharkNinja Operating LLC.
© 2021 SharkNinja Operating LLC
PRINTED IN CHINA
OL550UK_IB_MP_210630_MV2
VISIT US ONLINE AT:
ninjakitchen.co.uk
Or follow us on any of our social media pages:
This marking indicates this product should not be disposed of with other household
waste. To prevent possible harm to the environment or human health from uncontrolled
waste disposal, recycle it responsibly to promote the sustainable reuse of material
sources. To return your used device, please use the return and collection systems
or contact the retailer where this product was purchased. They can take this product for
environmentally safe recycling.
NOTE: Save these instructions. Keep for future reference.
TM
Question and Answer IconNeed help?

Do you have a question about the Ninja Doodi SmartLid OL550UK and is the answer not in the manual?

Summary

Important Safeguards

Parts and Accessories Overview

Accessory Assembly Instructions

Cook & Crisp Basket Assembly

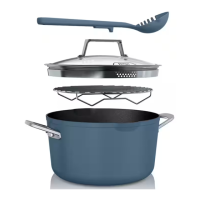
Instructions for correctly assembling the Cook & Crisp Basket with its diffuser.

Using the SmartLid Slider

Explanation of how the SmartLid Slider allows switching between cook modes.

Using the Pressure Cooking Functions

Before First Use

Initial setup steps including washing components and checking parts before first operation.

Installing the Condensation Collector

Guide on how to install and remove the condensation collector for cleaning.

Removing and Reinstalling the Anti-Clog Cap

Procedure for removing and reinstalling the anti-clog cap for maintenance.

Water Test for Pressure Cooking

Instructions for performing a water test to familiarize with pressure cooking.

Pressure Cooking Techniques and Functions

Natural vs. Quick Pressure Release

Explains the differences and usage of natural and quick pressure release methods.

Pressurising Process

Details on how pressure builds in the unit and what the display shows.

Using the Pressure Function

Step-by-step guide on operating the pressure cooking function with controls.

Using the Combi-Steam Mode Functions

Steam Air Fry

Instructions for using the Steam Air Fry function for crisping food with steam.

Steam Bake

Instructions for using the Steam Bake function for baking cakes and treats.

Using the Air Fry and Hob Functions

Air Fry Function

Guide to using the Air Fry function for cooking food with little to no oil.

Grill Function

Instructions for using the Grill function to caramelize and brown food.

Bake Function

Instructions for using the Bake function like a conventional oven.

Additional Air Fry;Hob Functions

Dehydrate Function

Instructions for using the Dehydrate function to dry fruits, vegetables, and meats.

Sear;Sauté Function

Guide to using the Sear/Sauté function for browning and simmering.

Steam Function

Instructions for using the Steam function to gently cook delicate foods.

Slow Cook Function

Instructions for using the Slow Cook function for longer cooking periods.

Yogurt Function

Making Yogurt

Step-by-step guide to pasteurizing milk and fermenting yogurt.

Cleaning and Maintenance

Cleaning Components

Guide to cleaning the unit's parts via dishwasher or hand-washing.

Silicone Ring Maintenance

Procedure for removing, reinstalling, and cleaning the silicone ring.

Cleaning the Lid

Steam Cleaning Procedure

Instructions for steam cleaning the interior of the lid.

Troubleshooting Guide

Pressure and Time Issues

Addresses slow pressurizing, slow time counting, and opening the lid.

Hissing and Not Reaching Pressure

Troubleshooting steps for hissing noises and failure to reach pressure.

Unit Counting Up

Explanation for why the unit may be counting up instead of down.

Troubleshooting Error Messages

Common Error Codes

Explains error messages like ADD POT, SHUT LID, ADD WATER, PRESSURE FAIL, ERR, SLIDE, LOCK LID.

Helpful Tips for Usage

Browning and Reheating

Tips for even browning, using parchment paper, and reheating food.

Overview

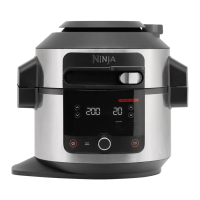
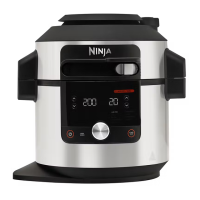
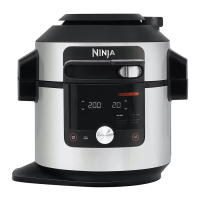
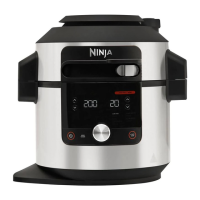
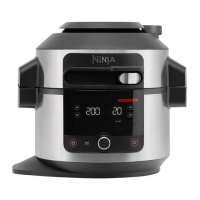
The Ninja Foodi SmartLid Multi-Cooker, model OL550UK, is a versatile kitchen appliance designed for a wide range of cooking functions, combining the capabilities of a pressure cooker, steam cooker, and air fryer.

Function Description:

The multi-cooker offers three main cooking modes, selected via the SmartLid Slider™:

  1. Pressure Mode:

    • PRESSURE: Cooks food quickly while maintaining tenderness. This mode requires the lid to be in the PRESSURE position and the pressure release valve in the SEAL position. The unit will pressurize before the timer starts counting down.
  2. Combi-Steam Mode: This mode combines steam with convection heat for juicy, crispy results.

    • STEAM AIR FRY: Crisps vegetables and proteins with little to no oil. Requires liquid in the pot to create steam.
    • STEAM BAKE: Bakes fluffy cakes and sweet treats. Requires liquid in the pot to create steam.
  3. Air Fry/Hob Mode: This mode allows for various dry and wet cooking methods.

    • AIR FRY: Provides crispness and crunch with little to no oil. Ingredients should be arranged in an even layer, and periodic shaking is recommended for best results.
    • GRILL: Uses high temperature to caramelize and brown food. No temperature adjustment is available for this function.
    • BAKE: Functions like an oven for baked treats and more.
    • DEHYDRATE: Dehydrates meats, fruits, and vegetables for healthy snacks.
    • SEAR/SAUTÉ: Acts as a hob for browning meats, sautéing vegetables, and simmering sauces. This function has no time adjustment and automatically turns off after 1 hour for settings "4" and "Hi 5," and 4 hours for "Lo 1," "2," and "3."
    • STEAM: Gently cooks delicate foods at a high temperature. Requires at least 250ml of liquid. No temperature adjustment is available for this function.
    • SLOW COOK: Cooks food at a lower temperature for a longer period. The pot should not be filled past the MAX line.
    • YOGURT: Pasteurizes and ferments milk for creamy homemade yogurt. This function includes pasteurization and incubation steps.

Important Technical Specifications:

  • Voltage: 230V~, 50Hz
  • Watts: 1460W
  • Capacity: 6L Removable Cooking Pot
  • Silicone Ring: Only a silicone ring specific to SmartLid Multi-cookers can be used.

Usage Features:

  • SmartLid Slider™: This unique feature allows users to switch between the three main cook modes (Pressure, Combi-Steam, Air Fry/Hob) by sliding the lid. The available functions illuminate based on the selected mode.
  • Control Panel: Features a dial for scrolling through functions, left arrows for temperature/internal outcome selection, right arrows for time adjustment, and a START/STOP button to begin or end cooking. The POWER button shuts off the unit and stops all cooking modes.
  • Lid Operation: The lid can be opened and closed when the slider is in the COMBI-STEAM or AIR FRY/HOB position. It cannot be opened when in the PRESSURE position if the unit is pressurized. The unit displays "OPN LID" when depressurized and ready to open.
  • Pressure Release Valve: Essential for pressure cooking, it must be in the SEAL position for pressure functions and VENT for quick pressure release. The valve is designed to be loose, facilitating easy transition between SEAL and VENT.
  • Condensation Collector: Slides into a slot on the cooker base to collect excess water and should be emptied after each use.
  • Accessories: Includes a Reversible Rack, Cook & Crisp™ Basket with a Detachable Diffuser, and a 6L Removable Cooking Pot. The diffuser on the Cook & Crisp™ Basket aids airflow and should always be installed.
  • KEEP WARM Mode: Automatically activates after steam, slow cook, or pressure cycles. It can be manually disabled. This mode keeps food at a warm, food-safe temperature and is recommended for use just before serving to prevent food from drying out.
  • Preheating: The unit displays "PrE" and a progress bar during preheating or pressure building. The timer starts counting down once the set temperature or pressure is reached.
  • Safety Features: The lid locks when the unit is under pressure and will not unlock until fully depressurized. The anti-clog cap protects the inner valve from clogging.
  • Troubleshooting: The display shows error messages like "ADD POT" (cooking pot missing), "SHUT LID" (lid open), "ADD WATER" (low liquid for steam/pressure), "PRESSURE FAIL" (pressure not building), "ERR" (unit malfunction), "SLIDE" (slider in wrong position), and "LOCK LID" (slider not in PRESSURE position for locking).

Maintenance Features:

  • Cleaning:
    • The cooker base and control panel should be wiped clean with a damp cloth.
    • The cooking pot, silicone ring, reversible rack, Cook & Crisp™ Basket, and detachable diffuser are dishwasher safe.
    • The pressure release valve and anti-clog cap can be washed with water and dish soap.
    • For stuck food residue, fill the pot with water and soak before cleaning; use a non-abrasive cleanser and nylon pad/brush if scrubbing is needed.
    • All parts should be air-dried after each use.
    • NEVER immerse the cooker base in water or put it in the dishwasher.
  • Silicone Ring: Should be removed and cleaned after each use to prevent odor absorption. It can be installed with either side facing up. It's recommended to have more than one silicone ring on hand, as it can absorb odors from acidic foods. The ring should be replaced if torn, cut, or damaged, as it affects the pressure-sealing function.
  • Anti-Clog Cap: Should be cleaned after every use with a cleaning brush. To remove, hold between thumb and index finger and rotate clockwise. To reinstall, position and press down.
  • Steam Cleaning: For food residue or oil buildup inside the lid, fill the pot with 700ml of water, move the slider to Air Fry/Hob, select STEAM, set time to 30 minutes, and press START/STOP. Repeat as needed.
  • Pre-Use Check: Always ensure the silicone ring is well-seated and the anti-clog cap is properly mounted before use. Also, check the pressure release valve and float valve for clogging.

The Ninja Foodi SmartLid Multi-Cooker is designed for ease of use and safety, providing a comprehensive cooking solution for various culinary needs.

Ninja Doodi SmartLid OL550UK Specifications

General IconGeneral
BrandNinja
ModelDoodi SmartLid OL550UK
CategoryKitchen Appliances
LanguageEnglish

Related product manuals