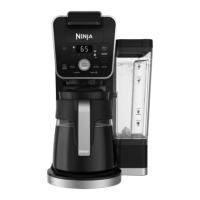
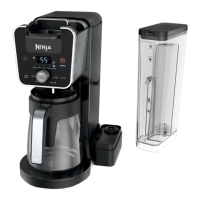
The Ninja DualBrew Specialty Coffee System is a versatile coffee maker designed to brew both ground coffee and coffee pods, offering a range of brew sizes and styles. This quick start guide provides essential information for setting up, operating, and maintaining the unit.
Function Description:
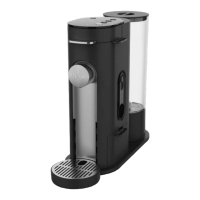
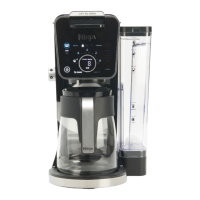
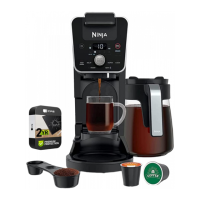
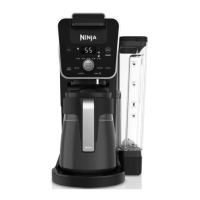
The Ninja DualBrew Specialty Coffee System allows users to brew coffee using either ground coffee or K-Cup pods. It features a "DualBrew" capability, meaning it can accommodate both brewing methods. The system offers various brew sizes, from single cups to full carafes, and multiple brew styles including Classic, Rich, Over Ice, and Specialty. The Specialty brew is a super-rich concentrate ideal for making coffee-based drinks like cappuccinos and lattes, and it brews only 4 oz. The Over Ice brew is specifically designed to brew hot coffee over ice without watering it down. An Intelligent Warming Plate automatically activates for Classic or Rich carafe brews, keeping coffee warm for up to 2 hours, with an adjustable duration of up to 4 hours. The unit also includes an integrated frother for preparing hot or cold frothed milk.
Important Technical Specifications:
- Water Reservoir: 70 oz. removable water reservoir.
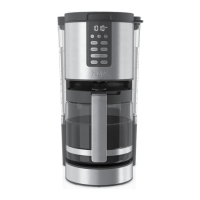
- Carafe: 14 cup glass carafe.
- Brew Sizes (Grounds):
- 8 oz.
- 10 oz.
- 12 oz.
- 15 oz.
- 18 oz.
- 28 oz.
- 40 oz.
- 52 oz.
- 65 oz.
- Brew Sizes (Pods):
- 6 oz.
- 8 oz.
- 10 oz.
- 12 oz.
- Specialty Brew Size: 4 oz.
- Filter Type: Permanent filter included, also compatible with #4 paper cone filters for ground coffee.
- Pod Compatibility: K-Cup pods only. Not compatible with reusable K-Cup filters.
Usage Features:
- First Brew (Priming): Before first use, the brewer needs to be primed. This involves plugging it in, filling the water reservoir to the "Full" line, removing the Ninja Pod Adapter, sliding the Sliding Lid into the closed position, placing the empty carafe under the brew basket, and running a Full Carafe, Classic brew. After the brew, discard the water.
- High-Altitude Calibration: For users in high-altitude areas, a calibration brew is required to prevent excessive steaming. Instructions for this are found in the Owner's Guide.
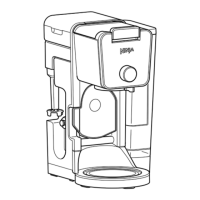
- Ninja Pod Adapter: The unique Ninja Pod Adapter comes pre-installed. It must always be inserted over the brew basket when brewing pods. To install, align the position indicator with "LOCK," pull the handle toward you, lift to open, insert a pod, firmly push down the handle to pierce the pod. To uninstall, remove the used pod, close the handle, push the handle away to "REMOVE" position, then lift the adapter out.
- Sliding Lid: Used only for brewing loose coffee grounds. It requires the Ninja Pod Adapter to be removed first. Slide the lid toward you until it clicks into place.
- Brew Basket: Must always be inserted, whether brewing grounds or pods. When brewing grounds, either the permanent filter or a paper filter must be inserted. When brewing pods, no filter is inserted into the brew basket itself, as the pod acts as its own filter.
- Ninja Smart Scoop™: A specialized scoop for accurately measuring coffee grounds. Recommended level scoops vary by brew size: 2-3 small scoops for 8 oz., 3-5 small scoops for 10-12 oz., 3-5 big scoops for 15-18 oz., and 4-7 big scoops for 28-65 oz. Users are advised to use fewer scoops for decaf coffee and to avoid using a paper filter with a permanent filter simultaneously.
- Drip Stop: A manual handle to close off the brew basket, preventing coffee from dispensing. It can be opened or closed at any point before, during, or after a brew. This allows for pausing a brew to pour a cup or stopping drips after a brew is complete.
- Frothing: The integrated frother does not heat milk. To froth, add milk to a cup (about ½ full). For cold froth, proceed directly. For hot froth, microwave the milk for 45-60 seconds. Swing the frother arm forward, twist the whisk onto the frother, submerge the whisk just below the milk surface, and press/hold the button on top for 30-45 seconds.
- Vessel Placement:
- Cup: Pull down the cup platform.
- Travel Mug & XL Sizes: Place on the base of the brewer.
- Carafe: Place on the Intelligent Warming Plate.
- Brewing Process: Press the "START BREW" button. A progress bar will illuminate. The brew cycle may pause multiple times, which is normal, allowing for full flavor extraction.
- Coffee Temperature Guidance: The type of cup significantly impacts coffee temperature. Ceramic mugs can steal heat, especially if cold. Pre-warmed ceramic mugs or paper cups help maintain hotter temperatures. Cold milk also lowers coffee temperature.
Maintenance Features:
- Frother Whisk Cleaning: After frothing, remove the whisk by twisting it to the left. Keep the cup below the whisk while carrying it to the sink or dishwasher for easy cleaning.
- Intelligent Warming Plate: The warming plate remains illuminated until it has cooled down.
- General Cleaning: The guide emphasizes reading the enclosed Owner's Guide for detailed instructions, which would include cleaning procedures.
- Safety: A warning advises against reaching across the top of the brewer to froth to avoid contact with steam and hot surfaces. The carafe is made of specialized glass safe for use with the brewer; no other glassware should be used. The carafe should not be put in the microwave.