Do you have a question about the Ninja DualBrew CFP451CCO Series and is the answer not in the manual?
Essential safety instructions for operating the coffee maker, covering electrical safety, child safety, and proper handling.
Guidelines on using accessories, placement, intended use, and avoiding hot surfaces or steam during operation.
Instructions for unplugging, cleaning, and maintaining the appliance to prevent hazards and ensure proper function.
Information regarding the power supply cord and the prohibition of using extension cords with the product.
Explanation of indicators that show the brewer's readiness for grounds or pods, and what 'No State' signifies.
Instructions on how to set the brewer's clock and the importance of resetting it after a power loss.
Procedure for high-altitude areas to calibrate the brewer for optimal water boiling point detection and consistent brewing.
Chart detailing approximate brew volumes for various sizes and brew styles for both grounds and pods.
Guidance on using the Smart Scoop or chart to determine the correct amount of coffee grounds for each brew size.
Step-by-step instructions for brewing coffee using grounds, including filter placement and sliding lid operation.
Instructions for brewing coffee using pods with the Ninja Pod Adapter, ensuring proper installation and operation.
Details on Classic, Rich, Over Ice, and Specialty brew styles, including specific preparation and brewing notes.
Specific instructions for brewing Over Ice coffee, emphasizing the use of ice-filled vessels for concentrated flavor.
Information on the Specialty Brew function, noting its consistent yield and specific brewing process.
Explanation of the automatic warming plate function for carafe brews and how to manually activate it.
Instructions on how to adjust the duration of the Intelligent Warming Plate, up to a maximum of 4 hours.
Step-by-step guide to setting a future brew time, ensuring the brewer remains powered on.
How to use the Drip Stop to control coffee flow, including manual operation and automatic reminders.
Instructions for using the integrated frother to froth milk, noting it does not heat the liquid.
Details on which parts are dishwasher safe and how to hand-wash components like the brew basket and sliding lid.
Recommendations for cleaning the water reservoir, either by hand-washing or placing it in the dishwasher.
Guidance on cleaning the glass carafe using warm, soapy water or the dishwasher, and avoiding abrasive materials.
Instructions for removing, hand-washing, and reinstalling the sliding lid, noting it is not dishwasher safe.
How to carefully clean the Ninja Pod Adapter, paying attention to the needles and pod holder area.
Steps for removing and cleaning the brew basket after use with grounds or pods.
Information on cleaning cycles for descaling the brewer, triggered by the Intelligent Clean Cycle Indicator.
Guidance on selecting the correct cleaning mode (Grounds or Pods) based on usage patterns.
Advice on reducing sediment by using coarser grounds or paper filters, and avoiding combined filter use.
Troubleshooting for cold Over Ice brews, emphasizing filling the vessel with ice before brewing.
Tips for stronger coffee, including using the Rich brew setting or increasing coffee grounds.
Tips for milder coffee, suggesting the Classic brew setting or reducing coffee grounds.
Explanation that brew times vary by size and style, with progress bar indicating status.
Reference to the Approximate Brew Volumes chart to prevent overflow issues.
Causes and solutions for brew basket overflow, including filter use, coffee grind, and decaf coffee.
Explanation that residual water in the reservoir is normal for optimal pump performance.
Troubleshooting steps for leaks, including checking the reservoir valve, brew basket, and contacting customer service.
Guidance on running a clean cycle when the indicator illuminates orange, especially with hard water.
Ensuring the Ninja Pod Adapter is correctly seated and locked into the brew basket.
Normal splatter is expected; use the cup tray to minimize distance between cup and outlet.
Ensuring the water reservoir is properly installed and seated firmly on its base.
Explanation of common display messages like 'End', 'Add Wtr', 'CLn', and 'STOP' during operation.
Instructions to contact customer service if the display shows an 'Er' message with a number.
Details on what the one-year limited warranty covers, including repairs or replacements for defective units.
Exclusions from the warranty, including normal wear, commercial use, and damage from misuse or mishandling.
Instructions on how to obtain warranty service, including visiting the support website or contacting customer service.
Steps for initiating a warranty claim, requiring product registration and proof of purchase.
Information on how state or provincial laws may affect warranty rights, particularly regarding incidental damages.
| Brand | Ninja |
|---|---|
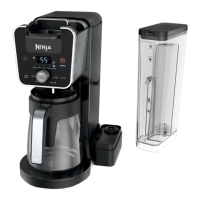
| Model | DualBrew CFP451CCO Series |
| Category | Coffee Maker |
| Language | English |