EasyManua.ls Logo

Ninja OO101UK - User Manual

Ninja OO101UK
8 pages
Print Icon
To Next Page IconTo Next Page
Loading...
Read and review instructions to understand operation and use of product.
Indicates the presence of a hazard that can cause personal injury, death or substantial
property damage if the warning included with this symbol is ignored.
Avoid contact with hot surface. Always use hand protection to avoid burns.
For outdoor use only.
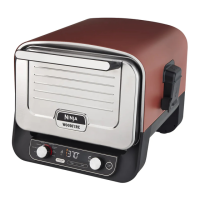
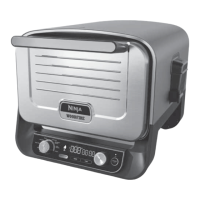
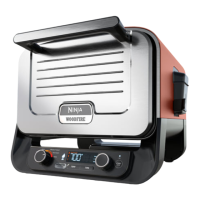
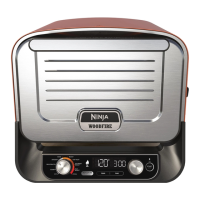
WOODFIRE OUTDOOR OVEN
OO101UK | Instructions
IMPORTANT SAFETY INSTRUCTIONS
HOUSEHOLD USE ONLY • READ ALL INSTRUCTIONS BEFORE USE
WARNING Failure to follow these instructions could result in electric shock, fire or
burn hazard which could cause property damage, personal injury, or death. When using electrical
appliances, basic safety precautions should always be followed, including the following:
1 To eliminate a choking hazard for young children, discard all packaging materials immediately upon
unpacking.
2 DO NOT use this appliance for anything other than its intended use.
3 DO NOT use in moving vehicles or boats. Misuse may cause injury.
4 DO NOT use indoors. This oven is designed for OUTDOOR USE ONLY in a well-ventilated area. If used
under any overhead cover, toxic fumes, including carbon monoxide, may accumulate and cause serious
bodily injury or death.
5 This appliance can be used by persons, including children, with reduced physical, sensory, or mental
capabilities or lack of experience and knowledge if they have been given supervision or instruction
concerning use of the appliance in a safe way and understand the hazards involved
6 To avoid property damage from flame or heat maintain a minimum distance of 92cm (3 feet) from rear,
sides and top to walls, rails or other combustible constructions.
7 Ensure the surface is level, stable, clean and dry. DO NOT place the appliance near the edge of the
surface the oven is placed on during operation.
8 Use care when opening the oven to avoid burns. ALWAYS open door partway before fully opening to
check for any flare up as some foods may cause fats, oils or grease to splash and create flare up or flame.
9 Children should be supervised to ensure that they do not play with the appliance. Keep the appliance and
its cord out of reach of children. DO NOT allow the appliance to be cleaned or maintained by children.
10 The appliance should be supplied through a residual current device (RCD) having a rated residual
operating current not exceeding 30mA. The appliance is to be connected to a socket-outlet having an
earthing contact.
11 A short power-supply cord is provided to reduce the risk of children grabbing the cord or becoming
entangled and to reduce the risk of people tripping over a longer cord. Longer detachable power-supply
cord or extension cords are available and may be used if care is exercised in their use.
12 To avoid property damage and burn injury from flame or heat, ALWAYS maintain a minimum safe
distance of at least 30cm (1 foot) from the pellet box during smoking. Small flames can come out from
the pellet box if the oven lid is lifted in windy conditions.
13 To avoid burn injury, ALWAYS use pellet scoop when adding pellets to smoker box. DO NOT add pellets
by hand.
14 To avoid burn injury and property damage, make sure the lid of the smoke box is fully closed to prevent
flames from escaping out of the smoke box.
15 Pellets may continue to burn after cook time is complete. Do not touch or remove the smoke box until
the oven has stopped smoking, pellets have completely burnt out and the smoke box has cooled.
16 To avoid personal injury and burns allow to cool before cleaning, disassembly, putting in or taking off
parts and storage.
TECHNICAL SPECIFICATIONS
Voltage: 220-240V~, 50-60Hz
Power: 2400W
RECORD THIS INFORMATION
Model Number: ��������������������
Serial Number: ���������������������
Date of Purchase: �������������������
(Keep receipt)
Store of Purchase: ������������������
REGISTER The PURCHASE
ninjakitchen.co.uk/registerguarantee
Scan QR code using mobile device
THANK YOU for purchasing the Ninja® Woodfire Outdoor Oven
www.ninjatestkitchen.eu
ninjakitchen.co.uk
Illustrations may dier from actual product. We are constantly striving to improve our products, therefore
the specifications contained herein are subject to change withoutnotice.
NINJA is a registered trademark in the United Kingdom of SharkNinja Operating LLC.
© 2023 SharkNinja Operating LLC
SharkNinja Europe Limited,
3150 Century Way,
Thorpe Park,
Leeds,
LS15 8ZB, UK
ninjakitchen.co.uk
SharkNinja Germany GmbH,
Rotfeder-Ring 9,
60327 Frankfurt am Main,
Germany
ninjakitchen.eu
OO101UK�IB�MP�230703�Mv2

Questions and Answers

Summary

Important Safety Instructions

Understanding Safety Symbols and Warnings

Explanation of hazard symbols, hot surface warnings, and outdoor use requirements.

General Safety Precautions (Part 1)

Crucial safety measures for appliance use, including packaging disposal and avoiding misuse.

Important Safety Instructions (Cont.)

General Safety Precautions (Part 2)

Further safety guidelines covering appliance operation, maintenance, and electrical safety.

Parts and Accessories

Appliance Components Identification

List and description of the main parts and accessories included with the oven.

Before First Use

Initial Unpacking and Cleaning

Steps for unpacking, cleaning accessories like the frame, tray, and rack before initial use.

Powering the Oven

Connecting to Power and RCD

Instructions for plugging in, testing, and activating the residual current device (RCD).

Extension Cord Guidelines

Smoke Box Usage

Installing and Filling the Smoke Box

Guide to installing the smoke box and filling it with Ninja Woodfire Pellets.

Accessory Frame Installation

Placing Accessories in the Frame

Instructions on correctly inserting the accessory frame and associated items like the pizza stone or pro-heat tray.

Control Panel Overview

Control Panel Buttons and Dials

Explanation of the function of each button, dial, and indicator light on the control panel.

Cooking Function Descriptions

Detailed descriptions of available cooking functions like Bake, Smoker, and Roast.

Using Cooking Functions - Part 1

Bake, Dehydrate, Warm Operations

Step-by-step guide for operating the Bake, Dehydrate, and Warm cooking modes.

Smoker Function Operation

Instructions for using the Smoker function, including pellet ignition and cooking process.

Using Cooking Functions - Part 2

Gourmet Roast and Max Roast Operations

Guides for operating the Gourmet Roast and Max Roast functions, including preheating and cooking stages.

Pizza and Top Heat Operations

Instructions for using the Pizza function with preset types and the Top Heat function.

Cleaning and Maintenance

Oven Interior Cleaning

Procedure for cleaning the inside of the oven after each use.

Accessory Cleaning Procedures

Instructions for cleaning specific accessories like the smoke box, pizza stone, racks, and trays.

Troubleshooting Common Issues

Troubleshooting FAQs and Solutions

Answers to common problems such as unit not turning on or error messages.

Manufacturers Guarantee

Guarantee Registration and Coverage

Information on registering the guarantee, what is covered, and what is excluded.

Making a Guarantee Claim

Steps for contacting customer service and returning a defective product for repair or replacement.

Overview

The Ninja Woodfire Outdoor Oven is a versatile outdoor cooking appliance designed for a range of functions including baking, dehydrating, warming, smoking, roasting, and pizza making. It offers various cooking styles for pizza, such as Artisan, Thin, Pan, New York Style, Frozen, and Custom, catering to diverse culinary preferences. The oven is equipped with Woodfire Technology, allowing users to infuse food with a smoky flavor using genuine Ninja Woodfire Pellets.

Technical Specifications:

  • Voltage: 220-240V~, 50-60Hz
  • Power: 2400W

Usage Features:

The oven features an intuitive control panel with a left-hand dial for selecting cooking functions (BAKE, DEHYDRATE, WARM, SMOKER, TOP HEAT, GOURMET ROAST, MAX ROAST, PIZZA, and OFF). It includes TEMP and TIME buttons, along with a right-hand dial, to adjust temperature and cooking duration. A START/STOP button initiates or pauses cooking. The "WOODFIRE FLAVOUR" button activates the smoking function, though it cannot be used with the WARM function. An RCD (Residual Current Device) plug is provided for electrical safety, with a RESET button and indicator light (orange for ON, black for OFF).

Installation and Setup:

To begin, the RCD must be plugged into an electrical socket and switched on. The RESET button on the RCD should be pressed, and an orange light should illuminate, indicating it's functioning correctly. Pressing the TEST button should turn the light black, confirming proper operation. After testing, the RESET button is pressed again to re-illuminate the orange light, and the unit can be switched on using the on/off switch on the back of the control panel.

The Accessory Frame is installed in the bottom level of the oven. For pizza cooking, the Pizza Stone is placed on the Accessory Frame. For other functions, the Pizza Stone is removed, and the Pro-Heat Tray is placed on the Accessory Frame. If using the Roast Rack, it nests in the Pro-Heat Tray.

The Smoke Box is installed by inserting it firmly into place. Ninja Woodfire Pellets are added to the smoke box using the provided pellet scoop until filled to the top, ensuring not to overflow. The smoke box lid must then be closed. For optimal performance and flavor, only Ninja Woodfire Pellets should be used.

Cooking Functions Overview:

  • BAKE, DEHYDRATE, WARM: After installing the Accessory Frame, select the desired function. If using Woodfire Flavour, fill the smoke box with pellets and press the WOODFIRE FLAVOUR button. Set temperature and time using the TEMP and TIME buttons and the right-hand dial. Press START/STOP to begin preheating (5-25 minutes). Once preheated, "ADD FOOD, PRS START" will display. Place ingredients, close the door, and press START/STOP to begin cooking.
  • SMOKER: Install the Accessory Frame and Pro-Heat Tray (optional Roast Rack). Fill the smoke box with Ninja Woodfire Pellets. Select SMOKER, set temperature and time. Press START/STOP. The pellets will go through an ignition cycle (IGN) for 3-4 minutes, then cooking begins.
  • GOURMET ROAST: Install the Accessory Frame. Select GOURMET ROAST. If using Woodfire Flavour, fill the smoke box and press the WOODFIRE FLAVOUR button. Stage 1 LED illuminates (high temperature). Set TEMP and TIME for Stage 1. Push the right-hand dial to turn on Stage 2 LED and repeat setting TEMP and TIME for Stage 2. Press START/STOP to preheat (15-20 minutes). Once preheated, "ADD FOOD PRS START" displays. Place ingredients, close the door, and press START/STOP. The oven automatically switches to Stage 2 settings after Stage 1.
  • MAX ROAST: Install the Accessory Frame and Pro-Heat Tray. Select MAX ROAST. If using Woodfire Flavour, fill the smoke box and press the WOODFIRE FLAVOUR button. Set TEMP and TIME. Press START/STOP to preheat (15-20 minutes). Once preheated, "ADD FOOD PRS START" displays. Place ingredients, close the door, and press START/STOP. The unit may beep and display "FLIP" for 30 seconds (optional).
  • PIZZA: Install the Accessory Frame and Pizza Stone. Select PIZZA. If using Woodfire Flavour, fill the smoke box and press the WOODFIRE FLAVOUR button. Select the desired pizza type (Artisan, Thin, Pan, New York Style, Frozen, or Custom). Set TIME (temperature is manual). Press START/STOP to preheat (10-25 minutes). Once preheated, "ADD FOOD PRS STRT" displays. Place pizza directly on the stone and press START/STOP. For back-to-back pizzas, wait for "READY" to appear before adding the next pizza.
  • TOP HEAT: Install the Accessory Frame and Pro-Heat Tray (optional Roast Rack). Select TOP HEAT. Set TEMP and TIME. Press START/STOP to begin cooking.

Maintenance Features:

  • Cleaning the Oven: The oven should be thoroughly cleaned after each use, allowing it to cool completely before cleaning. Unplug the grill, keep the door open for quicker cooling. Use soap and water with a nylon brush for cleaning the interior.
  • Smoke Box: Remove and discard contents after each use. Cleaning is not required after every use, but a wire brush can remove creosote after every 10 uses. Liquid cleaning solutions should not be used on the smoke box.
  • Pizza Stone: Allow the pizza stone to cool completely before cleaning. Scrape lightly with a non-metal spatula or knife. Wipe remaining debris with a soft cloth. The pizza stone should not get wet or be placed in a dishwasher.
  • Roast Rack/Accessory Frame: Allow to cool, then wash in warm, soapy water with a rough sponge, or place in the dishwasher. Rinse and towel-dry.
  • Pro-Heat Tray: Allow to cool. Do not put in the dishwasher. Wash in warm, soapy water with a rough sponge to remove discoloration. Avoid steel wool or abrasive scrubbers to prevent scratching. Rinse and dry with a towel.

Troubleshooting:

The manual provides solutions for common issues such as the unit not turning on (check RCD, switch position), "Add Food" display (preheating complete), "E" display (unit malfunction), "CLD" display (cold smoking, not for cooking), flames from the pellet box (windy conditions), and long preheat times. It also advises on pellet storage (dry area), disposal of burnt pellets (allow to cool), and whether Woodfire Flavour can be turned off during a cook cycle. The manual emphasizes contacting customer service for persistent issues.

Ninja OO101UK Specifications

General IconGeneral
BrandNinja
ModelOO101UK
CategoryOven
LanguageEnglish

Related product manuals