8 9ninjakitchen. comninjakitchen.com
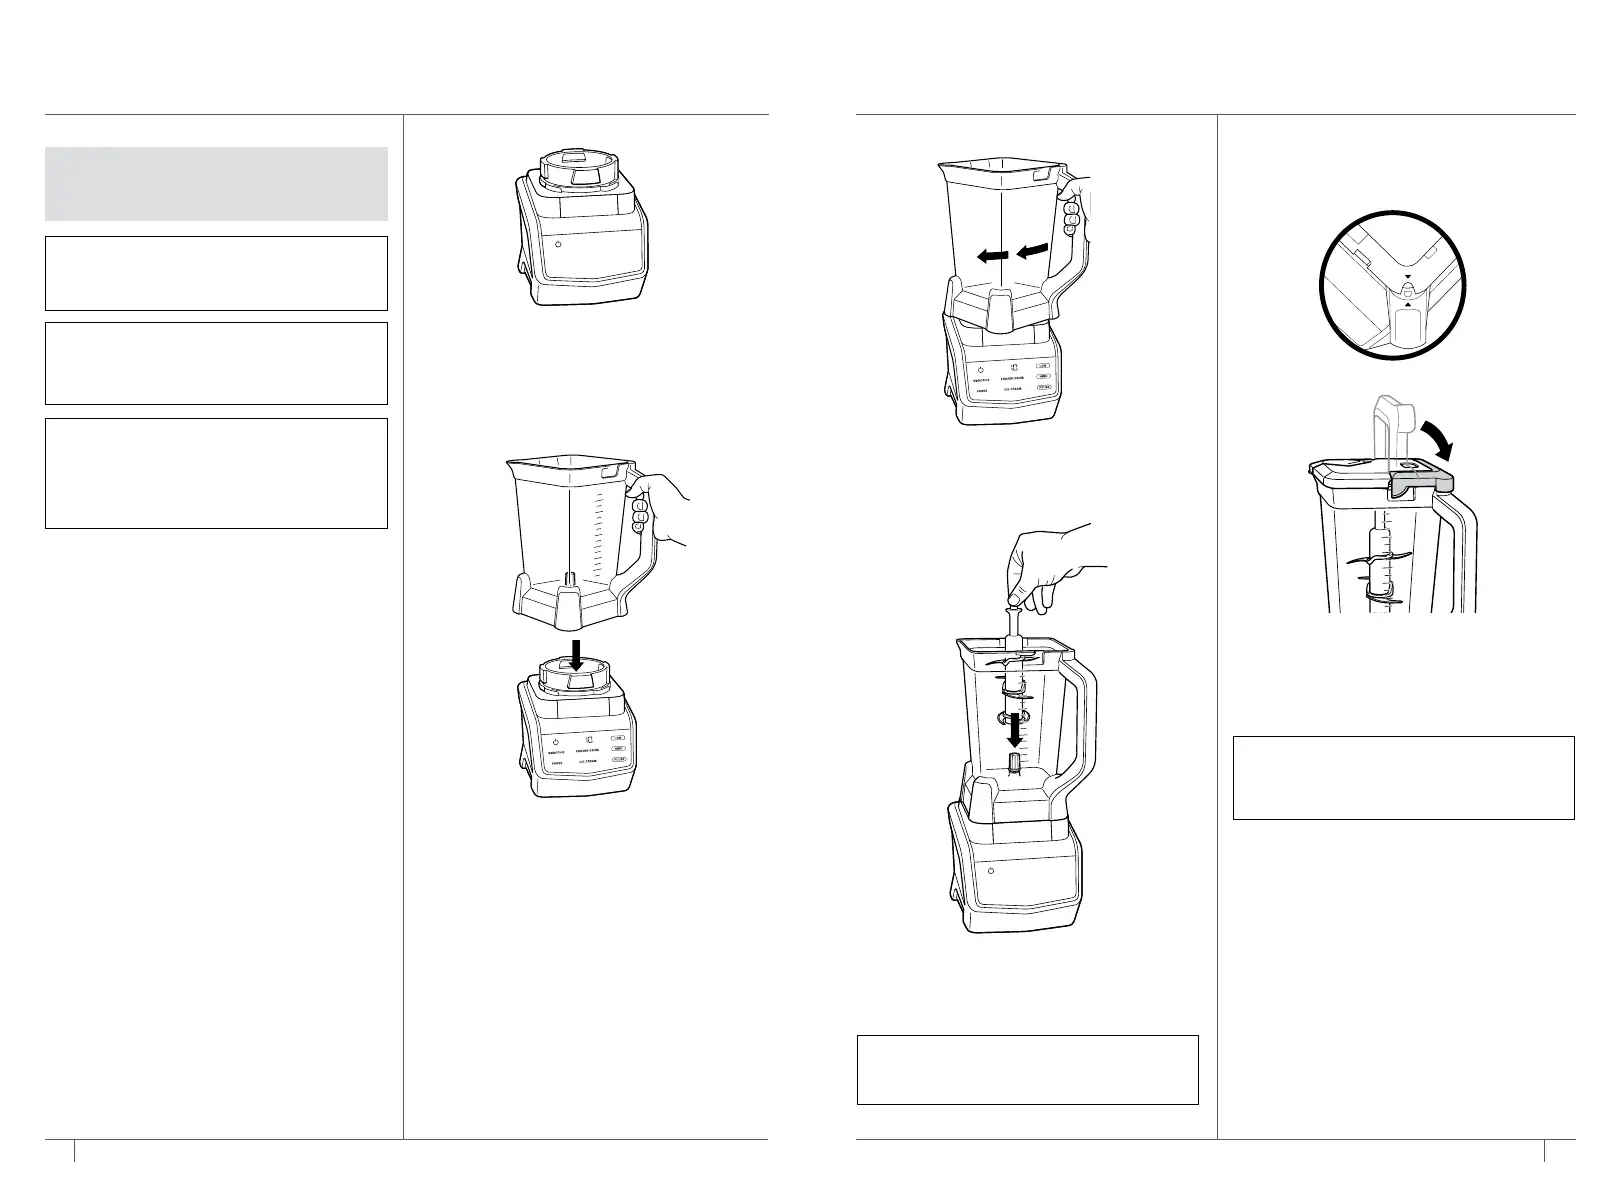
2 Lower the pitcher onto the motor base,
positioning it in a diamond position,
with the LOCK symbols visible on the
motor base.
ASSEMBLING & USING
YOUR TOTAL CRUSHING® PITCHER
3 To lock the pitcher in place, rotate it to
the left until you hear a click.
5 Add ingredients, making sure to not
exceed the Max Fill line marked on the
side of the pitcher.
4 Exercising care, grasp the Stacked
Blade Assembly by the top of the shaft
and place it onto the drive gear inside
the pitcher.
IMPORTANT: Review all warnings on
pages 4–5 before proceeding.
1 Plug in motor base and place on a
clean, dry, level surface such as a
countertop or table.
NOTE: The Stacked Blade Assembly
will fit loosely onto the drive gear.
TIP: If the Stacked Blade Assembly is
not fully seated, you will not be able to
install and lock the lid into position.
NOTE: DO NOT add ingredients before
completing installation of the Stacked
Blade Assembly.
NOTE: The pitcher can be installed in
two dierent positions. The handle can
be positioned on the front-right corner
of the motor base or the front-left
corner of the motor base.
NOTE: The triangle symbols MUST be
aligned for the lid to lock into place
and the unit to operate.
6 Place the lid on the pitcher, aligning
the triangle symbol located on the lid
with the triangle symbol located on
the pitcher’s handle. Press down on the
handle until you hear a click.
 Loading...