10 11AU ninjakitchen.com.au | NZ ninjakitchen.co.nz
AU 61 2 8801 7666 | NZ 64 800 112 660
Proof
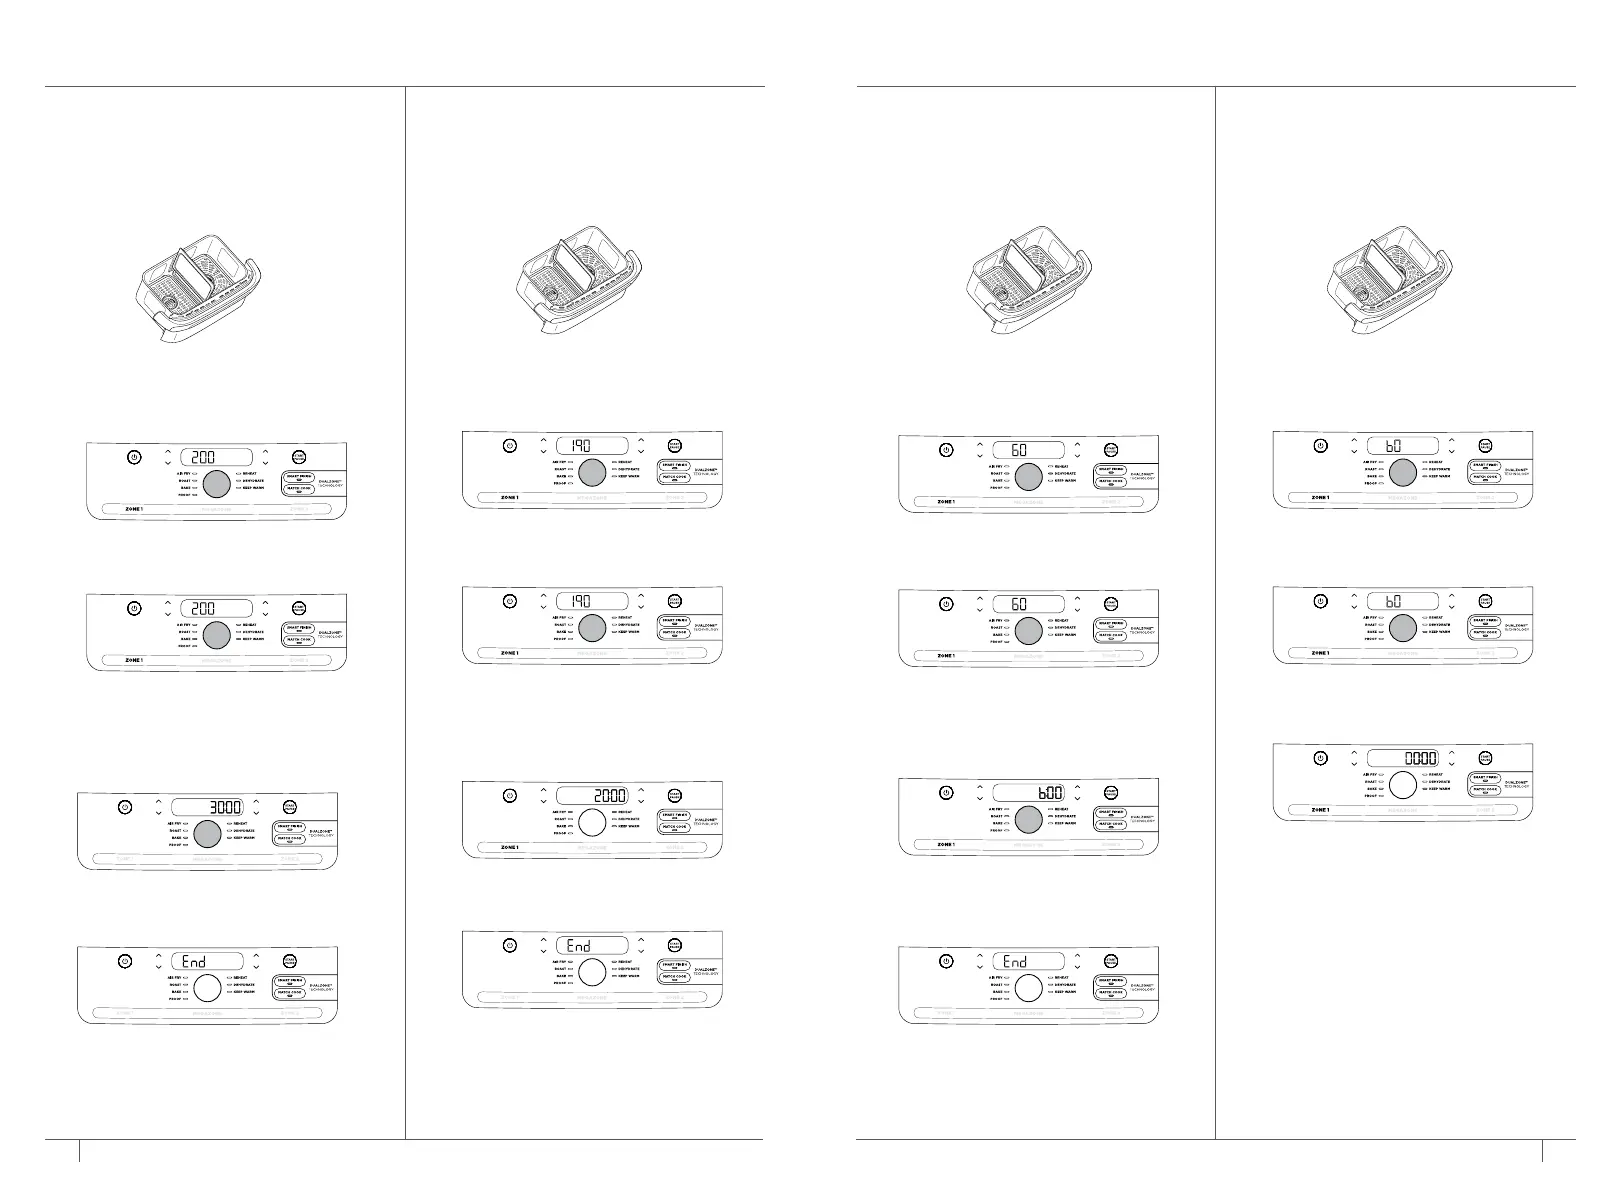
1 Install divider in the middle of the drawer.
2 Install the crisper plates in the drawer.
Place ingredients in the drawer, then
insert drawer in unit.
3 The unit will default to Zone 1 (to use
Zone 2 instead, select Zone 2). Select
PROOF.
4 Use the TEMP arrows to set the desired
temperature.
5 Use the TIME arrows to set the time in
1-minute increments up to 30 minutes.
Press the START/PAUSE button to
begin proofing.
6 When proofing is complete, the unit will
beep and “End” will appear on the display.
7 Remove ingredients by dumping
them out or using silicone-tipped
tongs/utensils.
COOKING IN YOUR XXXL FLEXDRAWER AIR FRYER – CONT.
Reheat
1 Install divider in the middle of the drawer.
2 Install the crisper plates in the drawer.
Place ingredients in the drawer, then
insert drawer in unit.
3 The unit will default to Zone 1 (to use
Zone 2 instead, select Zone 2). Use the
dial to select REHEAT.
4 Use the TEMP arrows to set the desired
temperature.
5 Use the TIME arrows to set the time
in 1-minute increments up to 1 hour.
Press the START/PAUSE button to
begin reheating.
6 When reheating is complete, the unit will
beep and “End” will appear on the display.
7 Remove ingredients by dumping
them out or using silicone-tipped
tongs/utensils.
Keep Warm
1 Install divider in the middle of the drawer.
2 Install the crisper plates in the drawer.
Place ingredients in the drawer, then
insert drawer in unit.
3 The unit will default to Zone 1 (to use
Zone 2 instead, select Zone 2). Use the
dial to select KEEP WARM.
4 Temp will default to 60°C to ensure food
is kept warm at a safe temperature.
5 Press the START/PAUSE button to begin
warming. Timer will count up from 00:00.
6 When you’re ready to serve your
food, remove ingredients by dumping
them out or using silicone-tipped
tongs/utensils.
Dehydrate
1 Install divider in the middle of the drawer.
2 Install the crisper plates in the drawer.
Place ingredients in the drawer, then
insert drawer in unit.
3 The unit will default to Zone 1 (to use
Zone 2 instead, select Zone 2). Use the
dial to select DEHYDRATE. The default
temperature will appear on the display.
4 Use the TEMP arrows to set the desired
temperature.
5 Use the TIME arrows to set the time in
15-minute increments from 1 to 12 hours.
Press the START/PAUSE button to
begin dehydrating.
6 When dehydrating is complete, the unit
will beep and “End” will appear on the
display.
7 Remove ingredients by dumping
them out or using silicone-tipped
tongs/utensils.
 Loading...