Please check the board and make sure all tubes are soldered correctly, then connect
the power adapter and check all functions following the user manual.
Assembly housing
The following parts are needed:
M3x18mm female-female for support top and bottom plate
M3x5mm female-female for support PCB board
M3 x 4mm for fix PCB board
Hexagon socket head screw
M3 x 5mm for fix PCB board
Hexagon socket head screw
M3 x 8mm for fix top and bottom plate
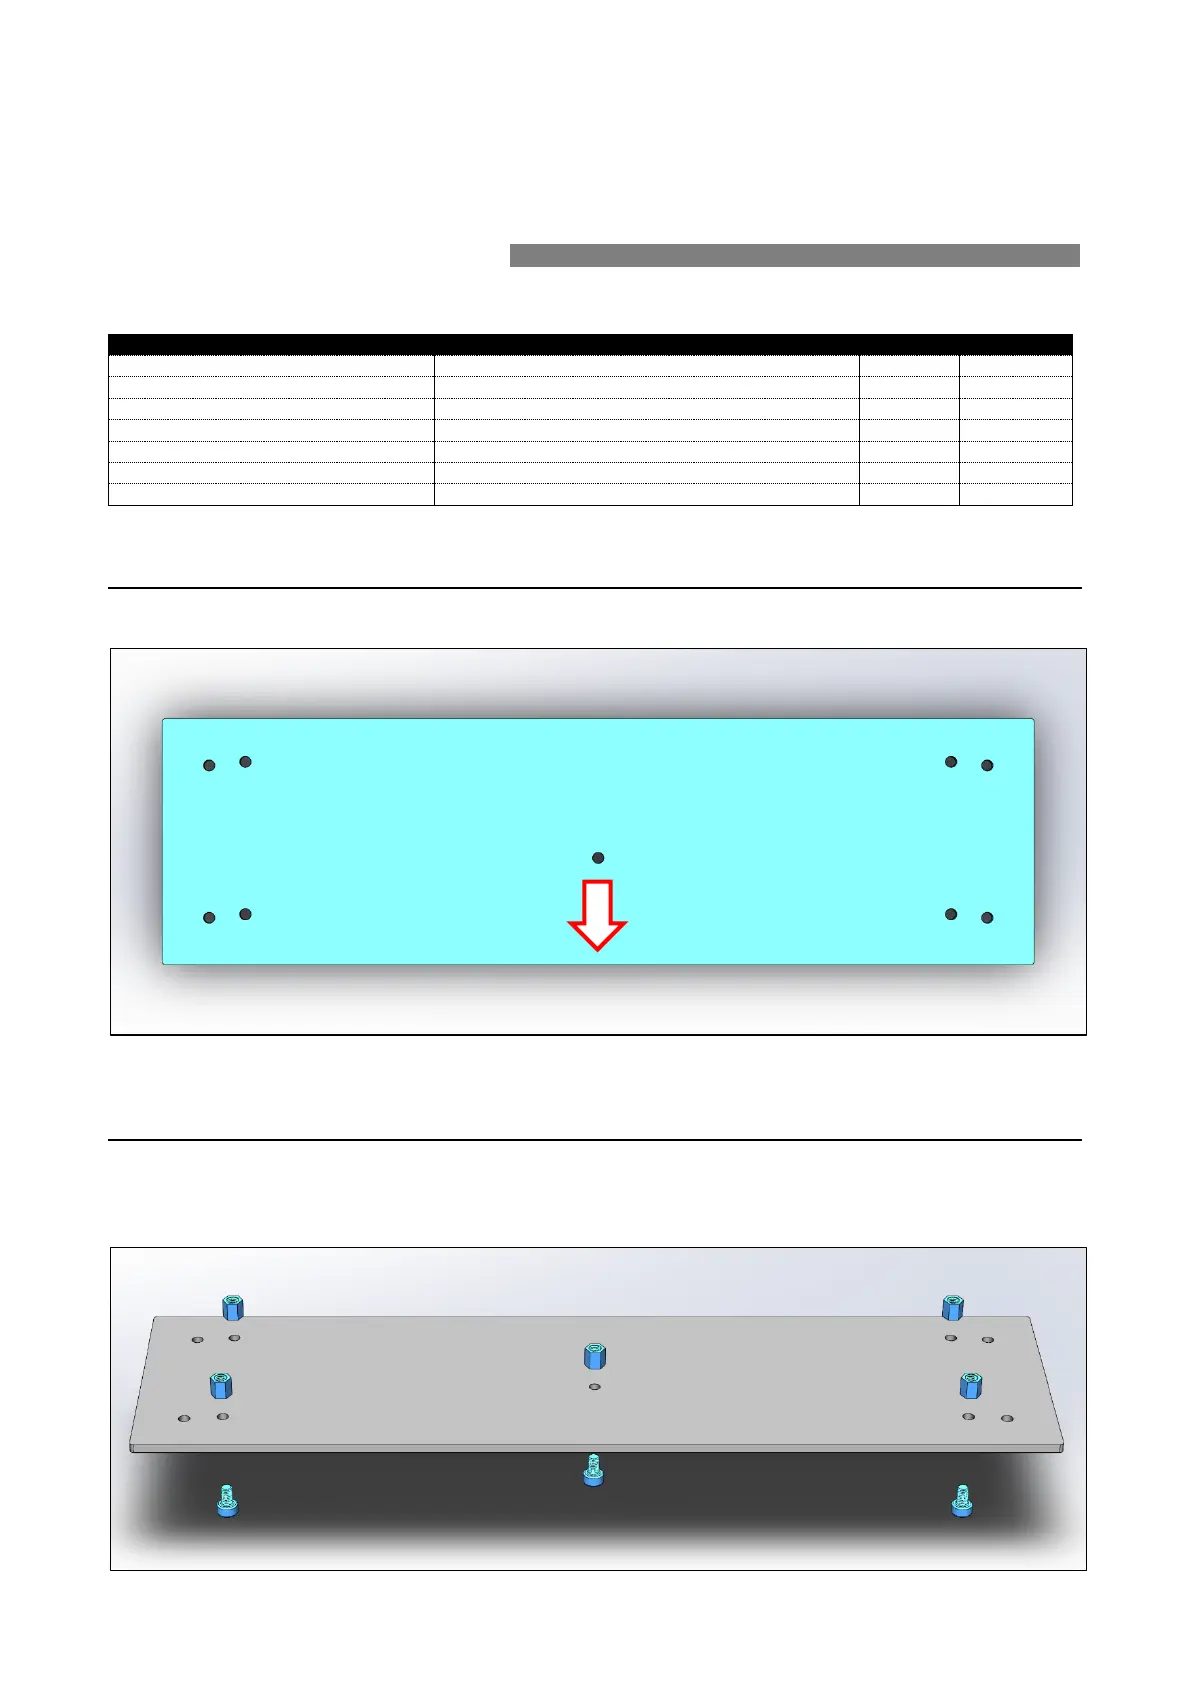
Step 1 Prepare bottom plate for assembly
Take out the bottom plate and place it in front of you following the picture below:
Step 2 Assemble spacers from bottom
Fix 5 pcs copper spacer (M3x5mm) with 5 pcs hexagon socket head screws (M3x5mm) from
the bottom.