5
Installaon
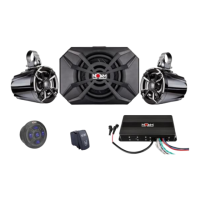
STEP 1: Slide the NR cables through the
Handlebar mount plate and screw the
plate to the back of the NR, using the 2
M4 cross head screw.
STEP 2: Use the M6 Hexagon socket
head screw to screw the handlebar
bracket to the back of the NR.
For a 7/8'' bar - use the Thick rubber ring
For a 1'' bar - use the Thin rubber ring
For a 1.25'' bar - place the bracket
directly on the bar (no rubber inserts
required).
Handlebar mount: This method
will allow you to mount your NR on
round 7/8'' , 1'' & 1.25'' handlebar.
STEP 2: Peel off the 3M scker's cover
STEP3: Place the NR on a perfectly flat surface.
4
Installaon
Mounng yor NOAM NR
The NR controller has 3 mounng opons:
1. Dash or Flush (Rear) mount
2. Surface mount
3. Handlebar mount (not available in the NUTV5 and NUTV5-S units)
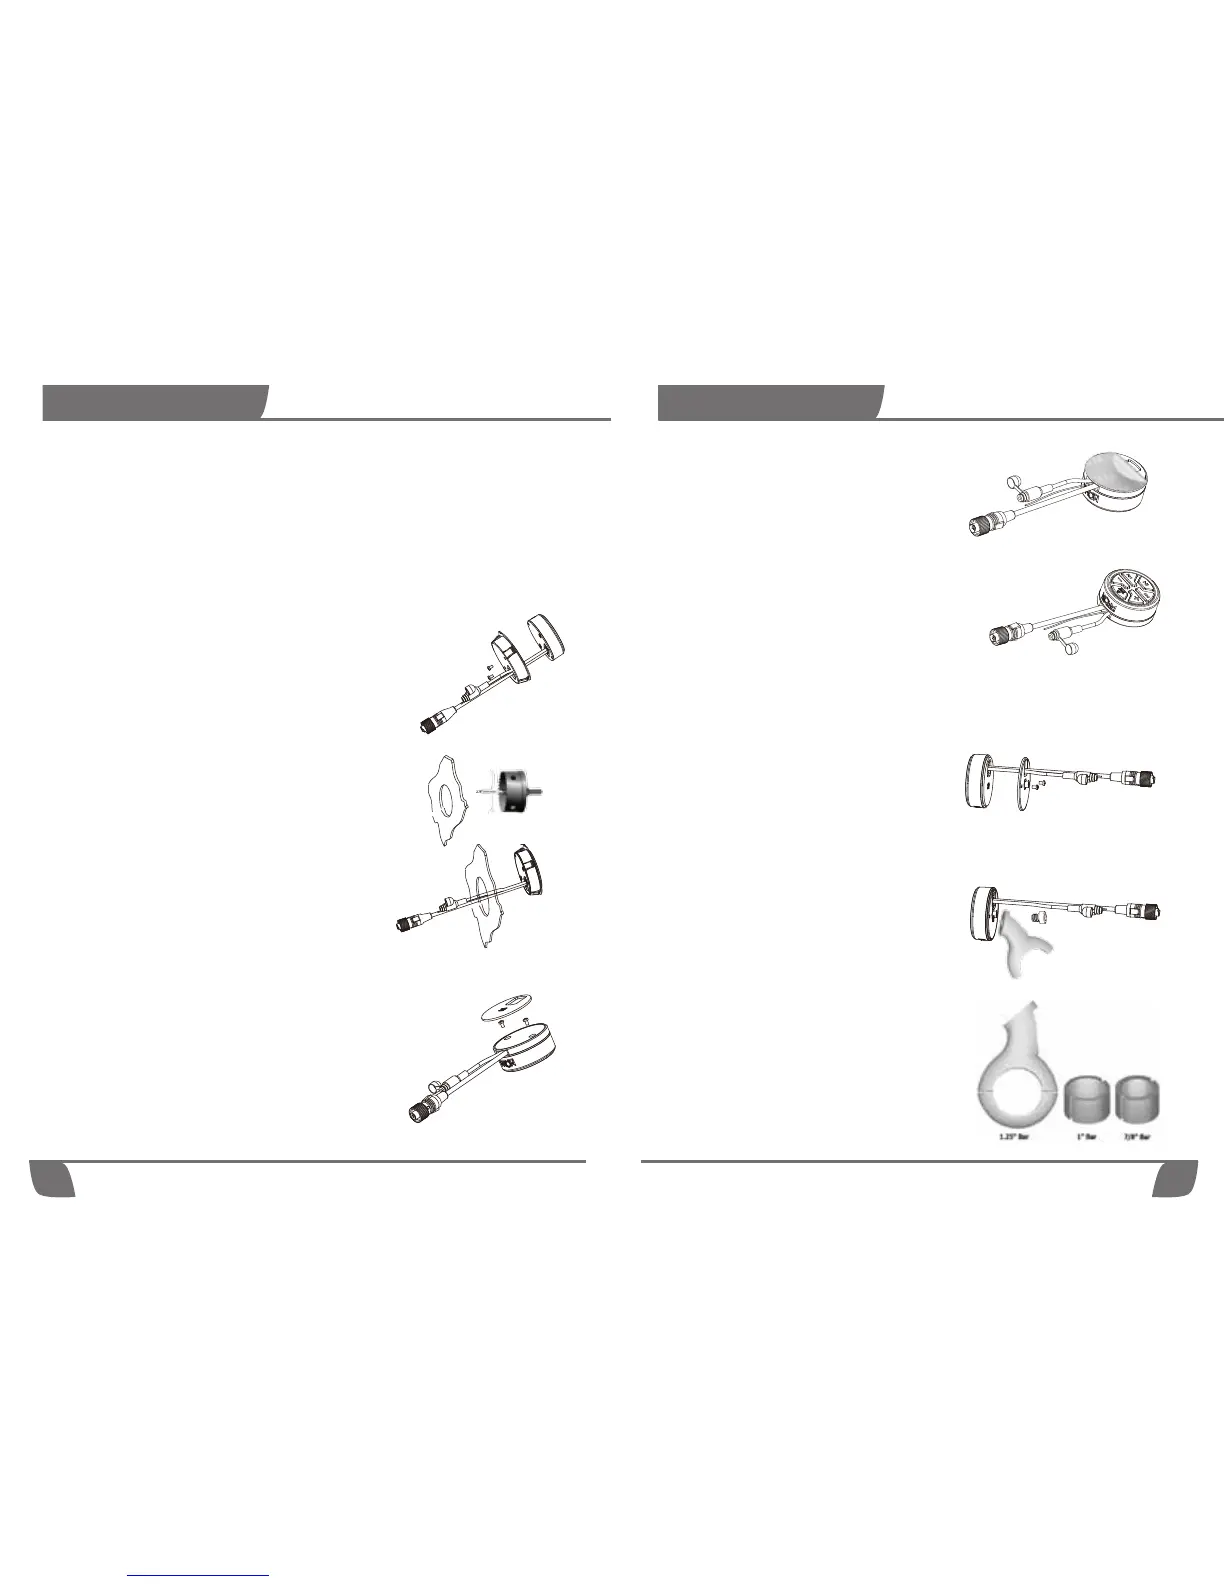
Dash or Flush (Rear) mount: This method will
allow the controller to sit flush to the mounng surface.
This requires a perfectly flat surface and ideally should
have access to the rear of the mounng plate.
STEP 1: Slide the NR cables through the Flush
mount plate and screw the plate to the back of
the NR, using the 2 M4 cross head screw.
STEP 2: Using a 2.75'' (70mm) hole saw, drill a
hole in your selected locaon. *Ensure you
have at least 1 inch of clearance on the back
side of your selected mounng locaon.
Surface mount: This method will allow you to
mount the NR on any perfectly flat surface. Using this
method will not require any cung or drilling of the
surface.
STEP 1: Place the NR cables in the rail found on the
inner side of the surface mount plate, and screw
the plate to the back of the NR, using the 2 M4
cross head screw. Then sck the 3M Scker on the
back of the surface mount plate.
STEP 3: Slide the NR through the hole.
STEP 3: Mount the bracket on the handlebar