esab gnitnuoM
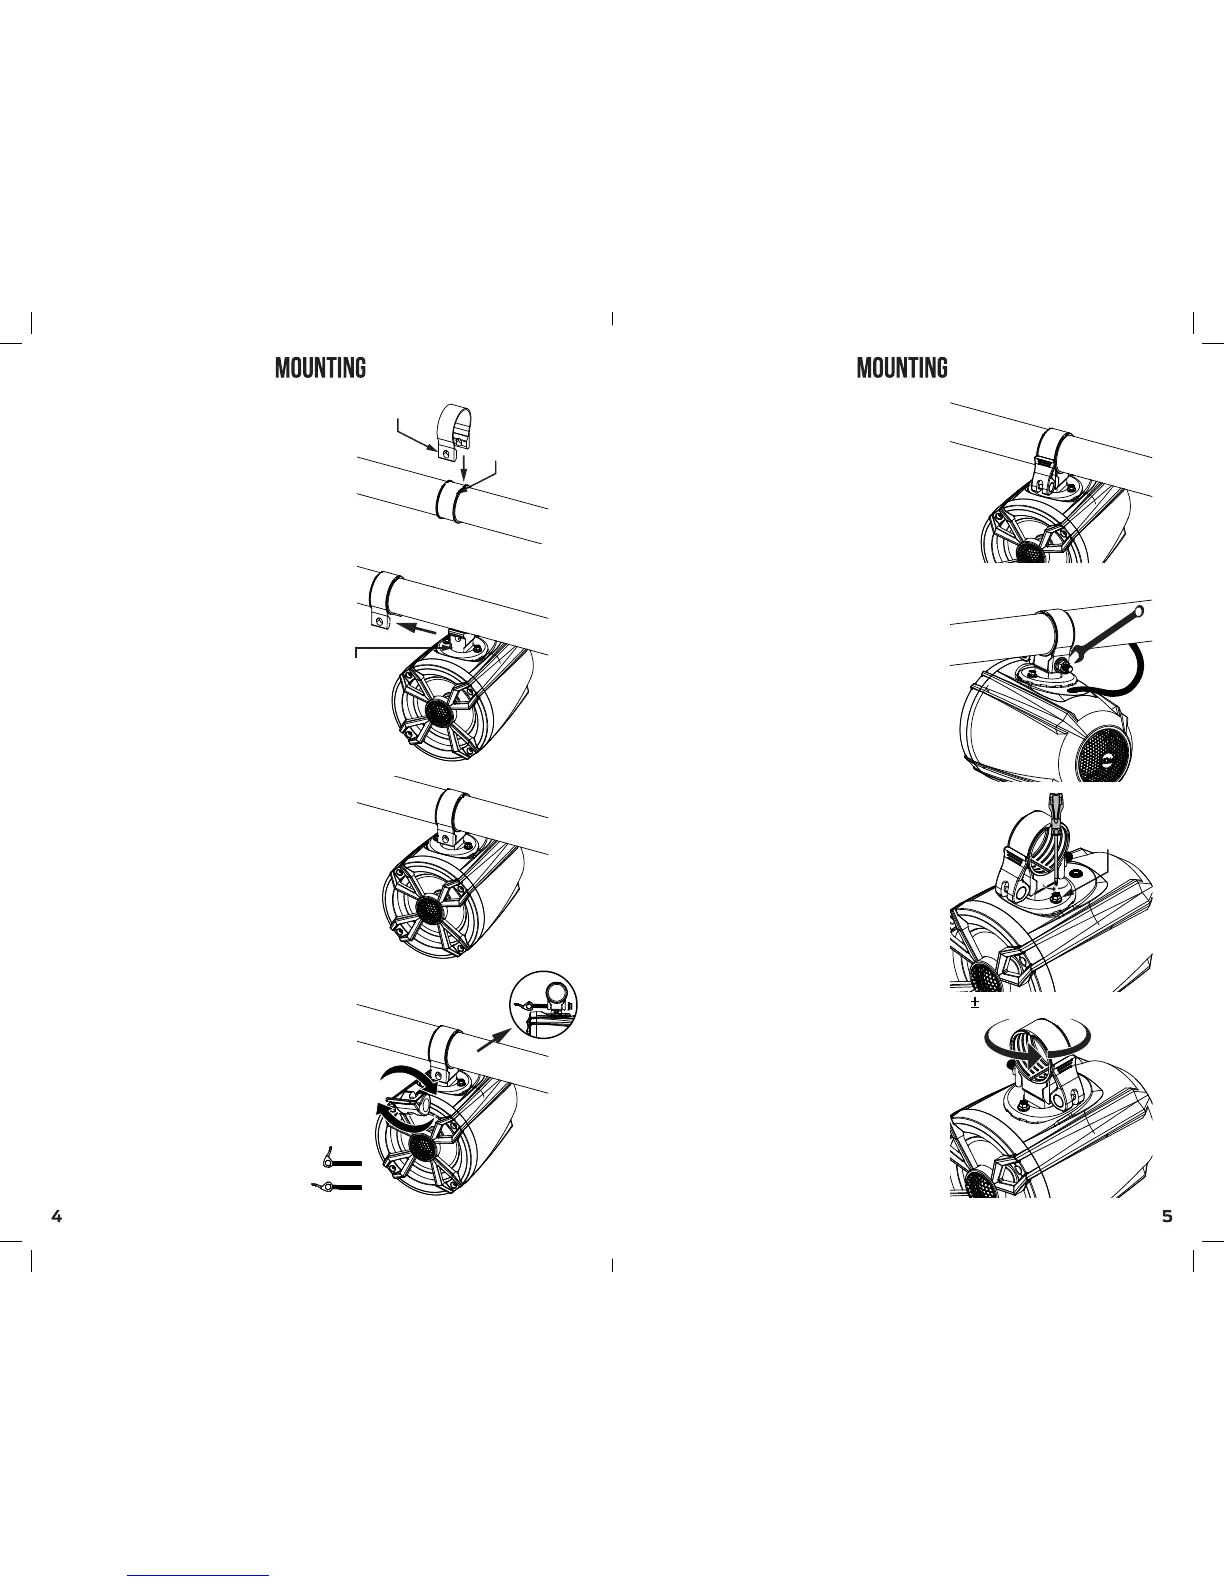
mounting band
rubber insert
Step 2: Hold the speaker in
place where the mounting base
fits the open space of the
mounting band.
Step 1: After choosing the
desired location, place the rubber
insert around the bar while its open
part is at the bottom. Then,
slide the mounting band over the
rubber insert and bar.
follow these instructions to avoid
scratching your bar.
Step 3: Slide the smart handle
screw through the mounting
band and base and screw it
to the Flange nut on the other end.
While opened, turn the smart handle
clockwise.
Step 3.1: Push the smart handle
to a closed position to tight the
mounting band on to the speaker’s
mounting base.
where you can push to close it by hand.
* note: screw the smart handle to a point
final tightening can be done easily using
a Wrench. see step 3.2.
Step 3.2: Using a 13mm nut Wrench,
tight the Flange nut for a safe
and secure grip of the speaker to
the bar.
note: after tightening the Flange nut,
it will be impossible to open the
smart handle by hand. Use a nut wrench
to loosen the smart handle’s grip.
Step 4: Setting angle (optional):
Using a Phillips screwdriver to
loosen the 2 screws found on the
speaker’s base will allow you to rotate
the speaker to a desired angle.
After setting the right angle, screw the 2
screws back to fix the angle.
70° Clamp Rotation
Phillips
Screw
‘closed’ position
‘opened’ position