EasyManua.ls Logo

NOCO Genius Genius G1100 User Manual

NOCO Genius Genius G1100
38 pages
To Next Page IconTo Next Page
Page #1 background imageLoading...
Page #1 background image
Welcome. Thank you for buying the NOCO Genius
®
G1100. Read and understand the User Guide before
operating the charger. For questions regarding our
chargers, view our comprehensive support information at
www.no.co/support. To contact NOCO for personalized
support (not available in all areas), visit www.no.co/connect.
What’s In The Box.
• G1100 Smart Charger
• (1) Battery Clamp Connectors
• (1) Eyelet Terminal Connectors
• User Guide
• Information Guide and Warranty
User Guide
G1100 V2.0
PRIOR TO USE, READ AND UNDERSTAND
PRODUCT SAFETY INFORMATION.
Failure to follow the instructions may result
in ELECTRICAL SHOCK, EXPLOSION,
or FIRE, which may result in SERIOUS
INJURY, DEATH, DAMAGE TO DEVICE or
PROPERTY. Do not discard this information.
DANGER
Cortesía de www.bateriasdelitio.eu
Question and Answer IconNeed help?

Do you have a question about the NOCO Genius Genius G1100 and is the answer not in the manual?

NOCO Genius Genius G1100 Specifications

General IconGeneral
ModelGenius G1100
Input Voltage100-240V AC
Input Frequency50/60Hz
Output Current1.1A
IP RatingIP65
TypeBattery Charger
Output Voltage6V, 12V
Battery Types SupportedAGM
FeaturesSpark-proof, reverse polarity protection
Charging ModesLithium

Summary

Critical Safety Warning: DANGER

Welcome and Product Overview

Contact Information

Product Description

Mounting Instructions

Charging Mode Selection

Standby

Charger is not charging, drawing minimal power. Orange LED illuminates.

12V NORM

For 12V Wet, Gel, MF, CA batteries. White LED illuminates.

12V COLD/AGM

For 12V batteries below 50°F or AGM batteries. Blue LED illuminates.

6V NORM

For 6V Wet, Gel, MF, CA batteries. White LED illuminates.

12V LITHIUM

For 12V lithium-ion batteries. Blue LED illuminates.

Battery Connection Procedure

Starting the Charging Process

Steps to verify connections and start the charging process. Orange LED indicates standby.

Interpreting Charge Status LEDs

Advanced Diagnostics and Error Codes

Detailed Charging Cycle

Step 1 & 2: Analyze & Diagnose

Checks battery's initial condition, voltage, state-of-charge, and health before charging.

Step 3: Recovery

Initializes desulfation process for deeply discharged or sulfated batteries.

Step 4: Initialize

Starts the charging process with a gentle (soft) charge.

Step 5: Bulk

Begins bulk charging, returning 80% of battery's capacity.

Step 6: Absorption

Brings charge to 90%, limiting gassing for battery life.

Step 7: Optimization

Finalizes charging, recaptures capacity, optimizes specific gravity for performance.

Step 8: Maintenance

Continuously monitors battery, initiates maintenance charge as needed, prevents overcharging.

Charging Times

Estimated time to charge batteries based on size (Ah) and depth of discharge (DOD).
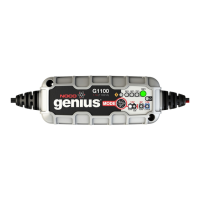
Technical Specifications

Related product manuals