EN
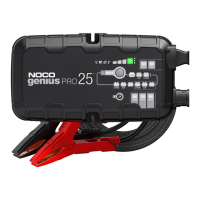
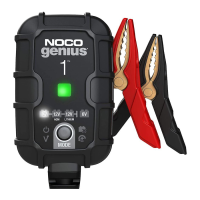
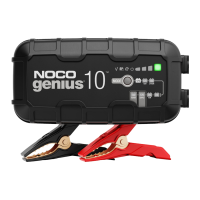
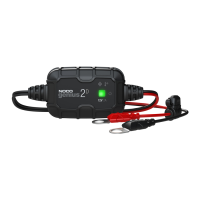
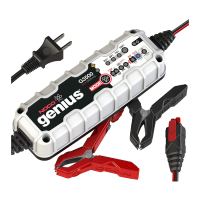
1.) Mode Button Push to cycle through charging Modes.
2.) Standby LED Illuminates when the charger is in Standby Mode, the charger is not charging or providing any power to the battery.
3.) Overvoltage Error LED Illuminates solid Red; Battery Voltage is above Protect voltage.
4.) Bad Battery Error LED Illuminates solid Red when connected battery will not hold a charge.
5.) Reverse Polarity Error LED Illuminates solid Red when reverse polarity is detected.
6.) Hot LED Illuminates solid or flashes Red when internal temperature is too high.
7.) Charge LED Indicates the connected battery(s) state-of-charge.
8.) Optimization Bar LED Slowly chases Green when the battery is fully charged and is in the optimization stage.
9.) 12V / 24V Supply Mode LED Illuminates solid Red when Supply mode is selected.
10.) Mode LED Indicates the Charge Mode the charger is currently in. Push the MODE button to cycle through charge Modes.
11.) «Press and Hold» Mode LED Mode button must be pressed and held for 3 seconds to enter the mode.
12.) 6V / 12V / 24V Repair Mode LED Illuminates solid Red when Repair mode is selected.
13.) 10A Mode Button Push to activate Reduced Charge Current Mode.
14.) 10A Mode LED “Reduced Charge Current Mode” Illuminates solid White when Reduced Charge Current Mode is active.