Do you have a question about the Noctua NH-L12S and is the answer not in the manual?
Instructions for removing the motherboard to install the backplate.
Guidance on attaching the backplate and securing it with thumb screws.
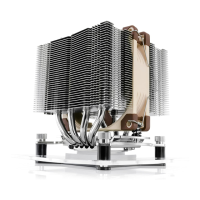
Procedure for installing the mounting bars using plastic spacers.
Instructions on cleaning the CPU and applying thermal paste.
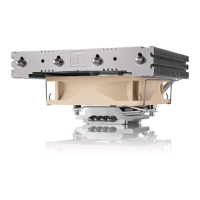
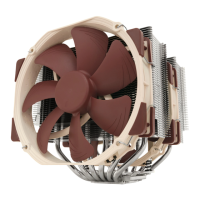
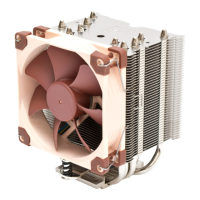
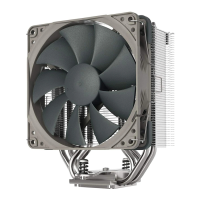
Details on fan placement for low profile and high clearance modes.
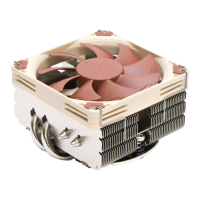
Steps to securely attach the heatsink onto the CPU.
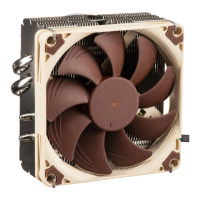
Connecting the fan and using the Low-Noise Adapter.
Procedure for installing mounting bars using bolts and thumb screws.
Guidance on applying thermal paste to the CPU heatspreader.
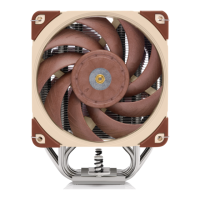
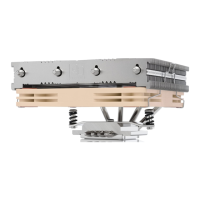
Options for fan placement: low profile vs. high clearance.
Steps to attach the heatsink to the CPU via mounting bars.
Connecting the CPU fan and option to use Low-Noise Adapter.
Instructions for removing the retention module or placing the backplate.
Guidance on selecting spacers and attaching mounting bars.
Procedure for cleaning the CPU and applying thermal paste.
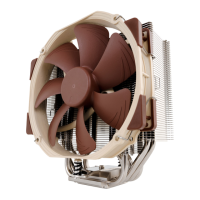
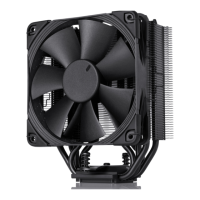
Details on fan placement for low profile and high clearance modes.
Steps to attach the heatsink to the CPU using mounting bars.
Connecting the fan and using the Low-Noise Adapter.
Information on the 6-year warranty and RMA service.
How to contact support and find answers on the website.
| Master (outer) case width | 308 mm |
|---|---|
| Master (outer) case height | 400 mm |
| Master (outer) case length | 330 mm |
| Master (outer) case weight | 10180 g |
| Harmonized System (HS) code | 84733080 |
| Quantity per master (outer) case | 8 pc(s) |
| Low-noise adaptor (LNA) | Yes |
| Type | Cooler |
| Airflow | 94.2 m³/h |
| Bearing type | Self-Stabilising Oil-pressure Bearing (SSO) |
| Fan diameter | 120 mm |
| Suitable location | Processor |
| Maximum air pressure | 1.53 mmH2O |
| Airflow with LNA (max) | 70.8 m³/h |
| Rotational speed (max) | 1850 RPM |
| Rotational speed (min) | 450 RPM |
| Noise level (high speed) | 23.9 dB |
| Noise level with LNA (max) | 16.8 dB |
| Compatible processor series | AMD A, Intel Celeron, Intel Pentium |
| Supported processor sockets | LGA 1150 (Socket H3), LGA 1151 (Socket H4), LGA 1155 (Socket H2), LGA 1156 (Socket H), LGA 2011 (Socket R), LGA 2011-v3 (Socket R), LGA 2066, Socket AM2, Socket AM2+, Socket AM3, Socket AM3+, Socket AM4, Socket FM1, Socket FM2, Socket FM2+ |
| Rotational speed with LNA (max) | 1400 RPM |
| Mean time between failures (MTBF) | 150000 h |
| Heatsink dimensions (W x D x H) | 128 x 70 x 146 mm |
| Material | Aluminium, Copper, Nickel |
| Fan connector | 4-pin |
| Fins material | Aluminum |
| Product color | Beige, Nickel |
| Number of fans | 1 fan(s) |
| Voltage | 12 V |
| Power supply | 1.56 W |
| Depth | 87 mm |
|---|---|
| Width | 128 mm |
| Weight | 520 g |
| Package depth | 146 mm |
| Package width | 142 mm |
| Package height | 185 mm |
| Package weight | 1178 g |
| Heatsink weight | 390 g |
| Fan dimensions (W x D x H) | 120 x 15 x 120 mm |