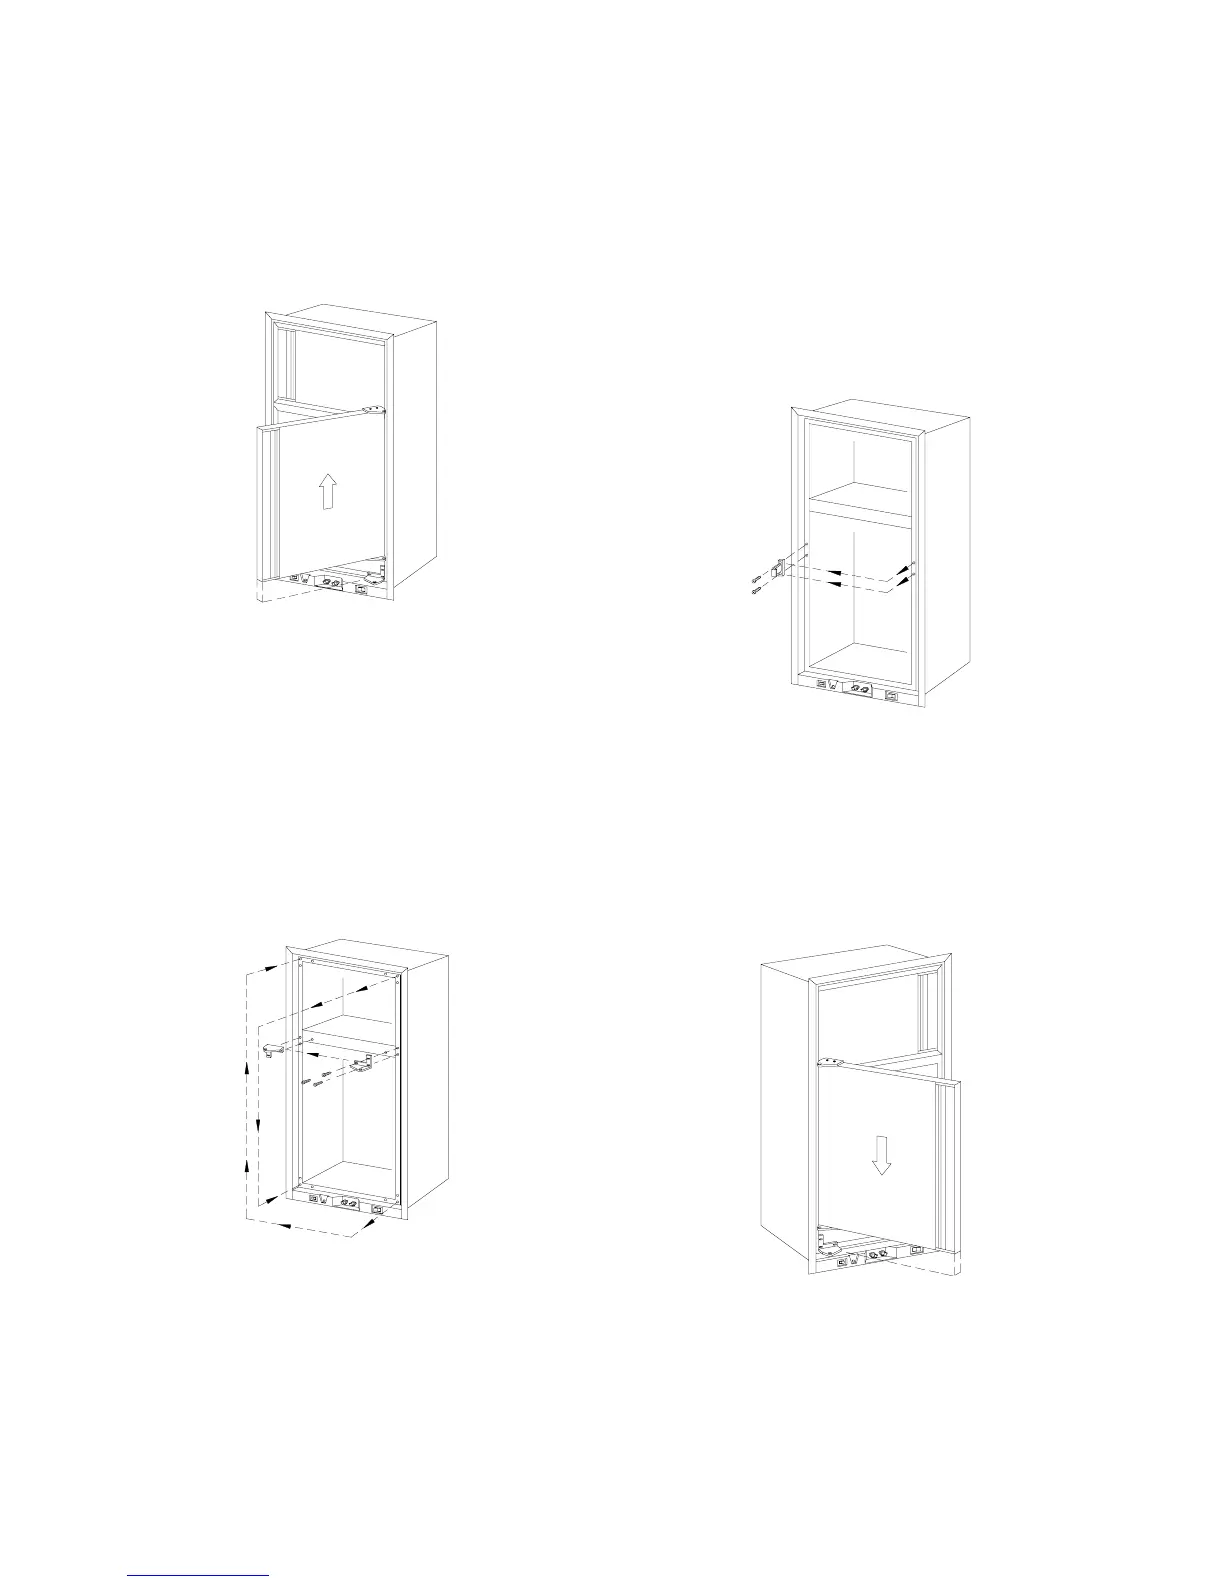
4 Remove the lower door b
openin
it sli
htl
and pullin
the top of the door awa
from the
refri
erator. Allow enou
h room so the door
can be lifted up and off of the bottom hin
e pin
shoulder
See Fi
ure 18
. Be sure to save the
hin
e plates alon
with the spacer used in the
middle hin
e bracket, for reassembl
later.
See Fi
ures 19A, 19B, and 19C
REMOVING AND RELOCATING THE HINGE
BRACKETS
5. Remove the middle hin
e bracket b
usin
the
#2 Phillips screwdriver and takin
out the three
screws holdin
it in place. Next, remove the
three screws on the opposite side correspond-
in
to the center hin
e location. Relocate them
in the holes
ust exposed b
the removal of the
hin
e bracket. Attach the hin
e bracket to the
refri
erator on the opposite side. Do not ti
hten
screws completel
.
See Fi
ure 15
6. Remove the top hin
e bracket and reposition it
in the opposite bottom corner. Use the same
techni
ue as outlined in Step #5.
7. Remove the bottom hin
e bracket and reposi-
tion it in the opposite top corner. Use the same
techni
ue as outlined in Step #5.
RELOCATING THE TRAVEL LATCHES
8. Remove both travel latches b
takin
out the
two screws holdin
each to the refri
erator.
Use the #2 Phillips screwdriver. Remove the
two screws from each of the correspondin
holes on the opposite side of the refri
erator.
Relocate them in the two holes
ust exposed b
the removal of the latches. Attach the latch in
the new position so the tab points towards the
opposite side of the refri
erator. Do not ti
hten
screws completel
.
See Fi
ure 16
9. Turn the door over so that the end previousl
at the bottom is now at the top. Relocate the
bottom of the door on the bottom hin
e pin
shoulder. Close door and ali
n holes in top
hin
e brackets. The ma
netic
asket will hold
the door in place. Before reinstallin
the top
door, check to insure that the spacer is in
place.
See Fi
ures 17 and 19C
10. Reposition the upper door in a similar manner
as described in Step #9, except the top of the
door must be en
a
ed into the hin
e pin
shoulder before settin
the door in place.
See Fi
ure 18
11. Startin
at the top, replace the hin
e pins usin
the slotted screwdrivers. Ti
hten all screws.
Fi
ure 14
Fi
ure 15
Fi
ure 16
Fi
ure 17
12