65
7. Pre-installation
Unpack the cabinet and check it for any transport damage. Do not use a damaged product! In the event of damage, please
contact the shipping company and make sure that the damage is noted on the consignment note. Then check that all the parts
on the parts list at the back of this user guide are present. Contact your vendor in the event of damage or deciencies.
The corner fridge units require a power supply of 220-240VAC 50 Hz and must be connected to an earthed min.10A mains
socket. If the cord is not long enough (3.6 m mains power cable is connected to the back wall.), then en electrician must install
a min. 10A socket closer to the fridge, e.g. on the ceiling above it. Never allow the unit to be connected to an extension lead
permanently. The socket must be readily accessible for installation/service.
When tting a new kitchen with a Norcool corner fridge, install the unit before the rest of the kitchen on the site where it will
stand permanently.
8. Installation
8.1. Installing cabinet. When installing the corner fridge, do NOT screw or drill anywhere else than shown in the manual.
If you do so it can ruin the construction and isolation ability.
1. Floor element. Begin with the oor element. For integration into the kitchen, install the adjustable feet to the oor element,
and adjust to the desired height in relation to plinth height of the kitchen. Check that the oor element is stable and level. The
maximum plinth height is190mm and the minimum is 145mm.
Freestanding corner fridges must have adjustable feet. The oor element must be stable and level. This is essential to ensure the
other elements and door will achieve a good seal.
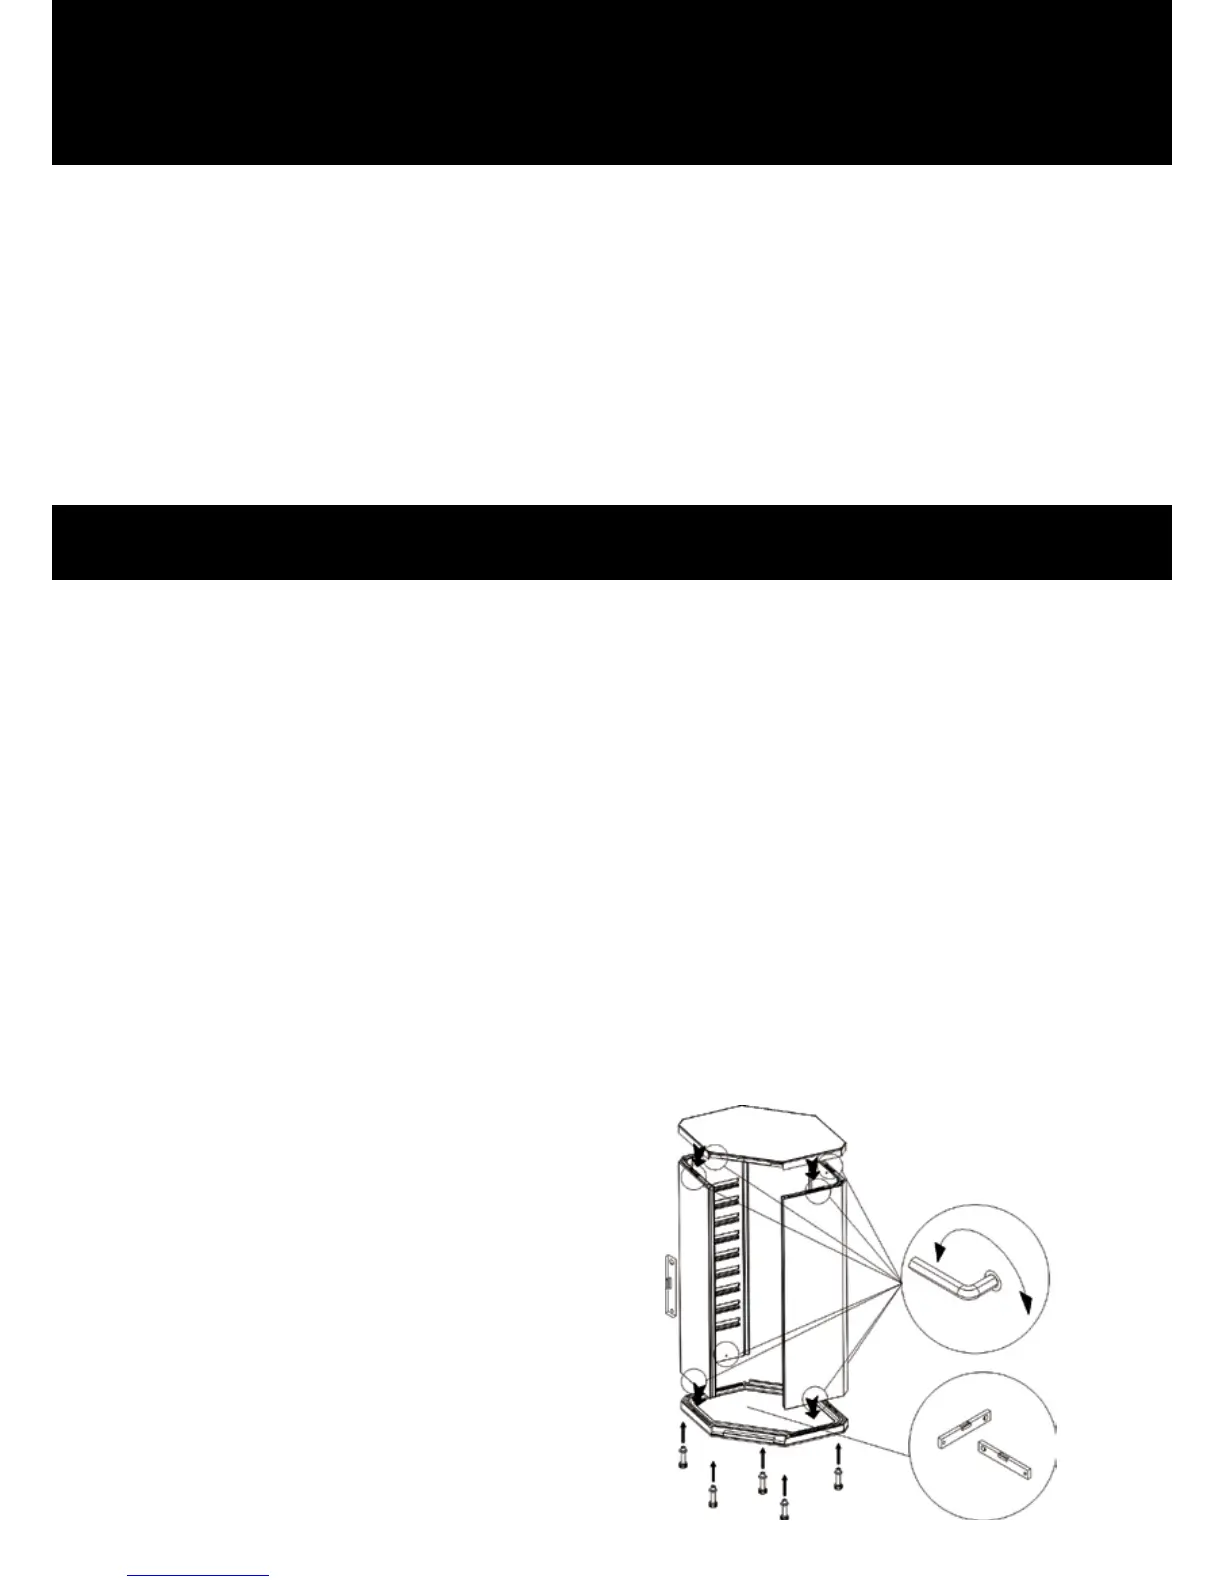
2. Side walls. Before installing the side walls, check that the lock tabs engage the lock housing. Twist the lock tabs back all
the way until you hear a click. For correct locking, turn the Allen key approx. 145°. NOTE: The elements can creak when being
locked. Mount the side walls on the oor element and lock them together. Fit the top element and lock into place. Fit the white
plastic plugs supplied over the lock holes to conceal them. NOTE: Power supply cable in back wall of ceiling ele-
ment must be accessible and hang down freely for connection of back wall. It is mounted ledge lists for the
door on all items. Check that the four ttings are ush in the corners.
If tting full-cover stainless steel elements, then now go straight to “Installing full-cover stainless
steel elements for freestanding corner fridges.”
3. Back wall with refrigeration unit. The mechanical element of the cooling wall must face in towards the corner in the
kitchen. Lift back wall through door opening in the fridge, grasp the cord from the ceiling element and connect this cord to the
back wall, labelled ”lys - light” and install this in the opening in the back wall. Check the power cable can reach
after installation! Screw back wall into place using the 5 white screws supplied with plastic washers.
NOTE! Press back wall rmly whilst tightening screws.
Make sure that the electric cable is free.
 Loading...