66
8. Installation
1
2
2
3
5
6
7
7
4
1
2
3
3
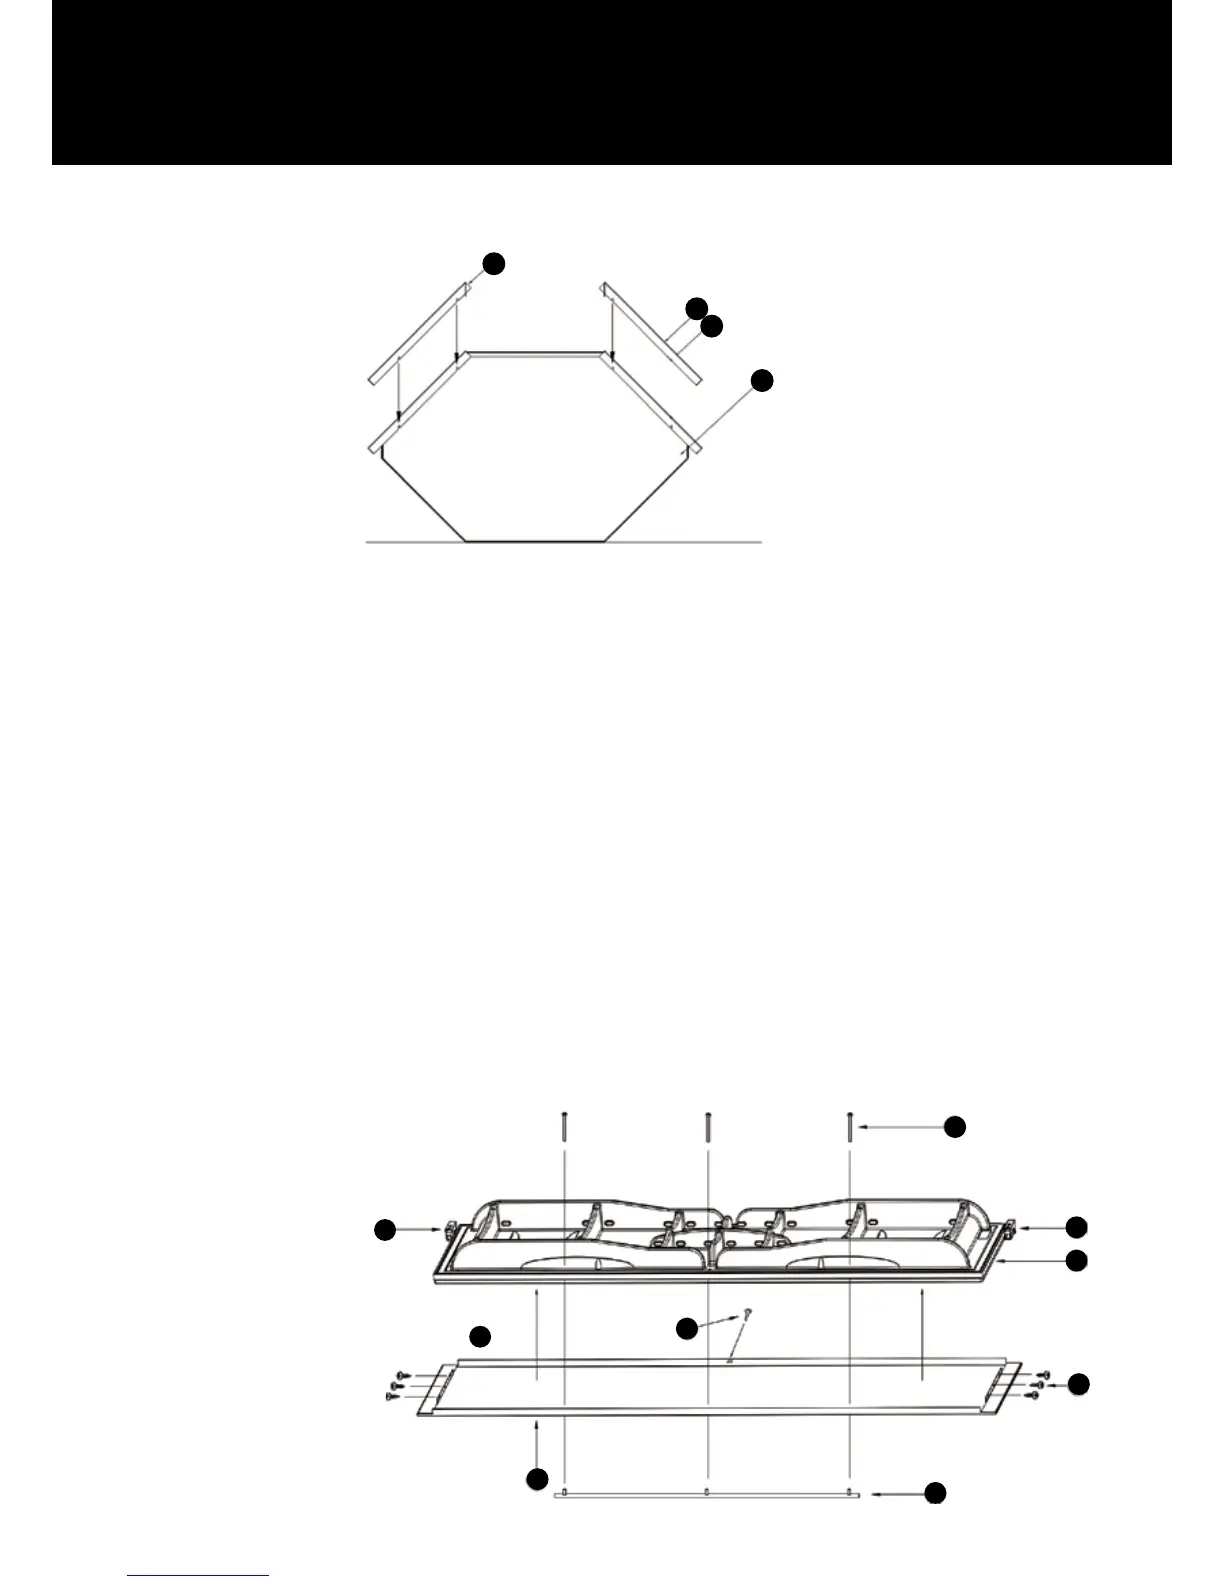
8.2. Installing full-cover stainless steel elements for freestanding corner fridge cabinet (see gure 3)
Fig 3
1. Floor-/ceiling element
2. Slots
3. Stainless steel full-cover side plates
Stainless steel side plates
1. Preparation: The corner fridge must be laid on its back with the door opening upwards to t the stainless steel elements on to
the side walls. Lay a piece of cardboard or paper on the oor to prevent scratches. Make sure that the elctric cable from the top of
the cornerfridge is free, place a piece of cardboard in between the top of the corner fridge and the oor.
NOTE: Do not remove Isopor lm from side plates!
2. Securing stainless steel side plates
Ease the stainless steel side plates onto the side walls. Check elements are positioned correctly and secure with 8 (4,8 x 16) self-
tapping screws supplied. Screw these into oor and ceiling in slots on the stainless steel side plates using an electric screwdriver.
Raise corner fridge up for remaining installation. Go back to point 8.1 “Back wall with refrigeration unit.” After which, continue with
the rest of this page.
Stainless steel door panel (see gure 4)
1. Hinges. Unscrew the screws for the hinges, upper and lower (point 2 in g. 4). Then mounts the hinges on the door. Re-
member the difference between right and left hinge!
2. Secure door panel. Lay door panel on a level surface, preferably cardboard, to prevent scratches. Check that the handle
side is not on same side as hinges. Position the fridge door in middle of panel and screw into place with 6 of the screws sup-
plied in pre-drilled holes on upper and lower sides of the door. Insert plastic plug in oblong hole in middle of hinge side to
secure panel even better.
3. Handle. Secure stainless steel handle using 3 screws supplied in pre-drilled holes in door panel.
1. Screws for securing handle
2. Hinge
3. Fridge door
4. Plastic plug
5. Qty. 6 screws for securing full-cover stainless
steel door panel.
6. Handle
7. Stainless steel door panel
Fig 4