67
8. Installation
4. Cabinet door. Remove hinge retaining screws in oor and ceiling on side selected for hinges using Allen key supplied.
Open hinges tted on fridge door. Hold the door in the open position while inserting hinge screws through holes in hinges.
Finger tighten up to (not completely tightened) oor and ceiling. NOTE: If working alone, place a support under
fridge door at correct height for hinges. Allow door to rest on this while installing hinges into place.
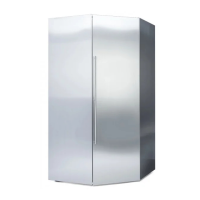
Light switch support piece (see Fig. 7) is mounted in the top of the door and prepared for right-hinged door. If you want to
change the door from right to left, this plastic piece (2) must be moved to the opposite end of the door. Remove the screws (3)
and move the piece to the opposite end and t the screw in the ready-drilled holes.
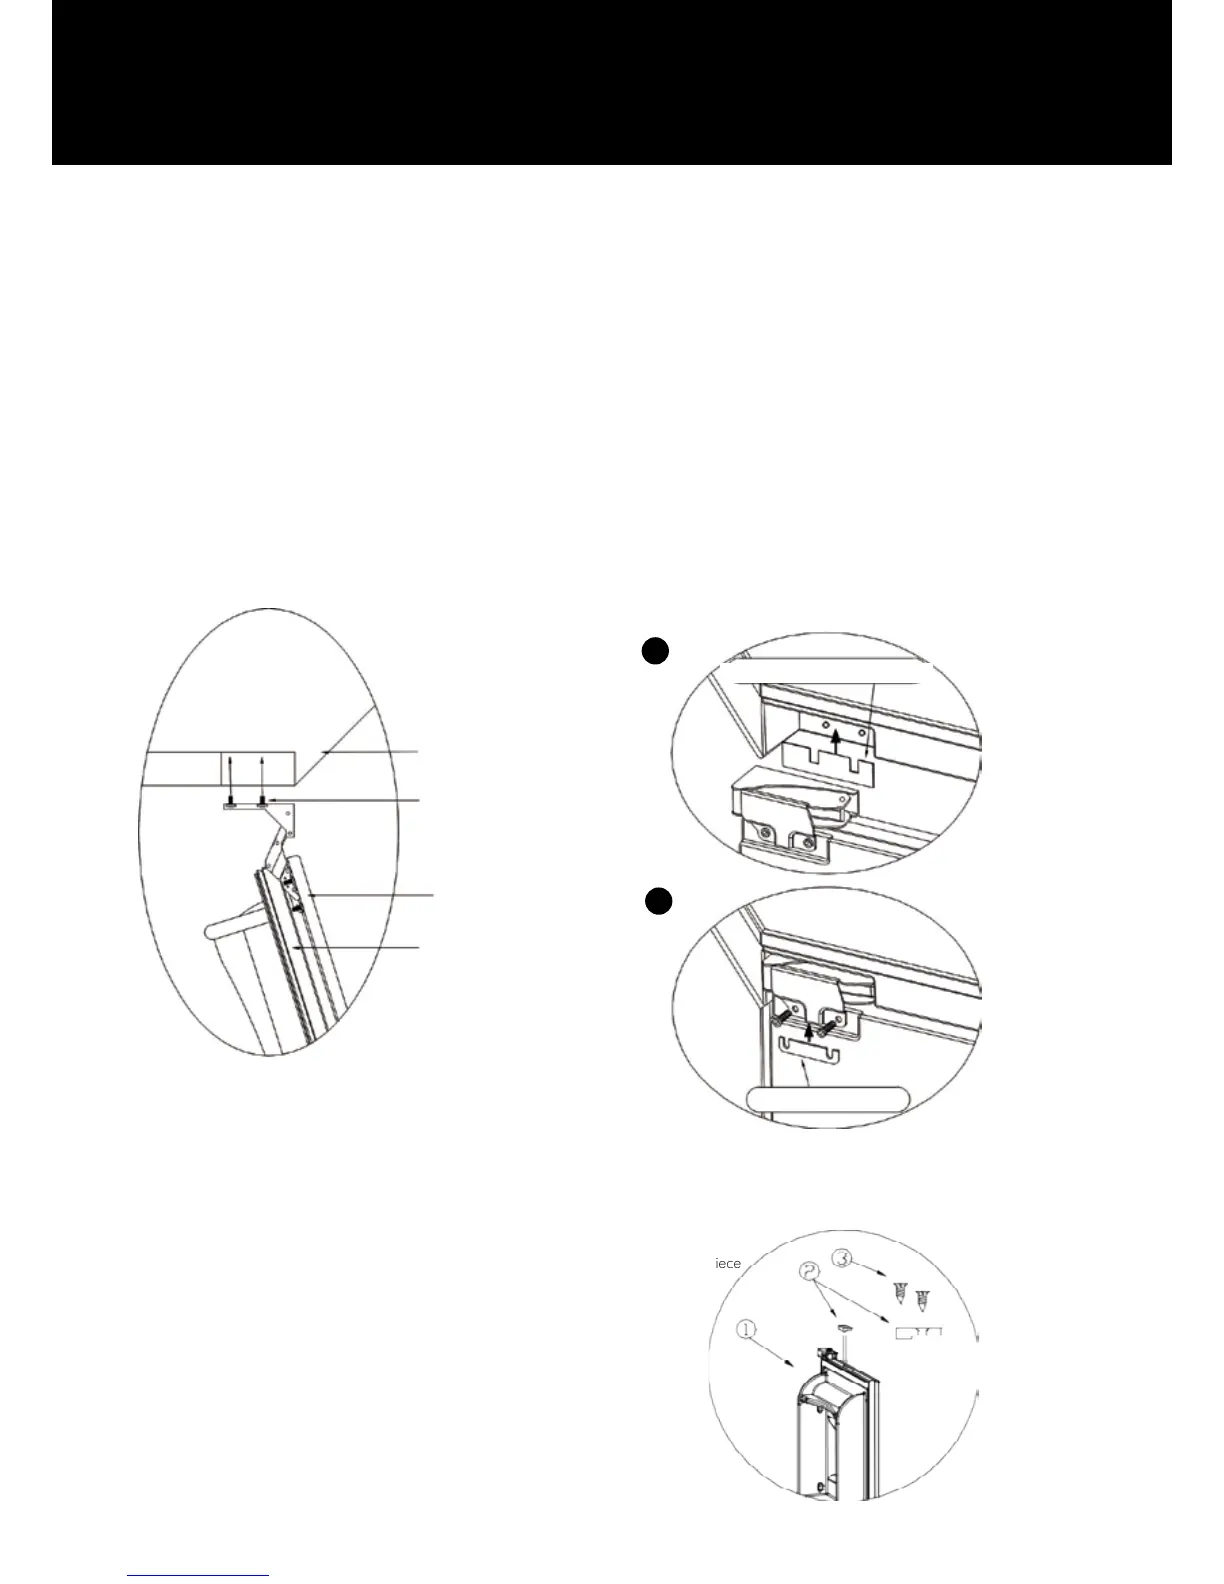
5. The magnetic seal can be compressed after being packed and transported. It will return to its original shape a while
after being unpacked. Door can be adjusted using adjustment plate supplied if the seal is compressed - see g. 6B. If the
magnetic seal is pressed too hard on door seal or is twisted; open door 90° and loosen hinge screws to oor/ceiling, move
adjustment plate inwards between hinge and ceiling/oor and screw securely. See g. 6A.
6. Adjustment and sealing. Door can be adjusted sideways to correct position and then securely screwed. Examine
whether the door can close properly. If you can pull a sheet of paper our through the closed door without any great resistance,
then the door ought to be further adjusted.
Fitting door
Hinges out/in
A
B
Floor/ceiling element
Adjustment plate oor/ceiling
Adjustment plate door
Kitchen front
Fridge door
Screws for fastening hinge
Fig 5
Fig 6
Light switch support piece
Fig 7