68
8. Installation
8.3. Integration of corner Fridge cabinet (see g 9)
Adjust and level cabinet oor height in accordance with plinth height of your kitchen. Depth of Cover sides and/or worktop will
determine distance from room corners. Corner fridge may need to be pulled forward, as worktop should not be deeper than
cover side. This will avoid the door hitting the worktop. The ideal combination is cover sides of 600mm and door plate 595mm.
Pull corner 10mm forward to reduce white line around door as much as possible.
NOTE: Avoid screwing kitchen front too tightly. 1 spacer block is supplied for each side wall. Do not remove these, as they
ensure air circulation and prevent condensation on walls in the room.
8.4. Fitting furniture fronts (see gures 5, 6 and 8)
1. Hinges. Remember difference between right and left hinge. Remove screws in countersunk holes on cold room door. Position
correct hinge in recess and screw securely.
2. Securing furniture front. Lay front(s) on a level surface. Check up/down for fronts and handle position. Position
fridge door correctly on furniture door(s). If in doubt about positioning, t fridge door to cabinet and check correct positioning
in relation to cornice seal and side plates. Mark holes for securing furniture front in the possible positions using an awl through
outside door plate and into furniture front. Then remove fridge door. Drill hole in door plate with Ø4.5 mm drill. Drill max. 5
mm into marked points in the furniture front with a 2.5 mm drill. Lay fridge door on furniture front. Bruk håndverktøy og skru fast
møbelsfront med medfølgende skruer (4x45 mm). Do not over-tighten screw to avoid damaging plastic cover or their hold in the
furniture panel. Then press the supplied plastic caps into the covers to conceal the screw heads.
3. Cabinet door. Remove hinge retaining screws in oor and ceiling on side selected for hinges using Allen key supplied.
Open hinges tted on fridge door. Hold the door in the open position while inserting hinge screws through holes in hinges.
Finger tighten up to (not completely tightened) oor and ceiling - see g. 5.
NOTE: If working alone, place a support under fridge door at correct height for hinges. Allow door
to rest on this while screwing hinges into place.
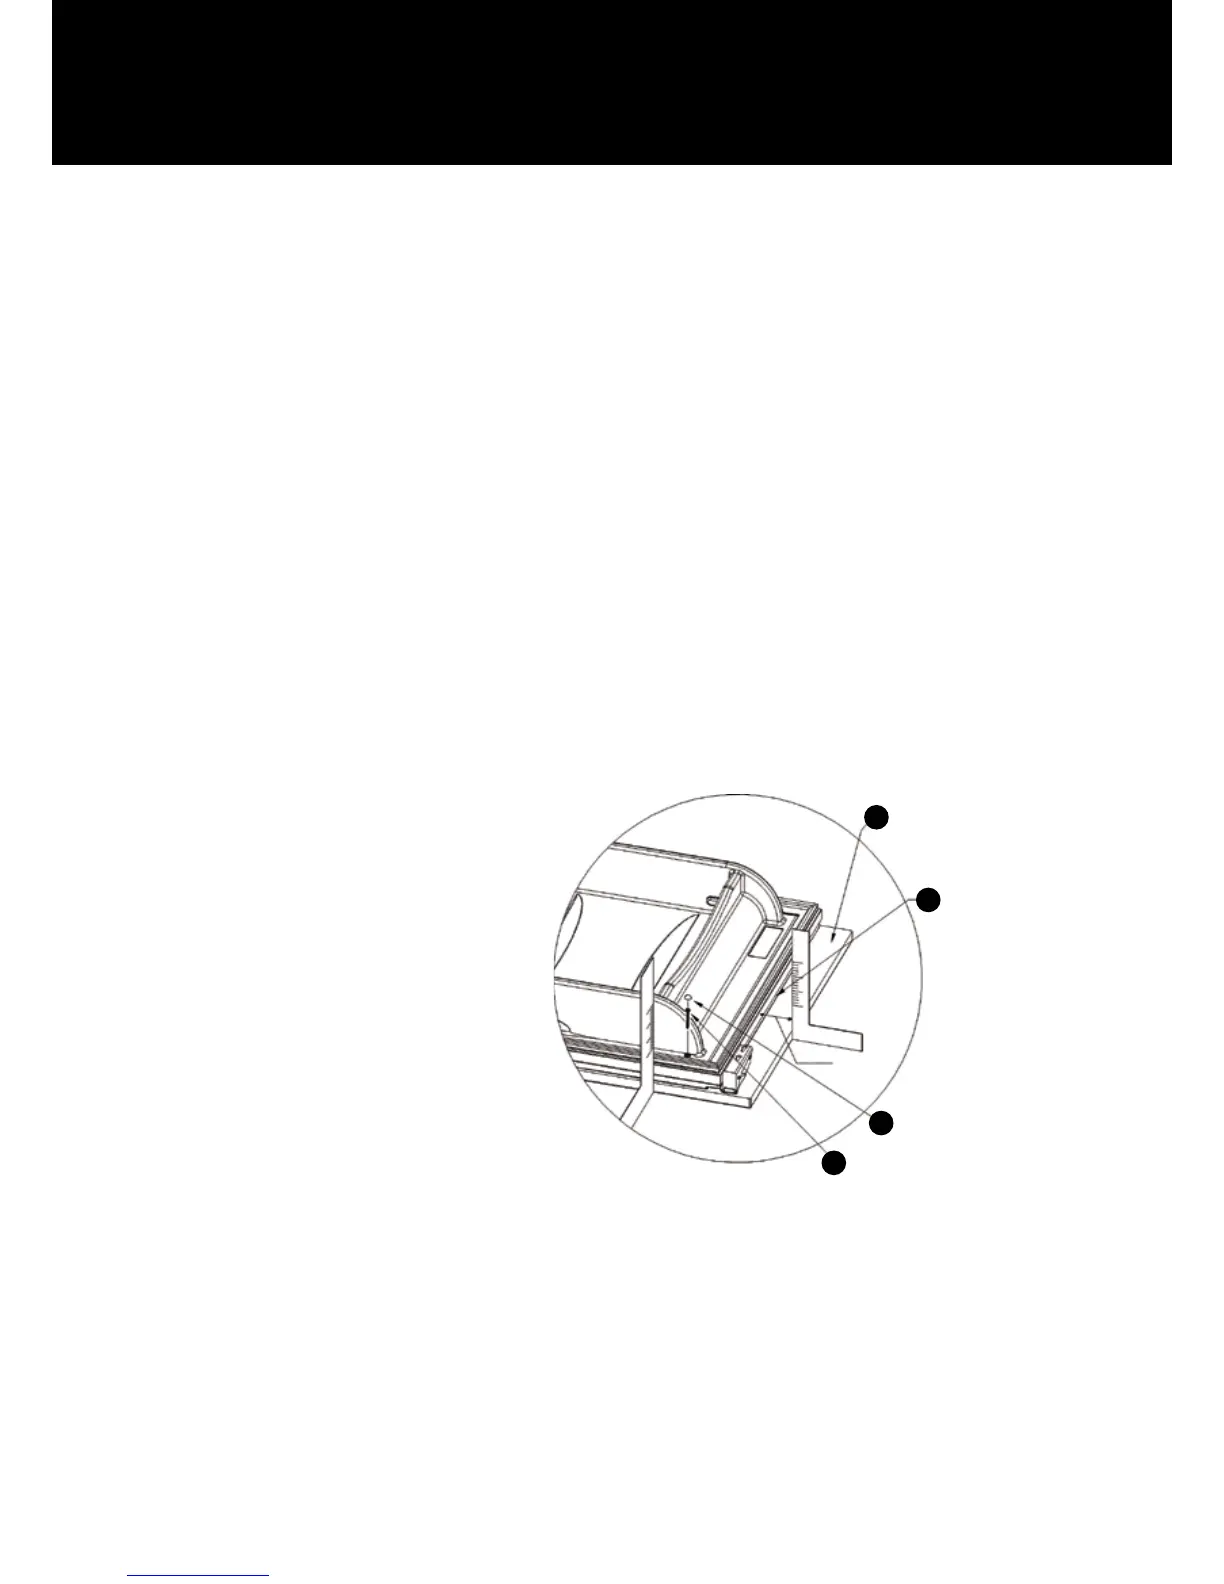
Fig 8
1. Outer edge fridge door
2. Furniture panel
3. Screw
4. Plastic cap
2
1
4
3
53 mm
TOP